Category: Videos

V-Berth Insulation, Part 5, Epoxied Frames
This is a large scale project. We may be in the boatyard for up to a year. We have worked on Dawn Treader for long periods before, but this time our projects seem bigger and more numerous.
Dawn Treader has been in the boatyard for 13 weeks. We have worked solidly for 9 of those weeks. The time has passed steadily. The days have stretched, allowing for long hot days of work. If our year long refit plan becomes a reality, than we should be 25% of the way through our projects. Have we completed 25% of our to do list? Hardly. But, we are optimistic that we can increase our pace.
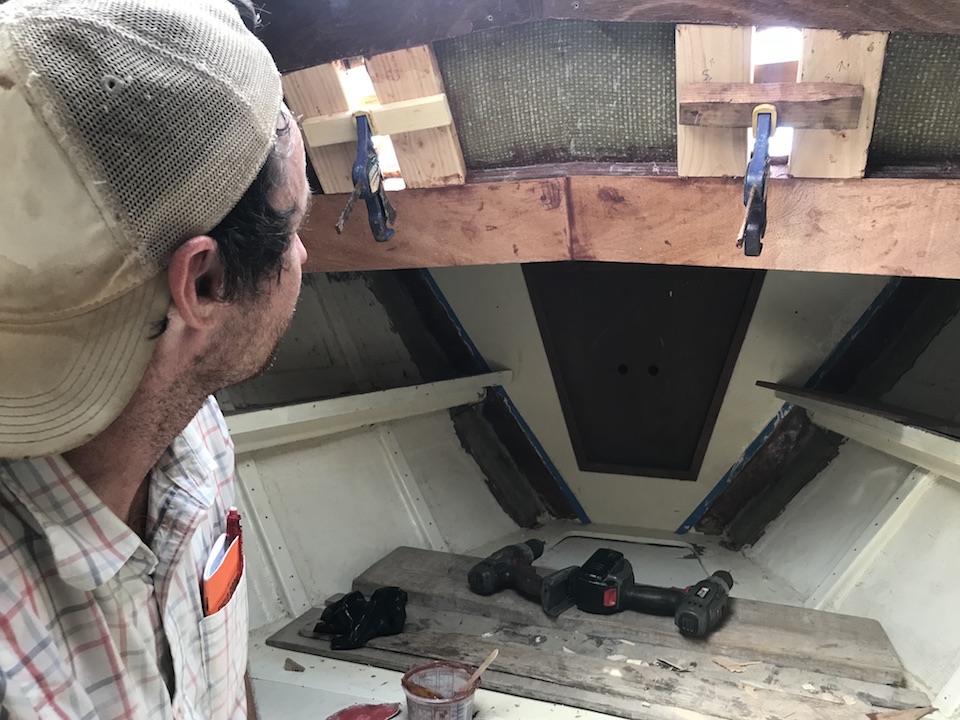
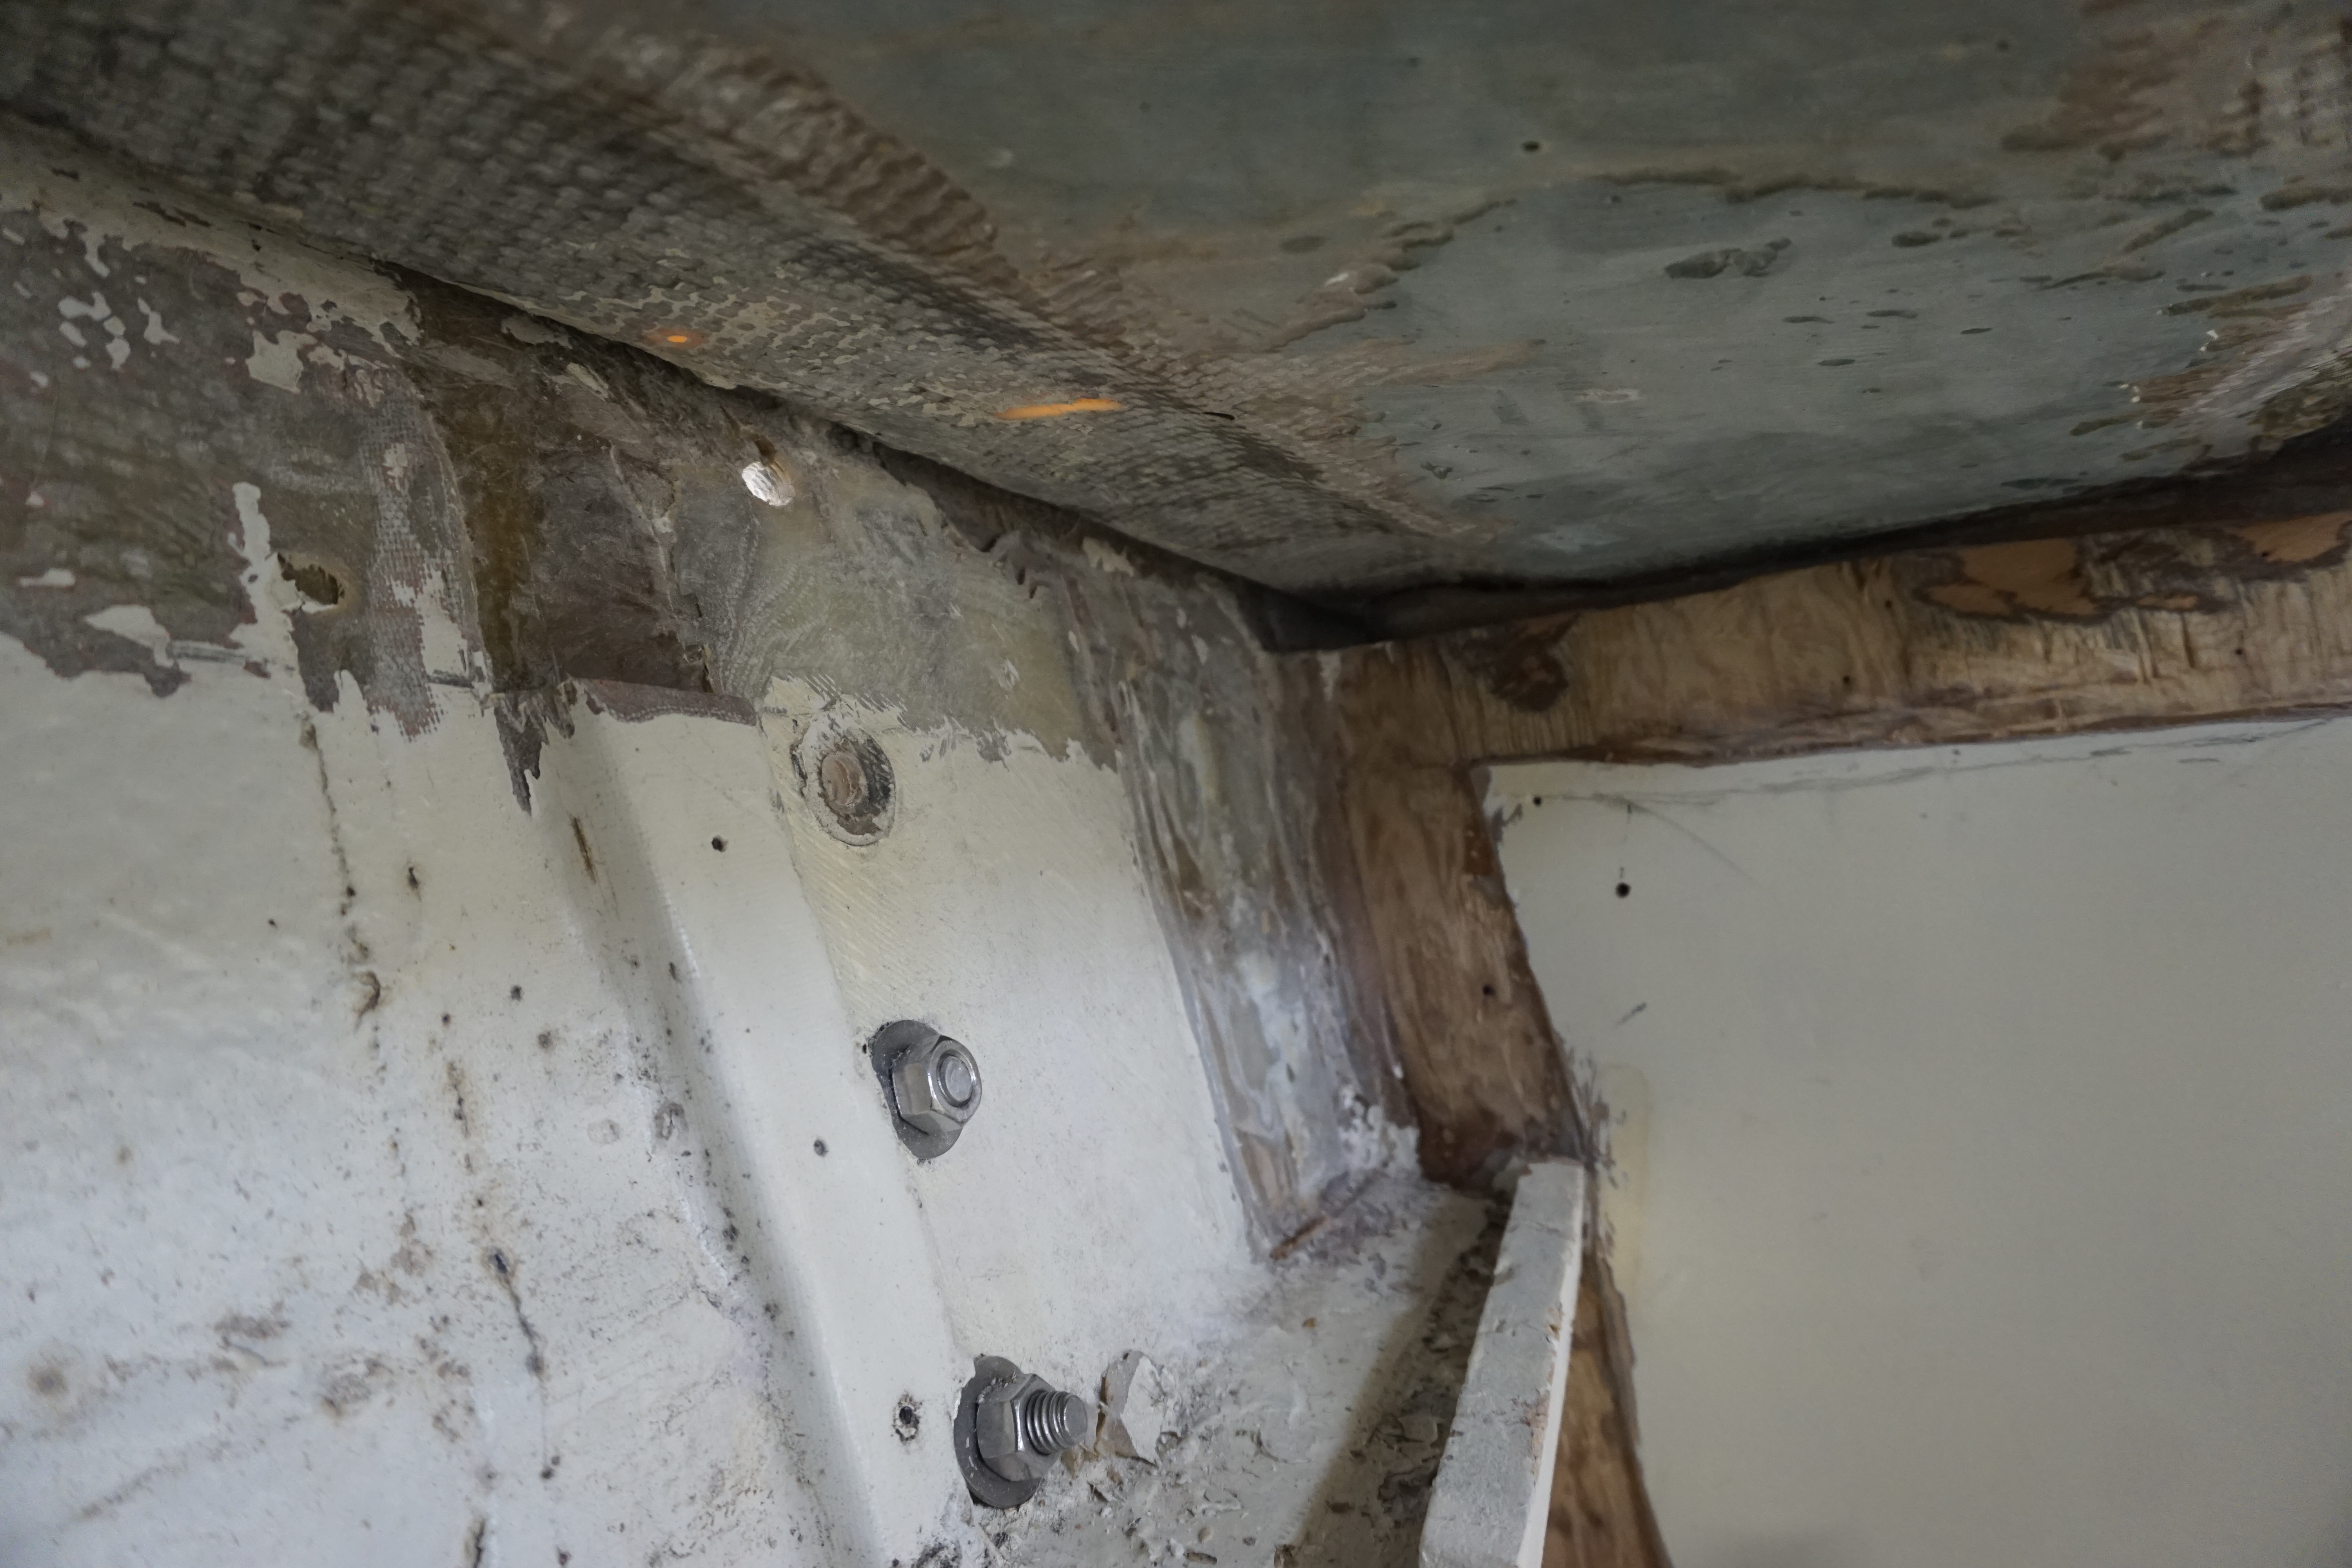
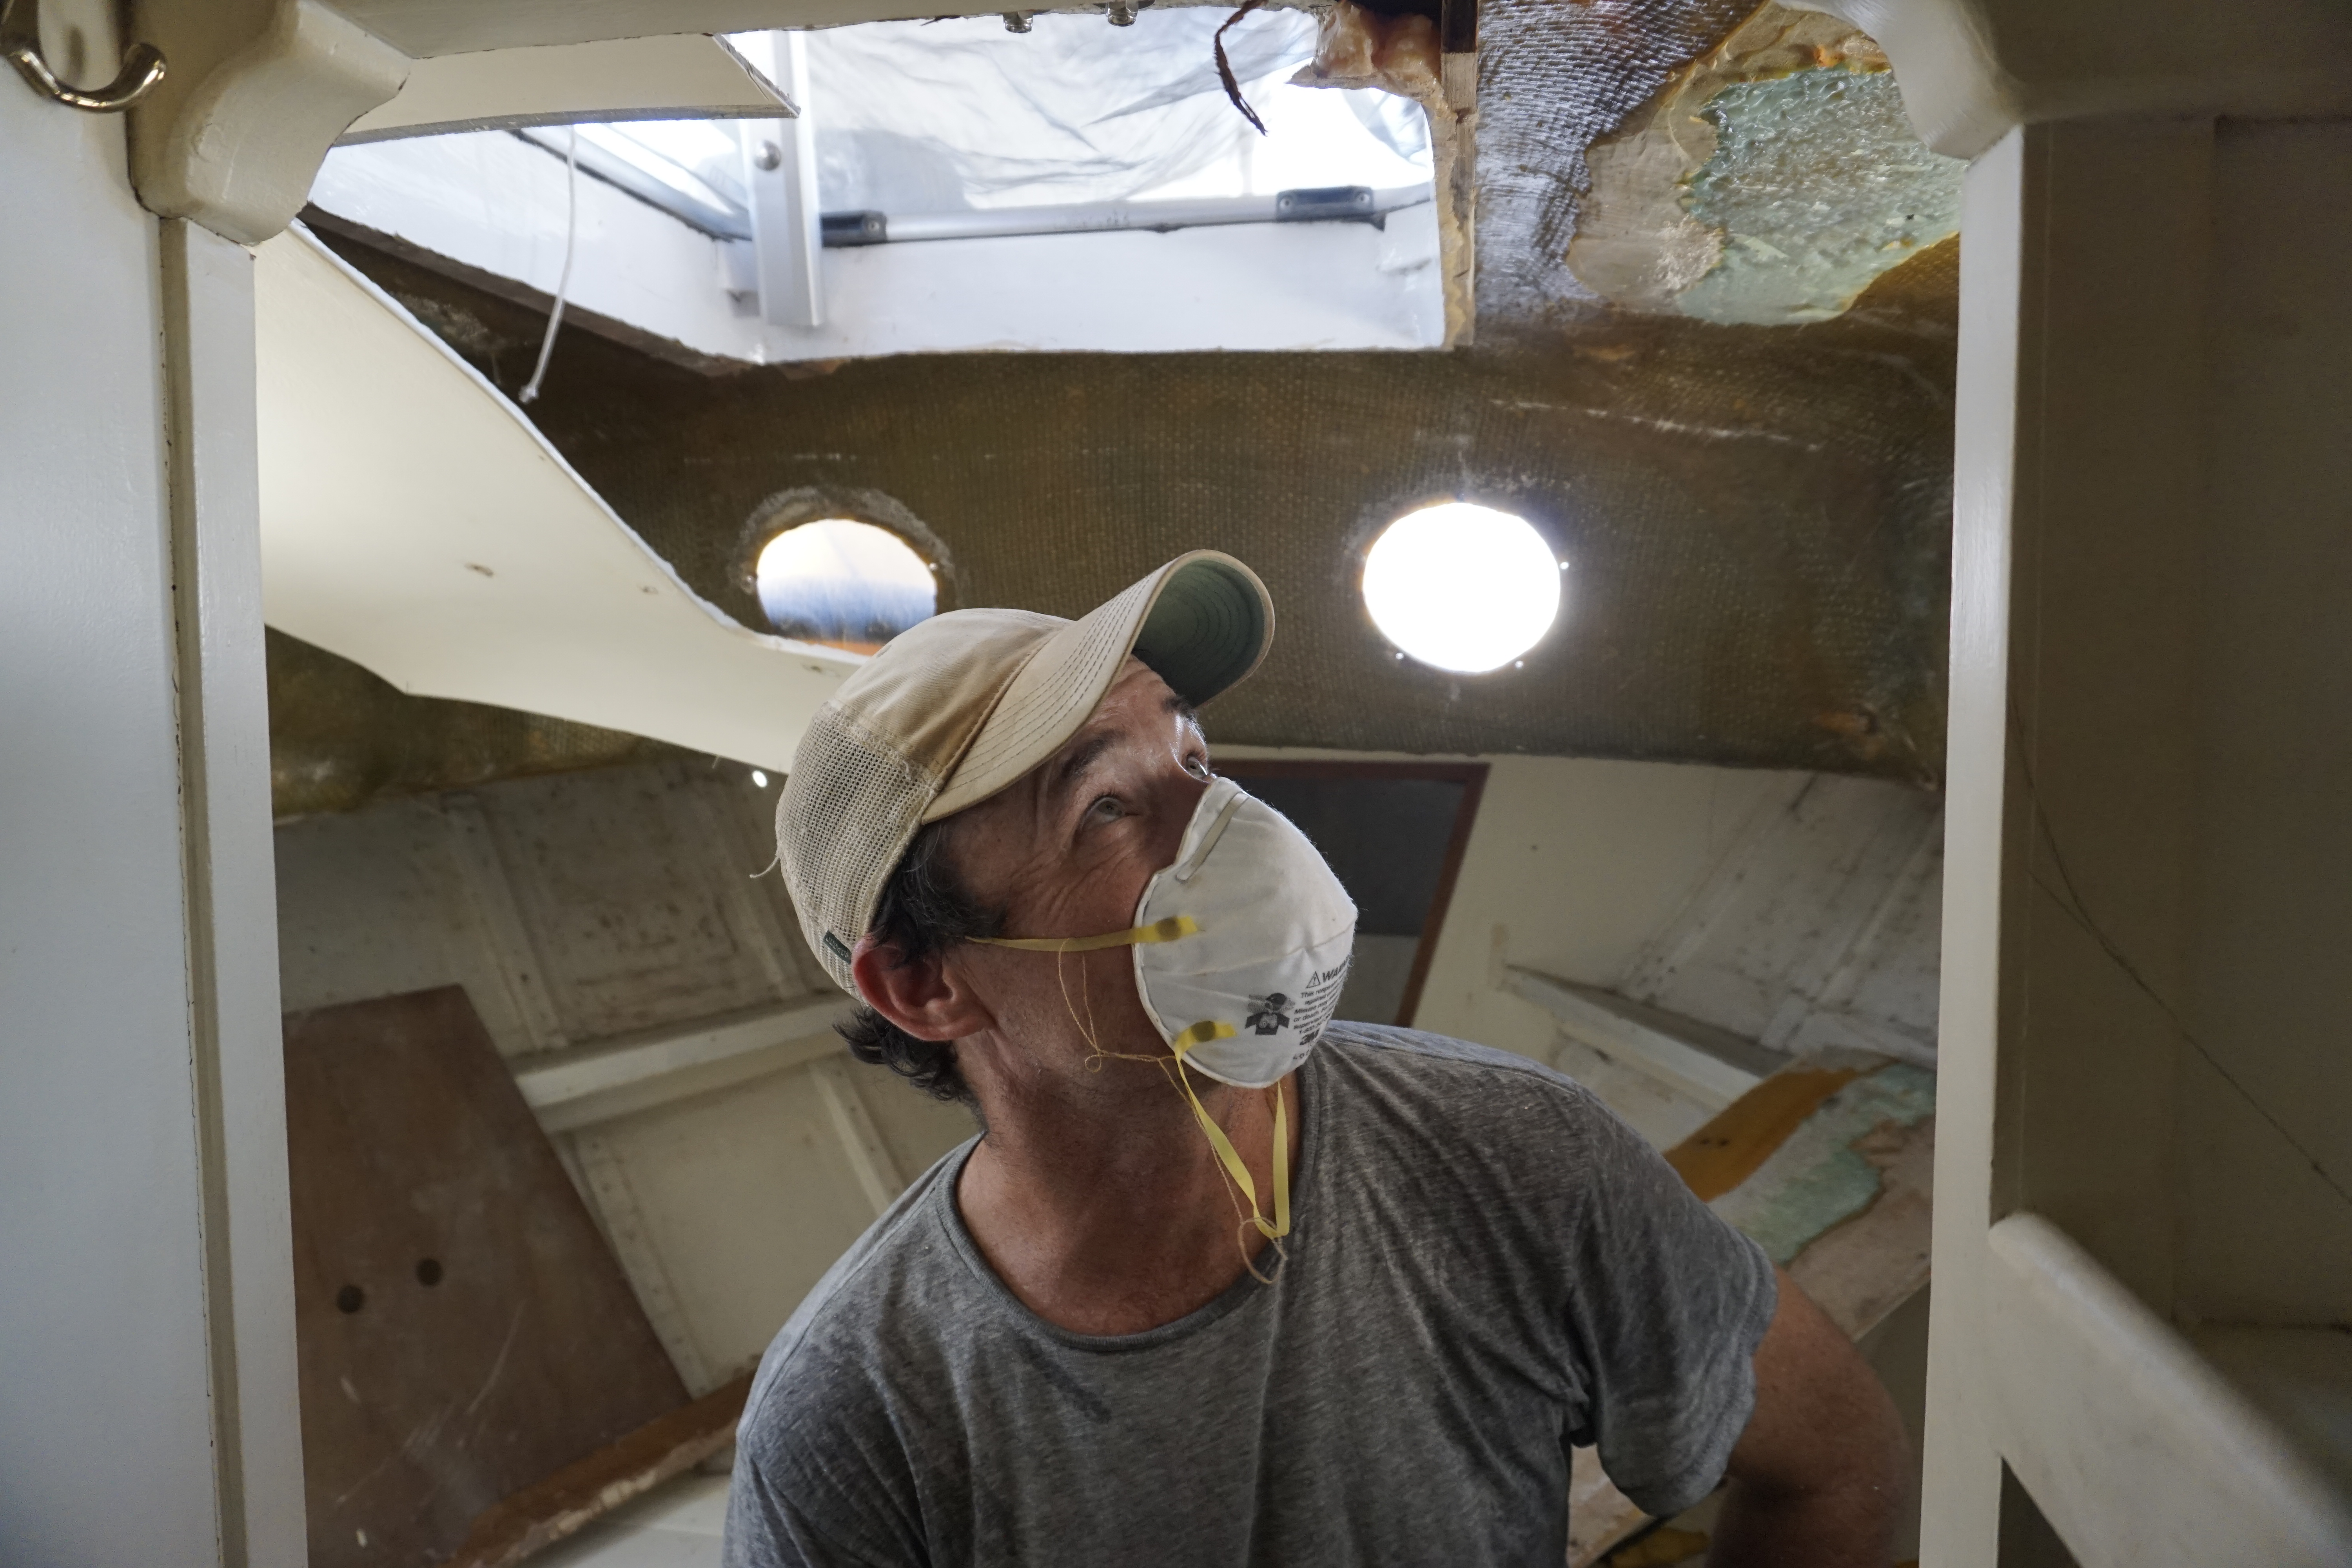
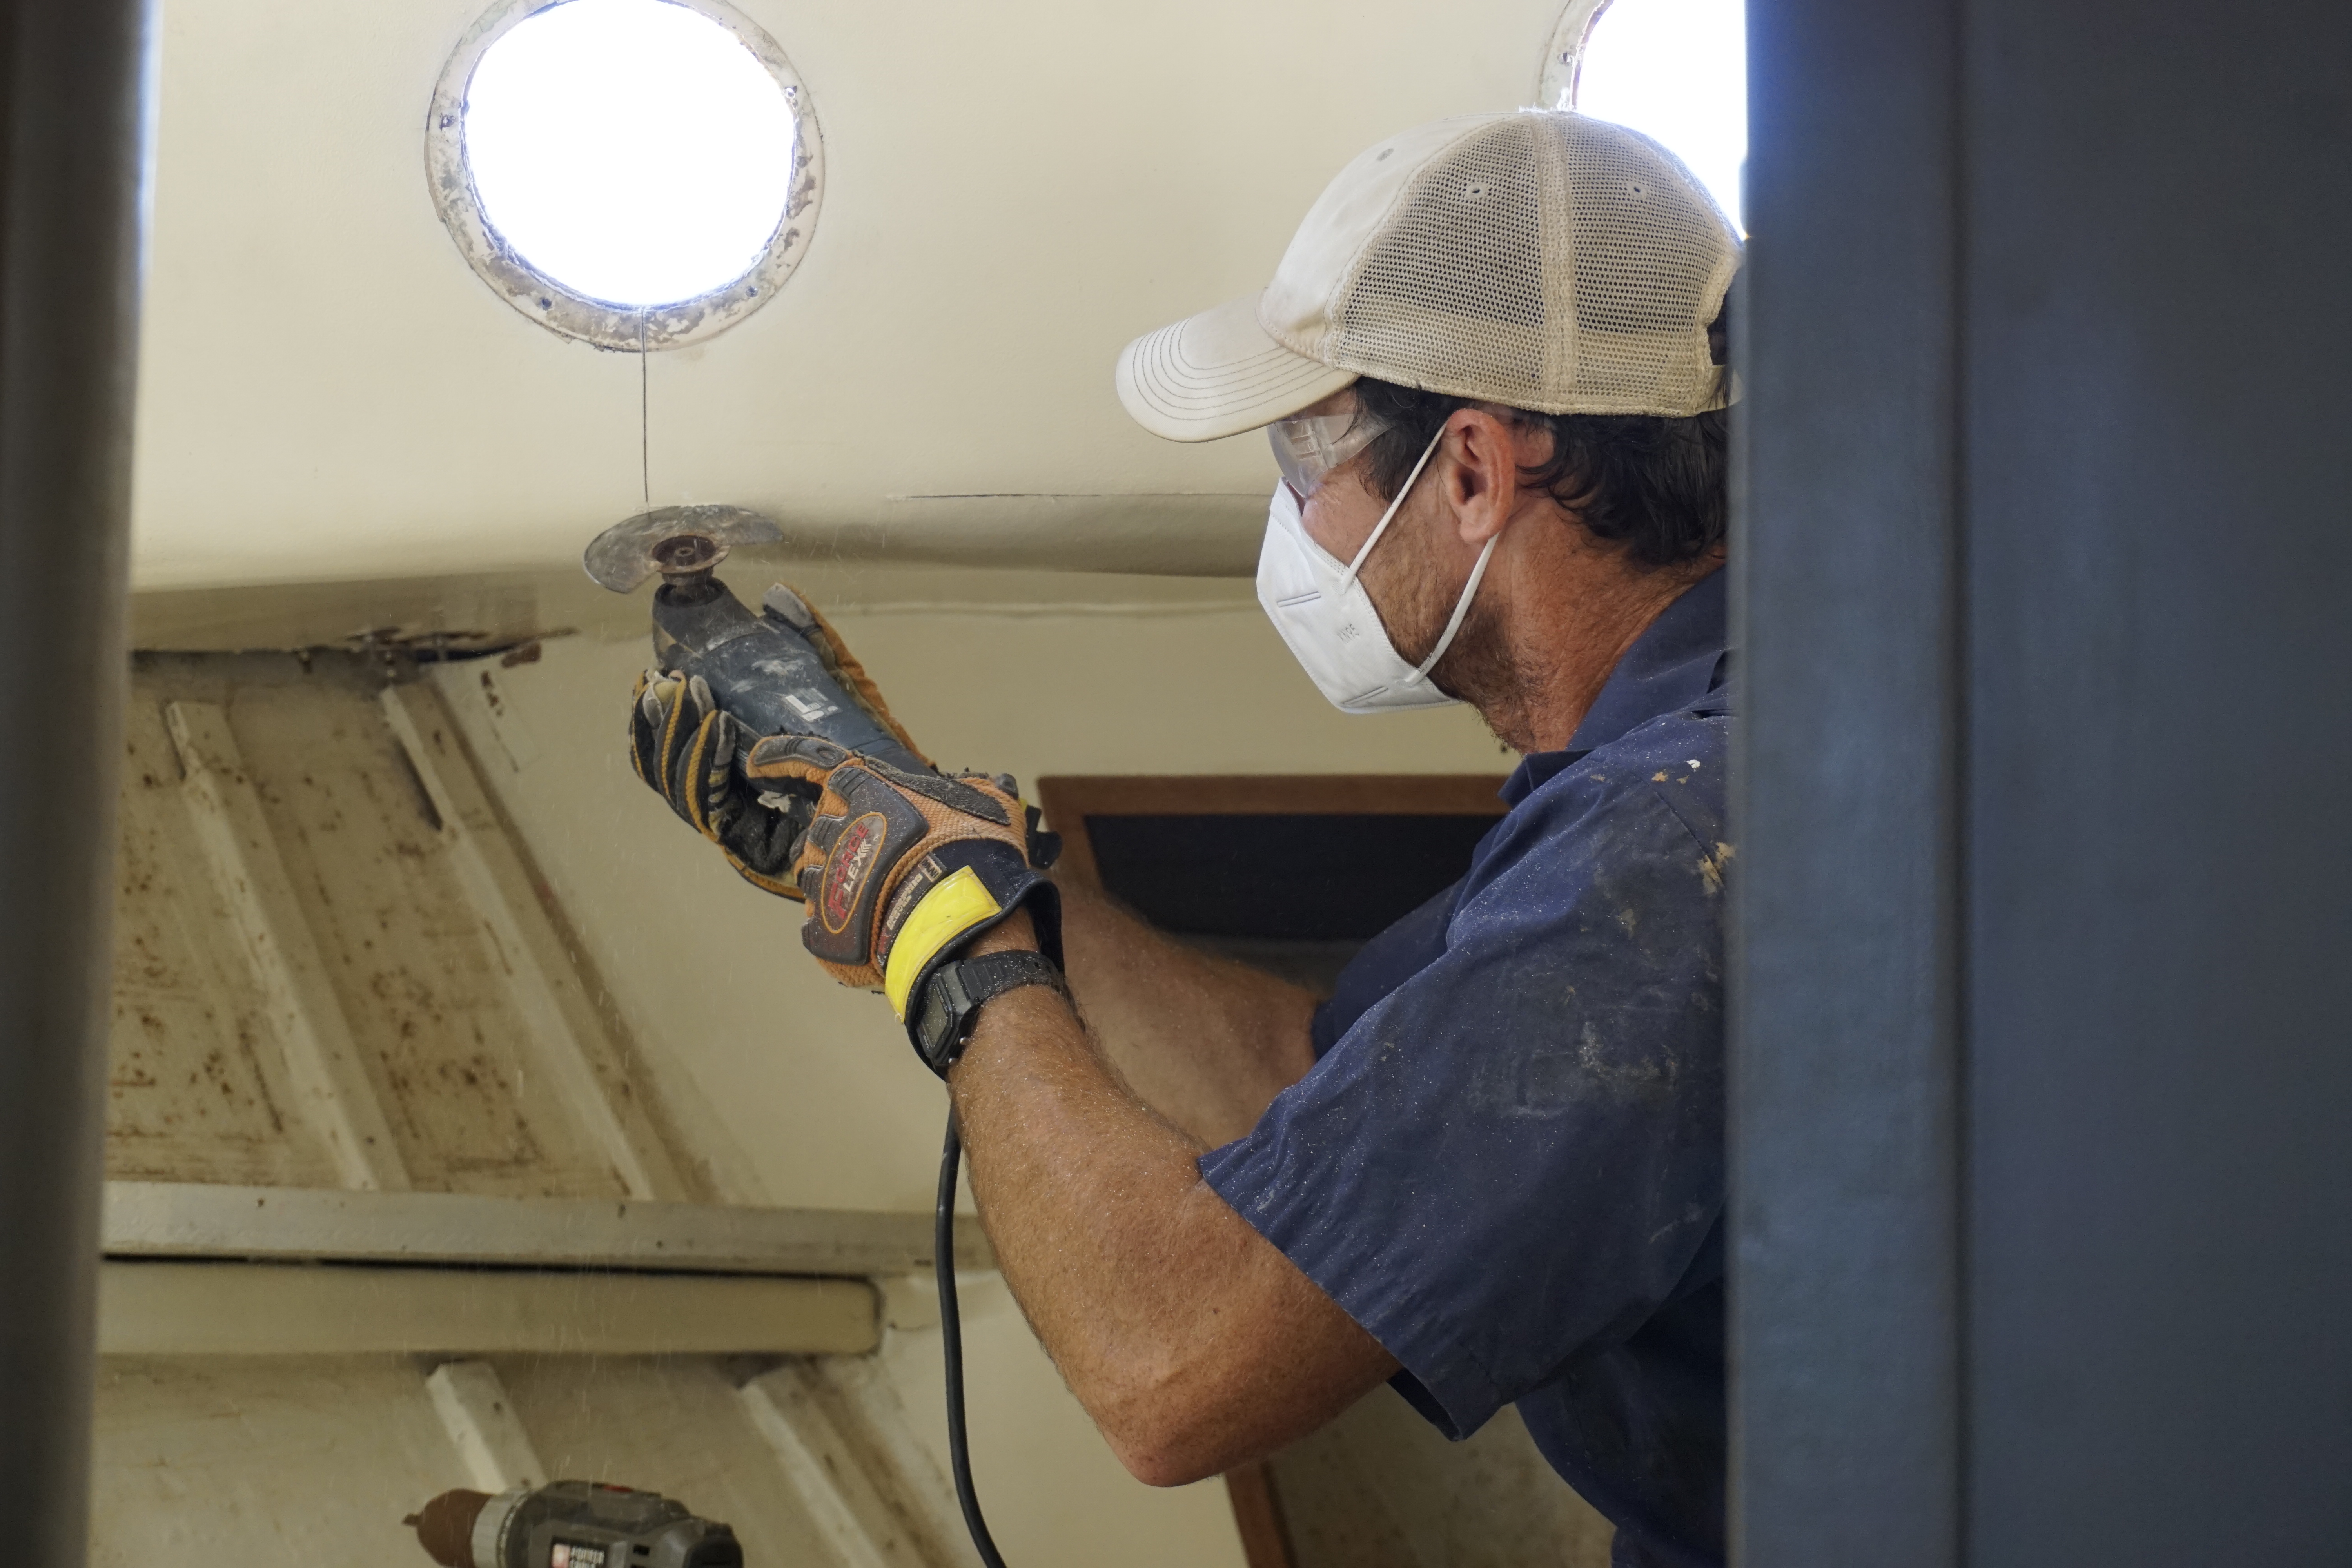
Last week, we made our first lasting addition. We used epoxy to coat the frames for the overhead in the V-Berth, and then used thickened epoxy to attach the wood pieces to Dawn Treader. The framework is strongly fixed in place. We cannot move the frames, even if we push and pull with all of our force. With the framework overhead, Dawn Treader feels like a tank, an armored or reinforced vehicle ready for combat.
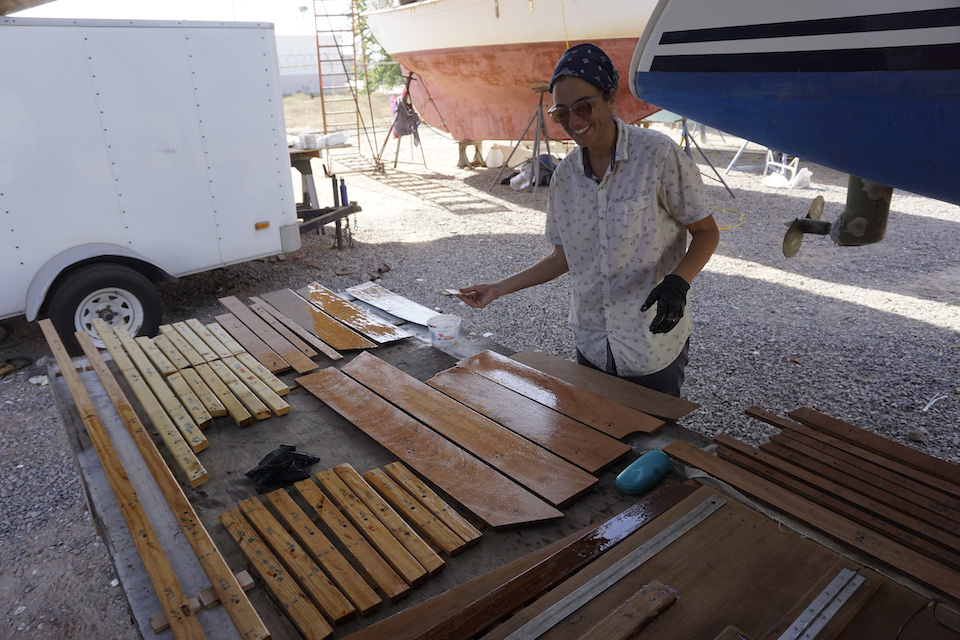
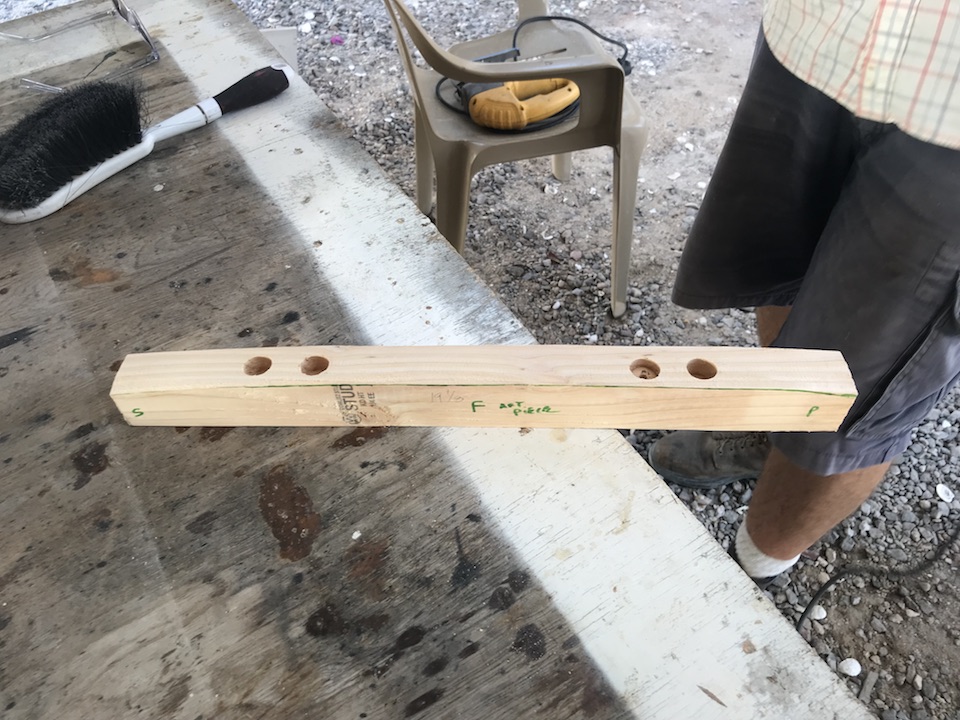
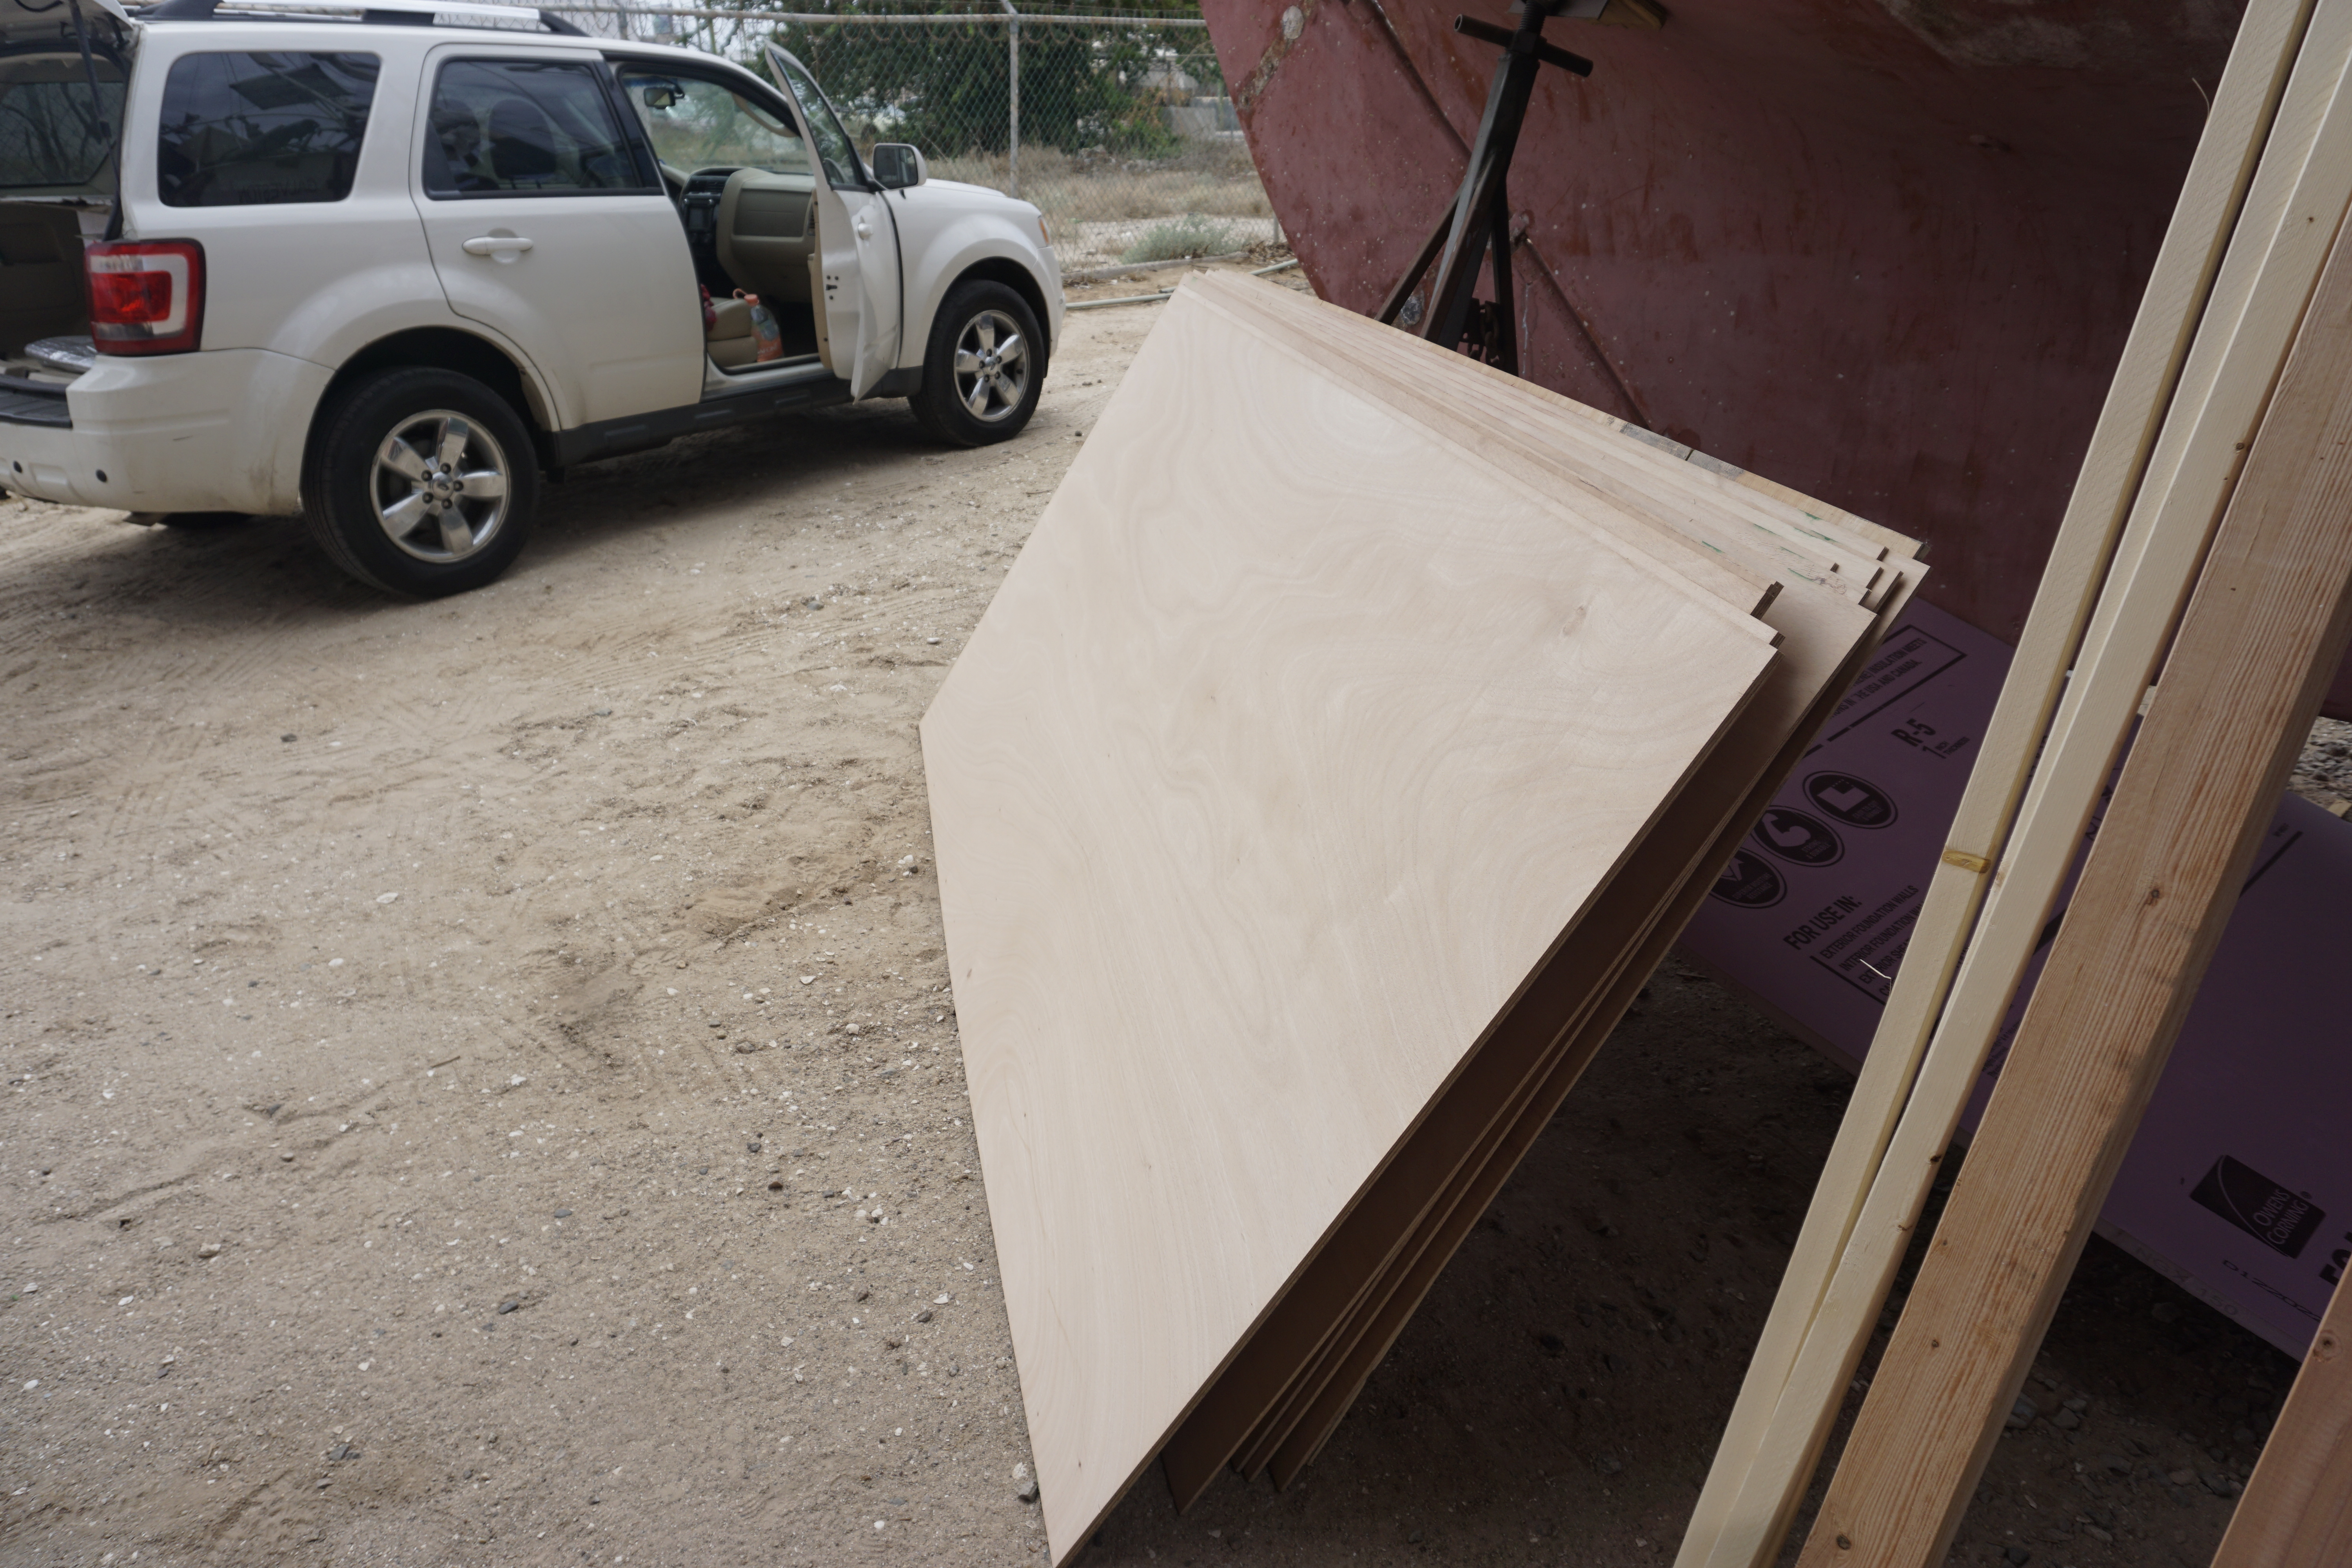
The framework is strong, but it is also as light as we could manage. Where there are larger panels, there are smaller cleats or foam hiding underneath. Light furring strips act as spacers for stronger heavier douglas fir. The plywood is either 3/16 inch thick teak or lightweight 1/2 inch okoume.
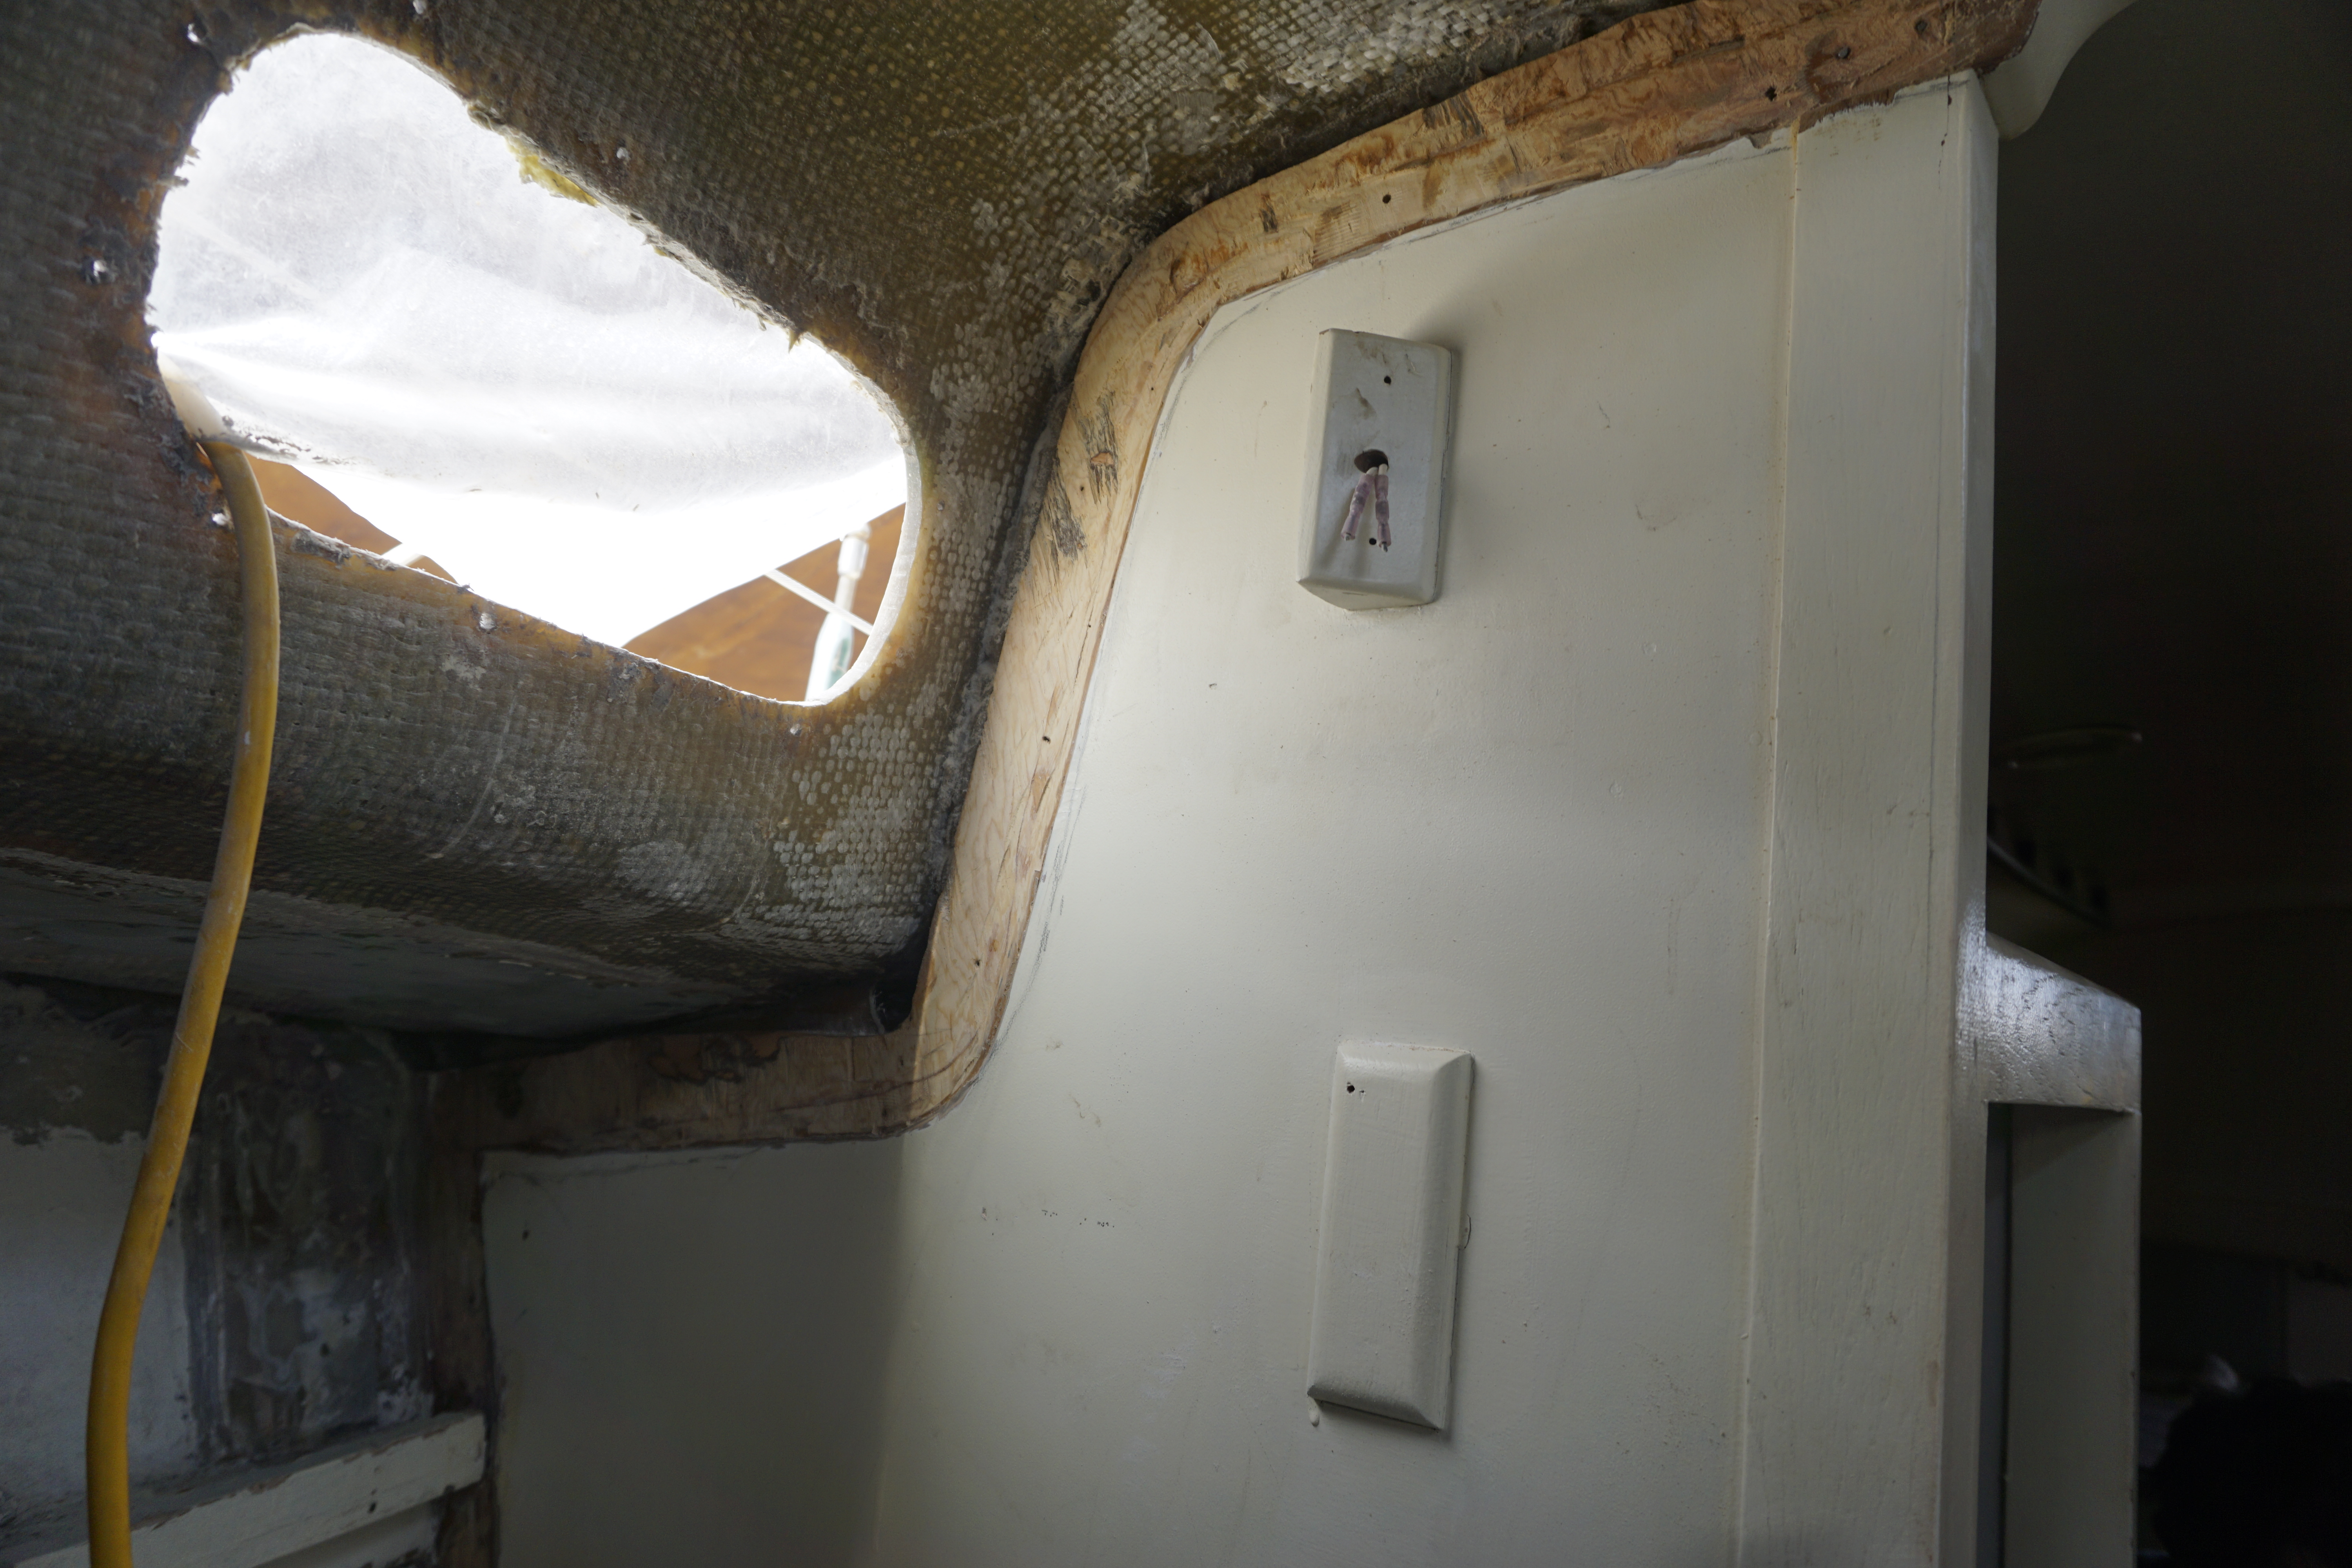
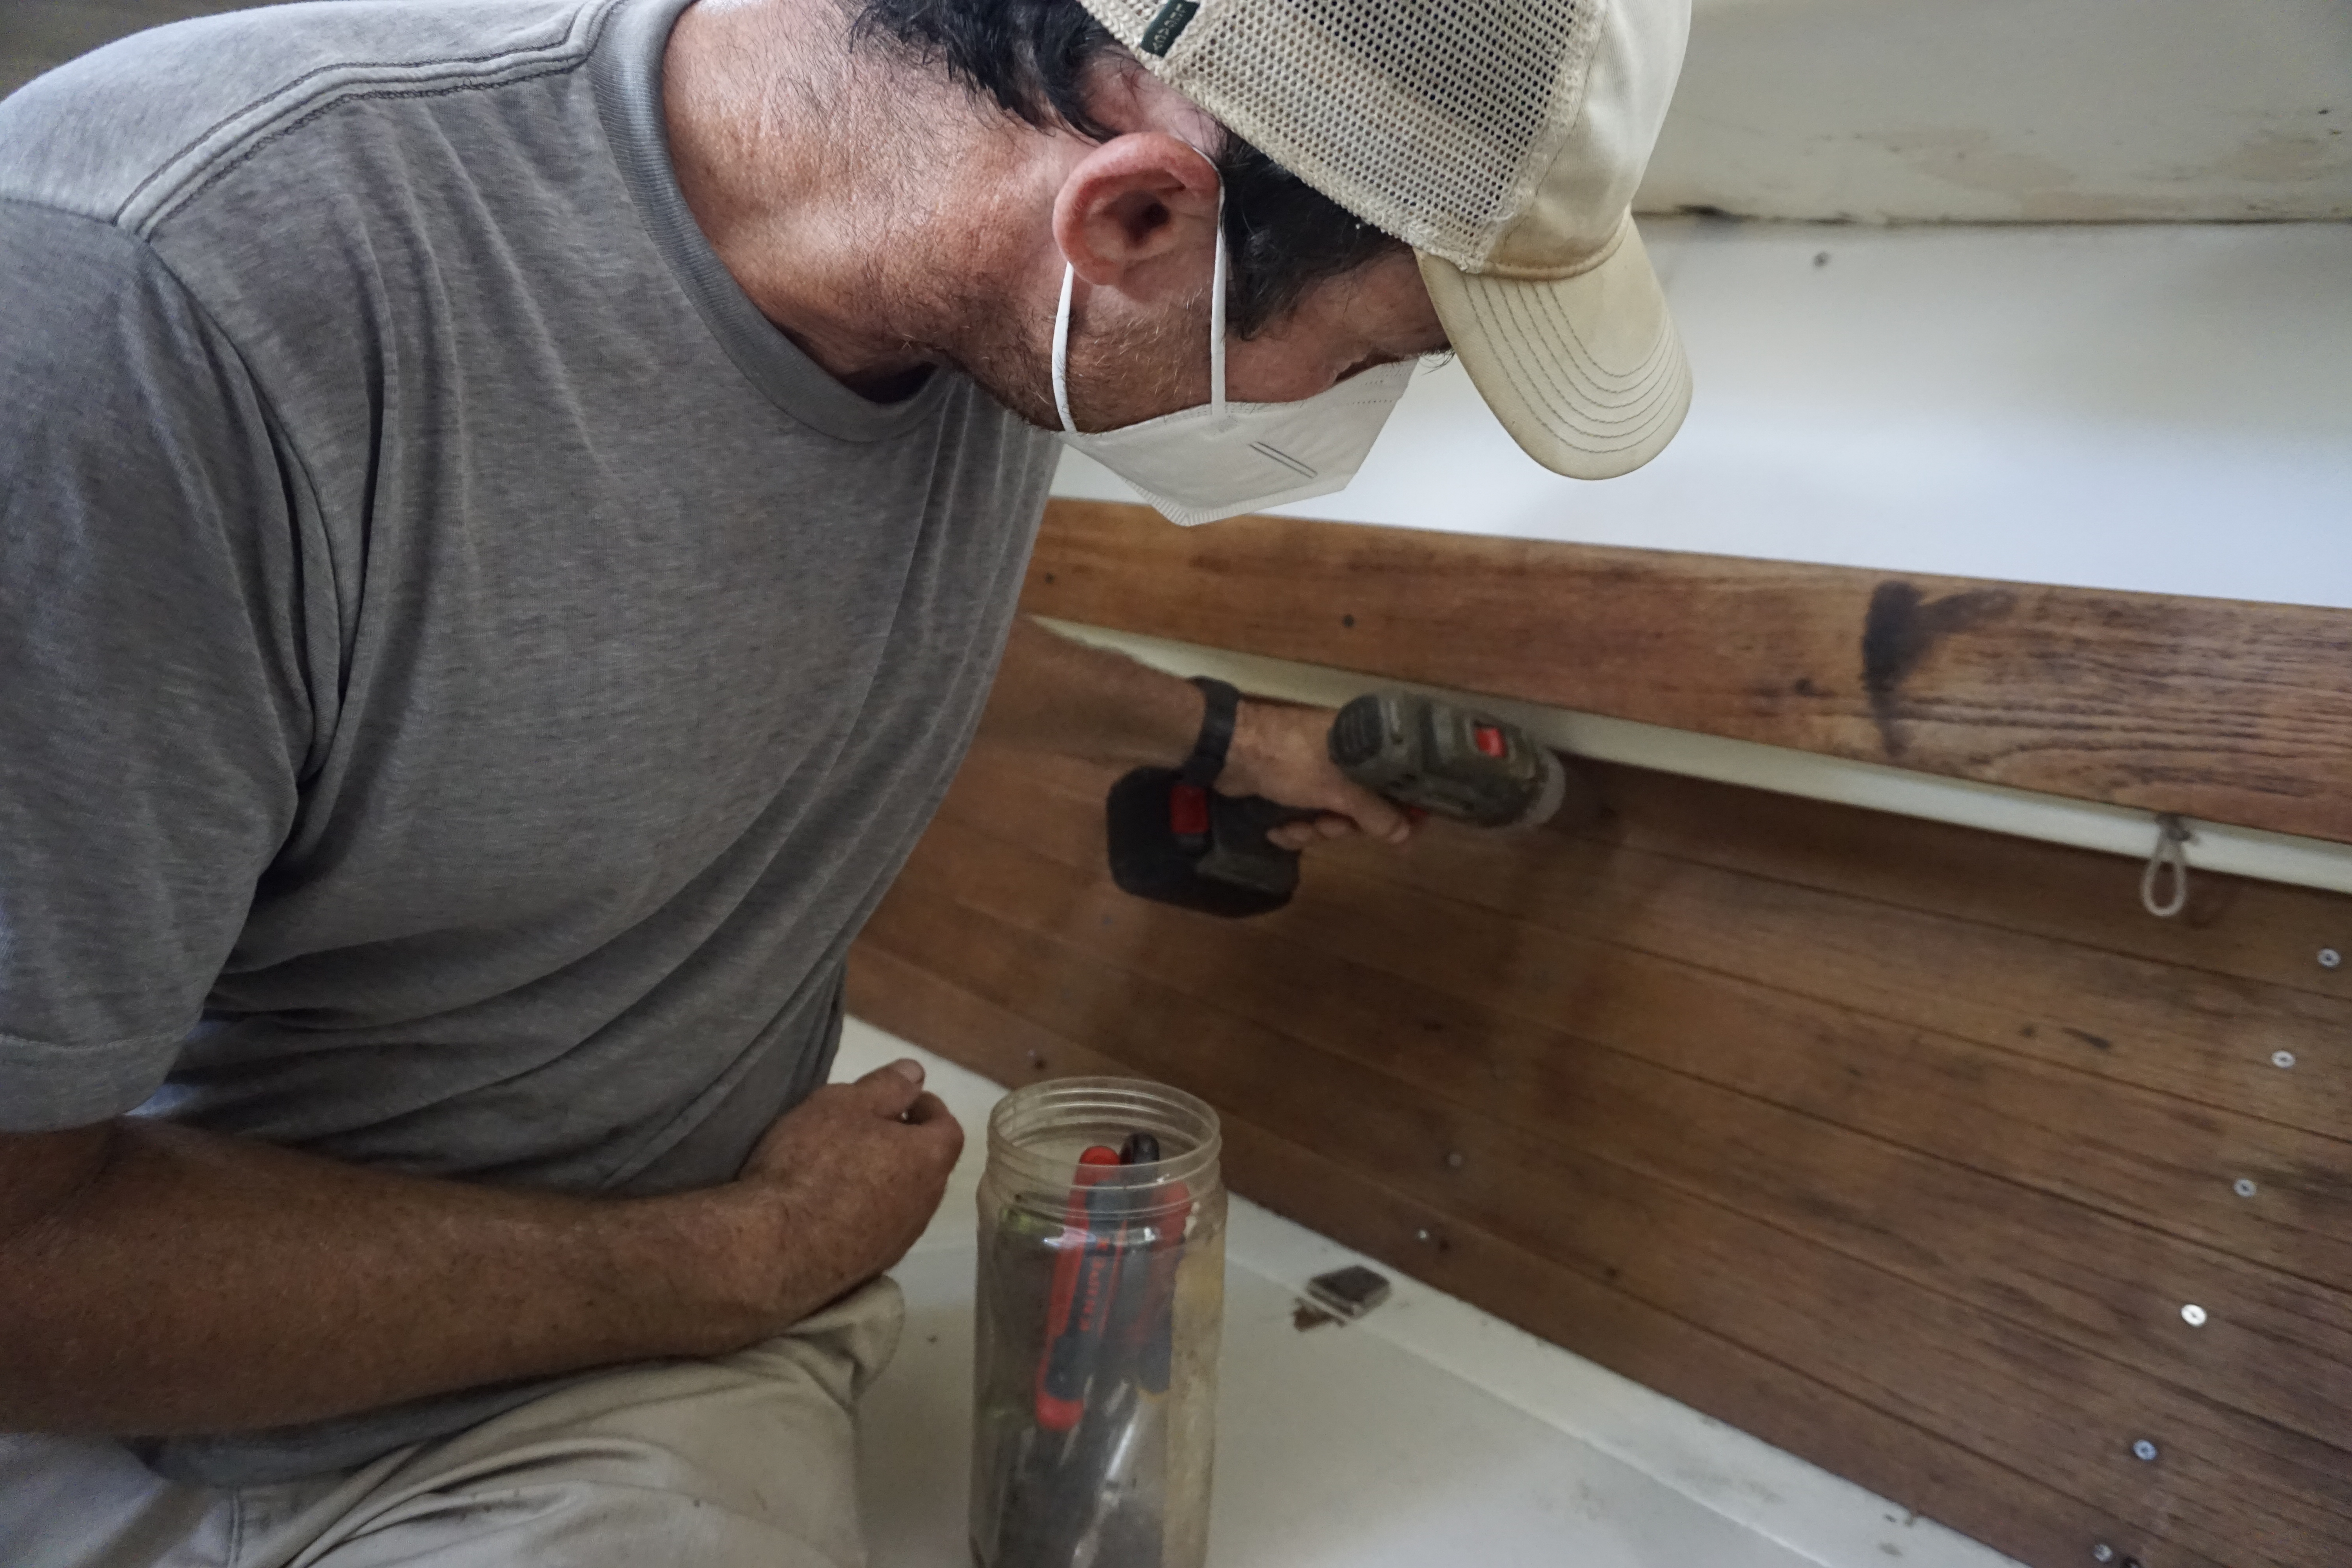
With the frames in place, we have sufficient room to add an inch of insulation overhead. Although we are not finished working on the frames, they want a bit of epoxy, some sanding, and a coat of paint, they are ready to act as supports. We will cut and dry fit a new overhead liner, 1/4 inch okoume plywood panels, to the frames in our next steps.
Project Notes

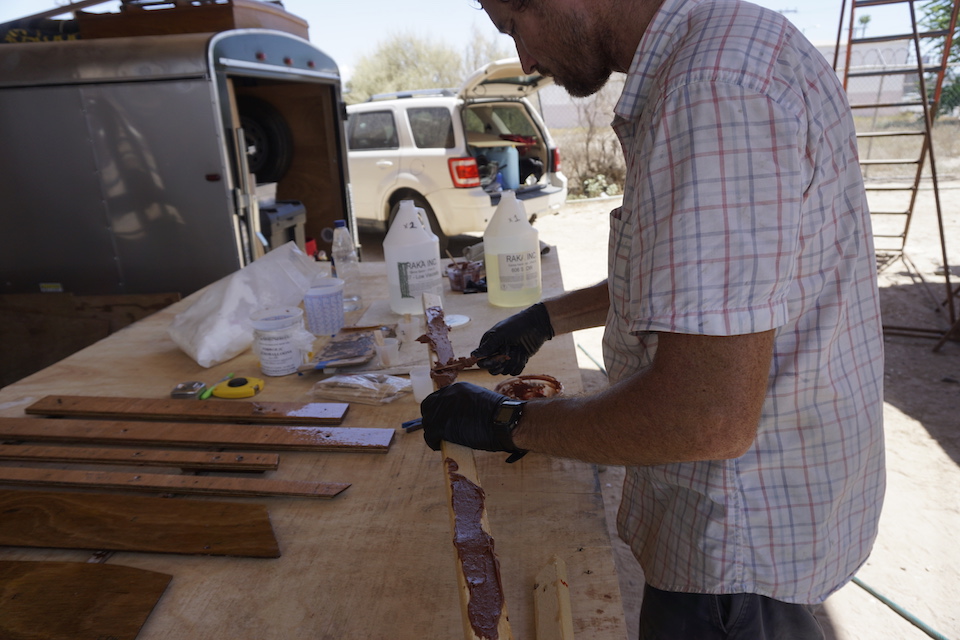
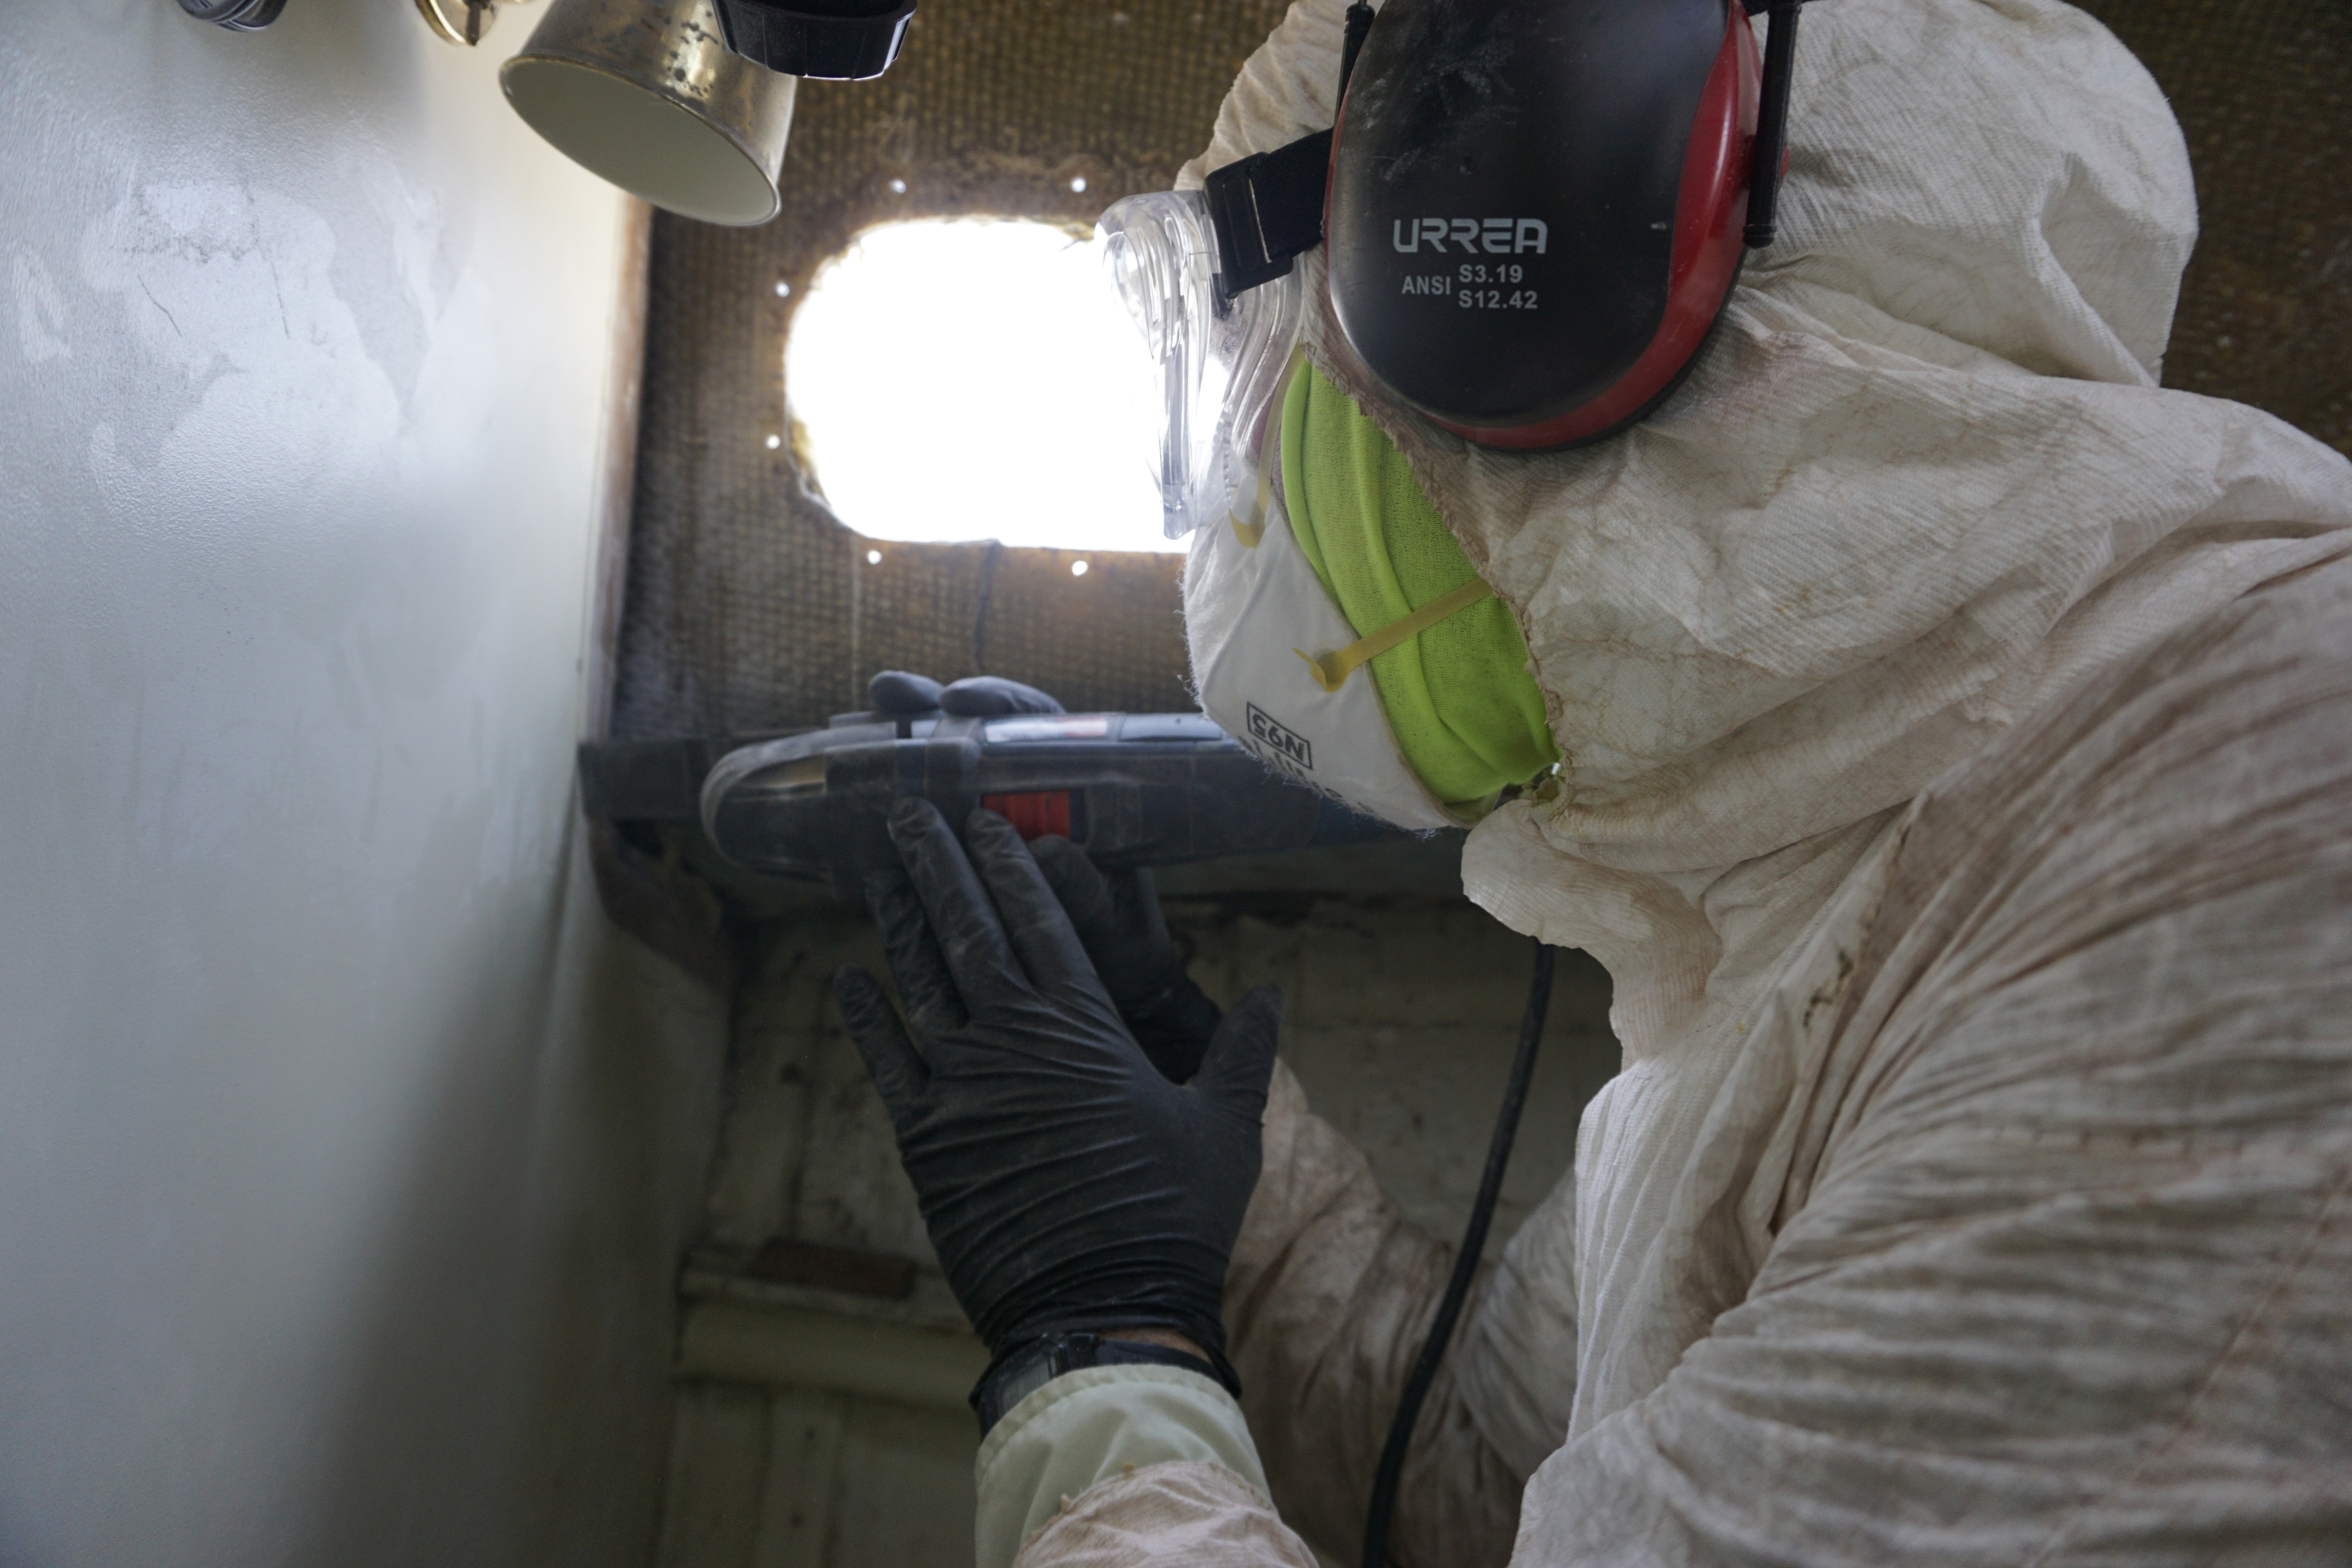
We removed all the frames and coated them with epoxy. We made a mistake when mixing one of the pots of epoxy. We mixed Part A with Part A instead of A with B. The sticky pieces coated with this pot of epoxy had to be scraped and sanded, and then coated again. We continue to make mistakes. It is hot, our heads are muddled, and we still feel rusty when it comes to boat work.


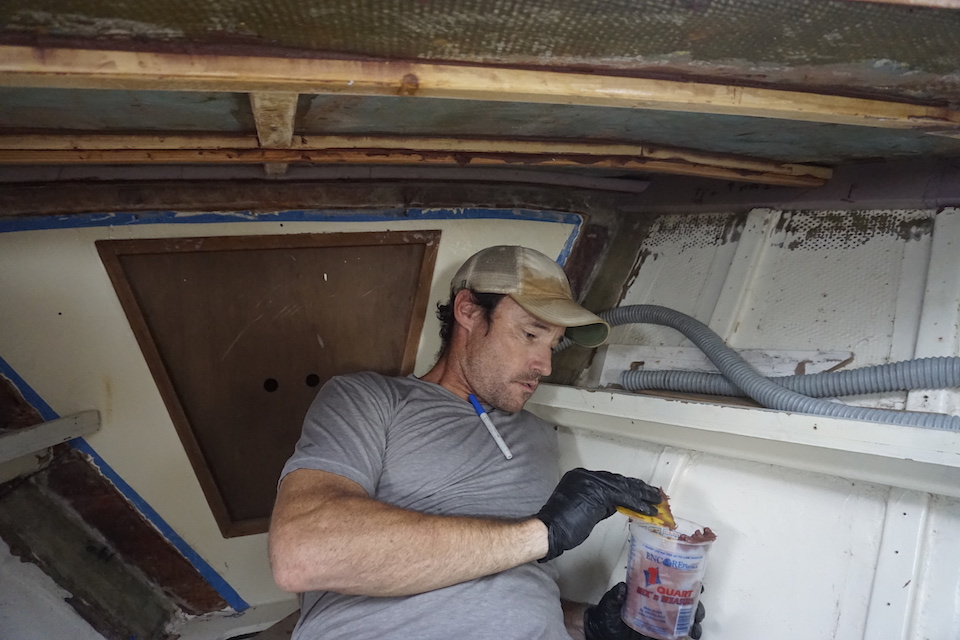
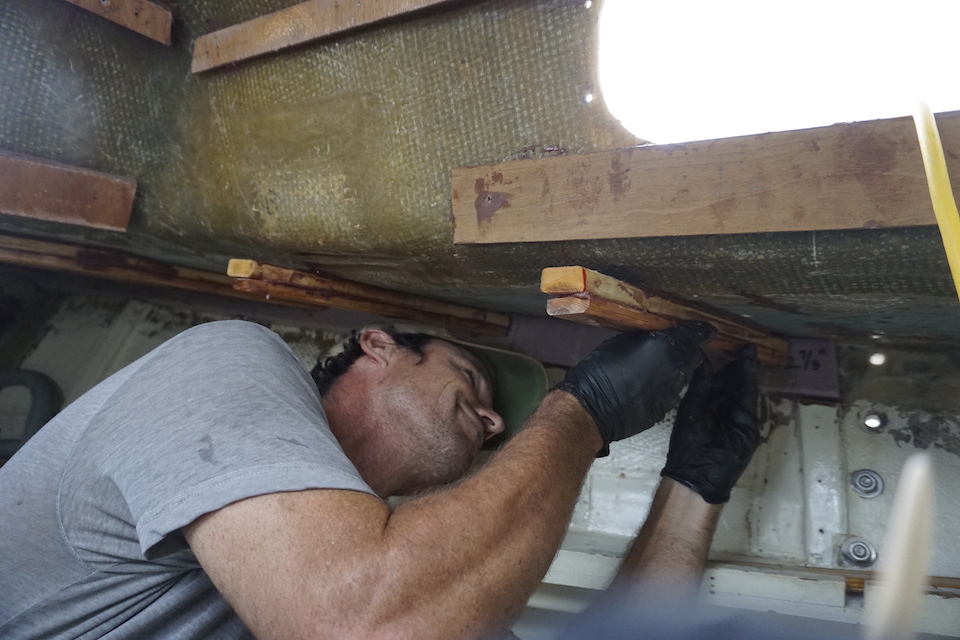
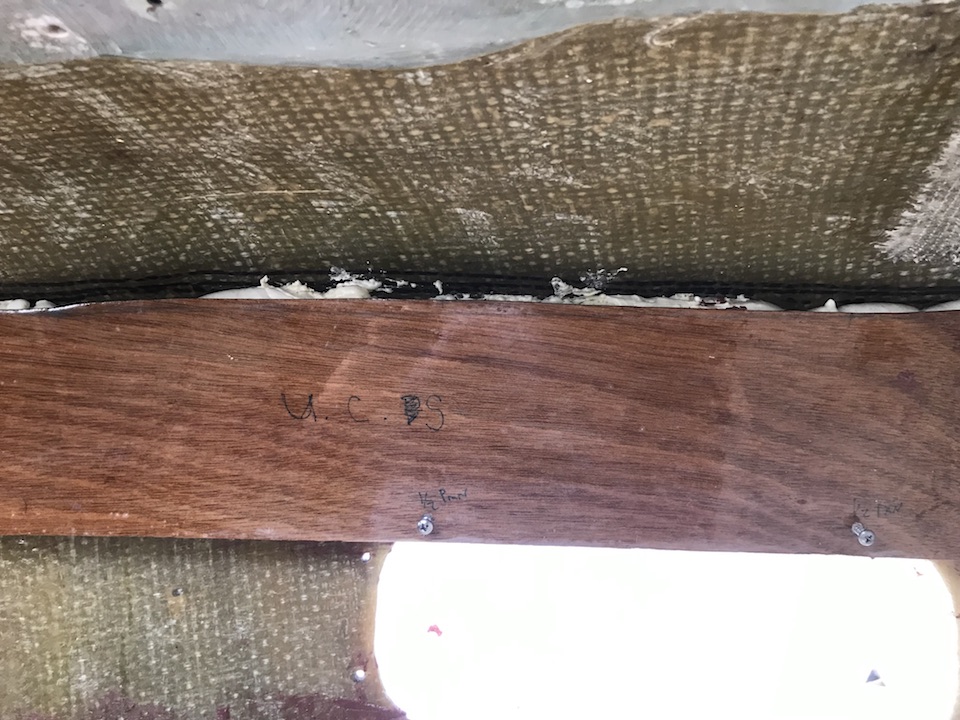
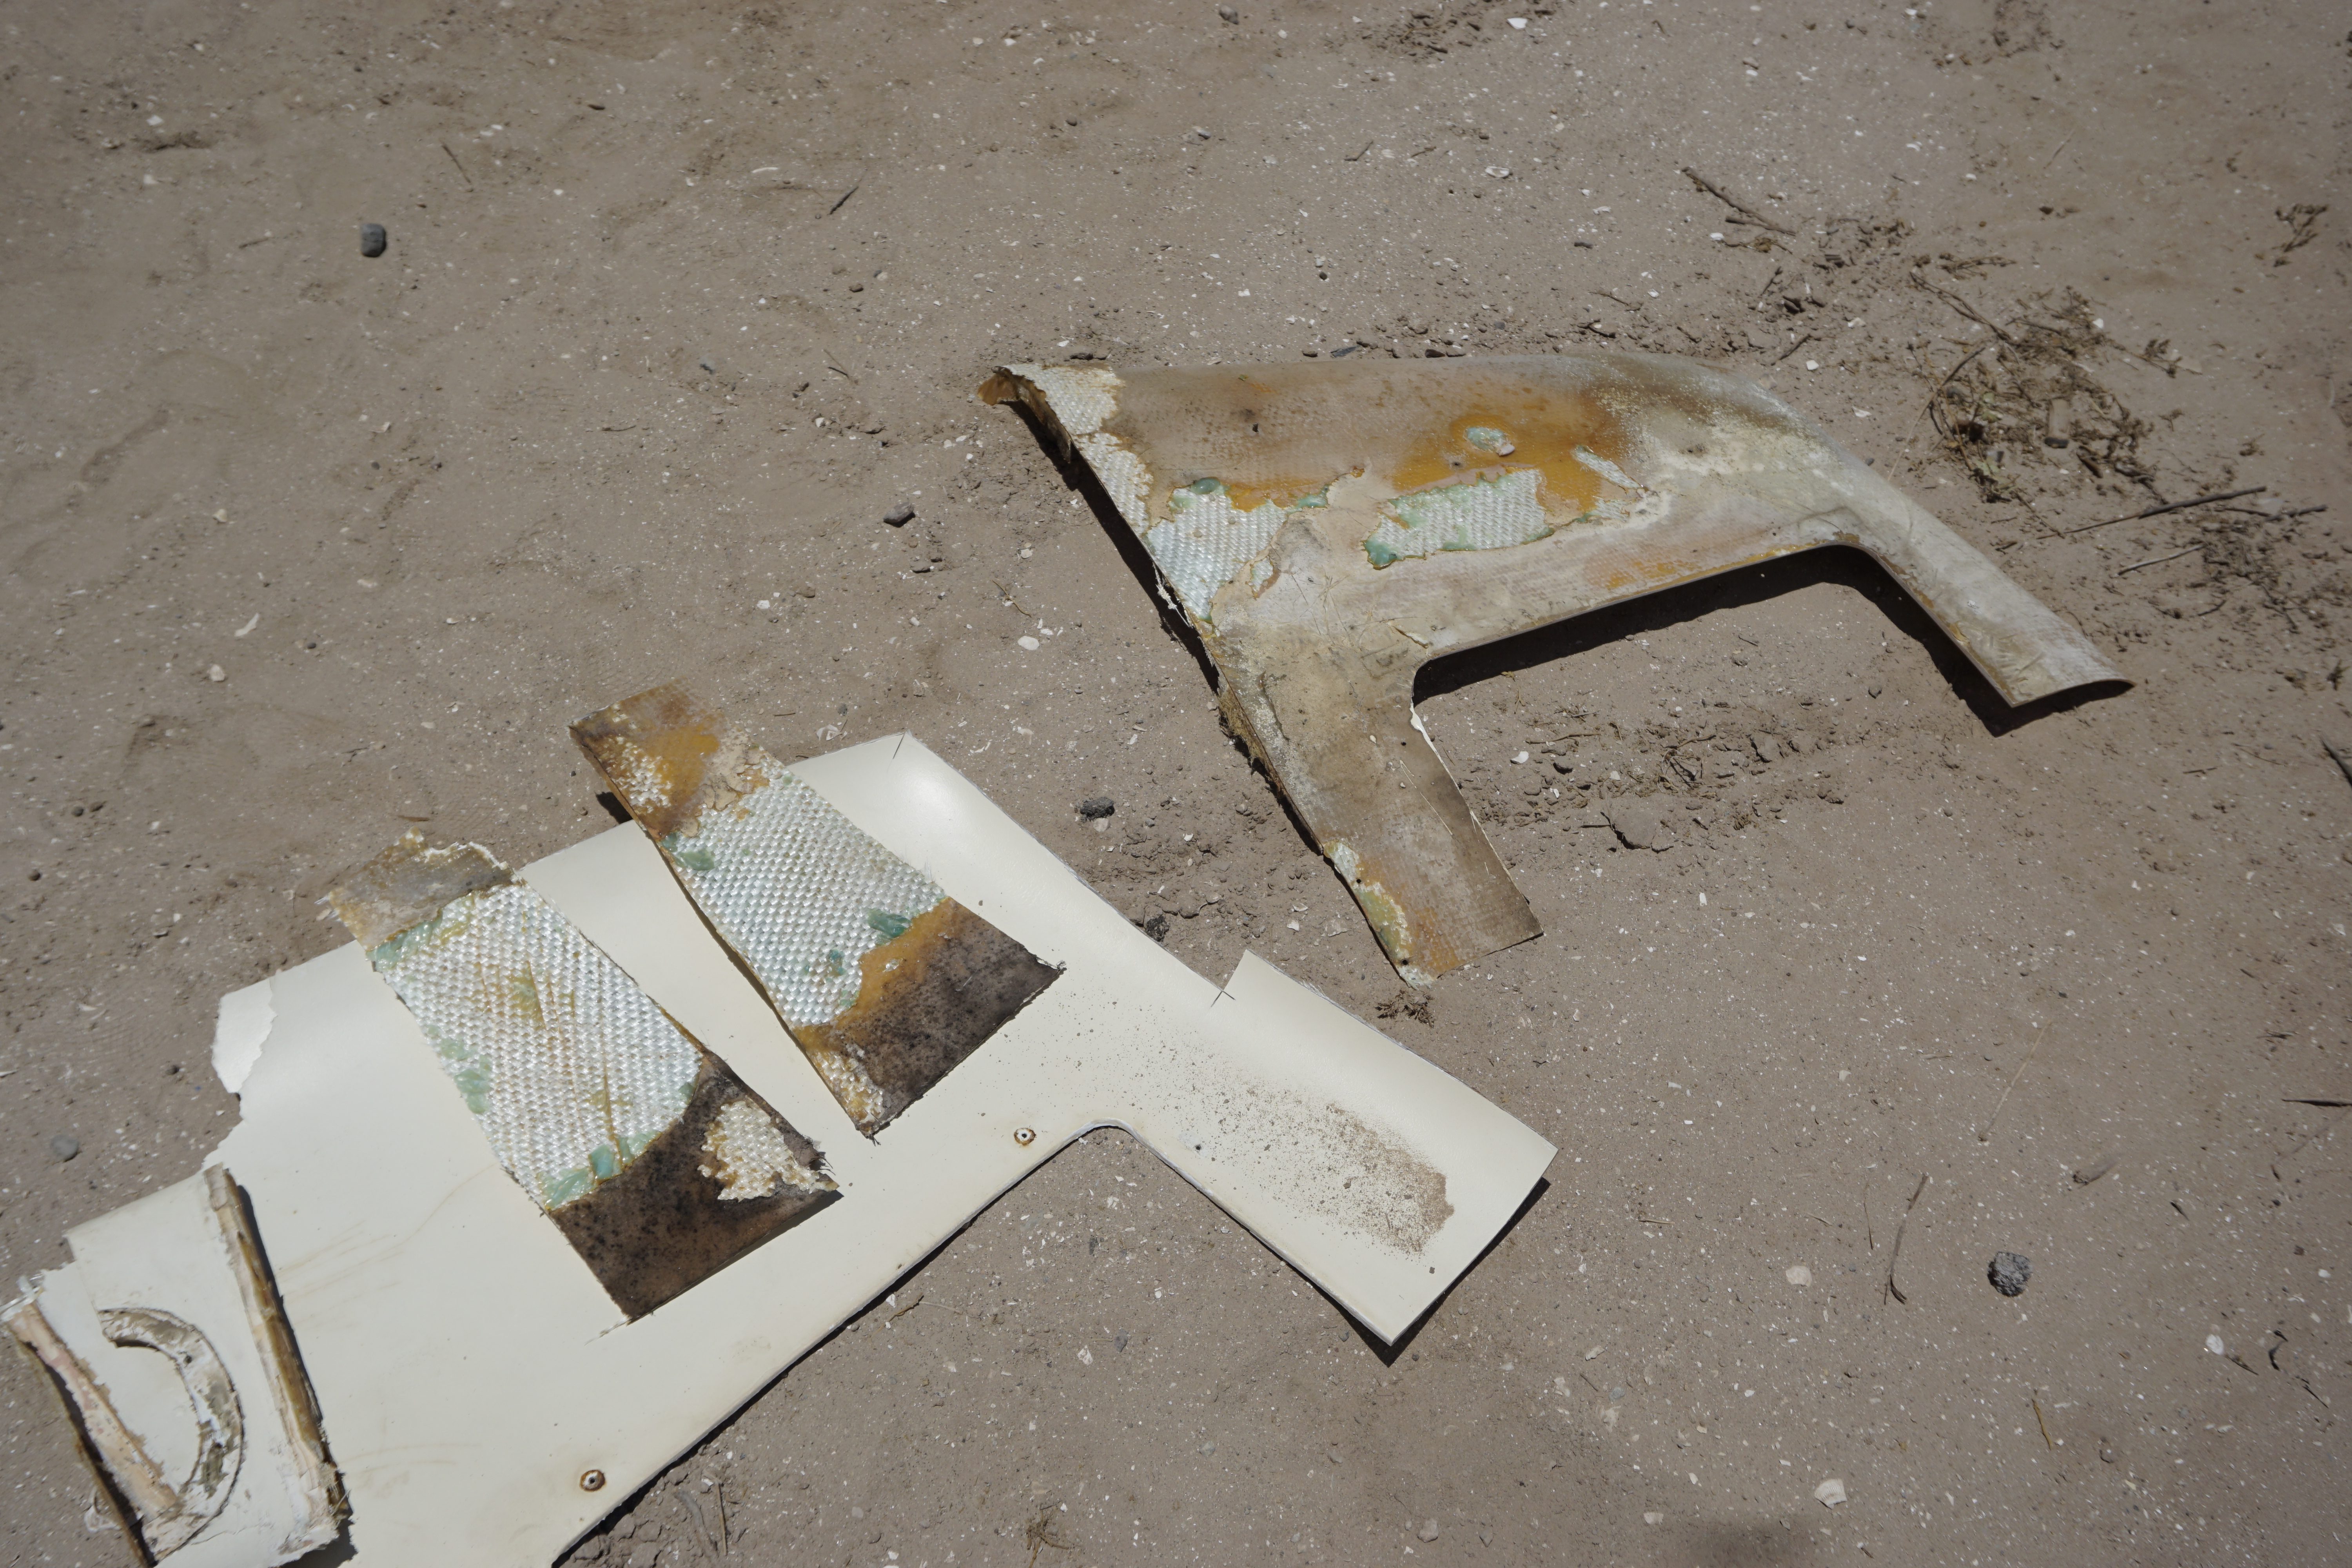
We added thickened epoxy to each piece and glued them to the overhead. Screws and clamps held each piece in place until the epoxy set. Layers were laminated together and we were almost done. But, the awkward curved space on the upper cabin sides called for a more times consuming, unique approach. This is the only place where plywood will be fixed over a small volume of space, a space that we will not be able to access and insulate later. To insulate this gap, we used XPS foam and spray foam. We then epoxied 3/16 inch plywood atop the cleat that bordered the foam at its lower limit.
Unfortunately, the polyurethane spray foam grew and pushed the tops of the plywood pieces out of place. Having never used the foam before, we thought it would expand and flow out of the gaps at the top of the plywood. Instead it expanded more uniformly, and its growth displaced the plywood. Brian made the quick decision to take the panels down before the epoxy set. The next day, he trimmed the foam, we sanded down the epoxy, and then we successfully installed this third layer, the second time around.


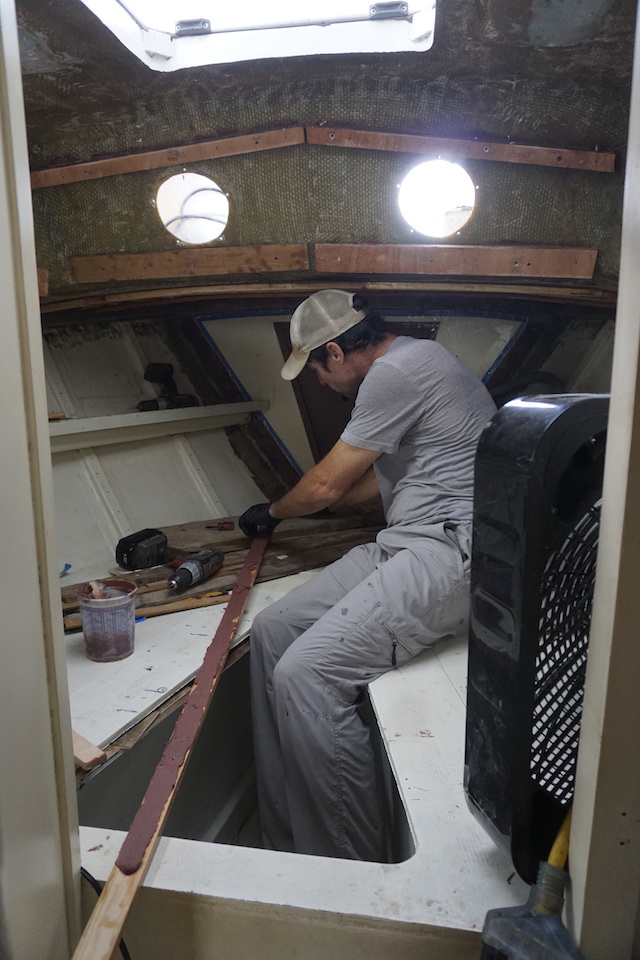
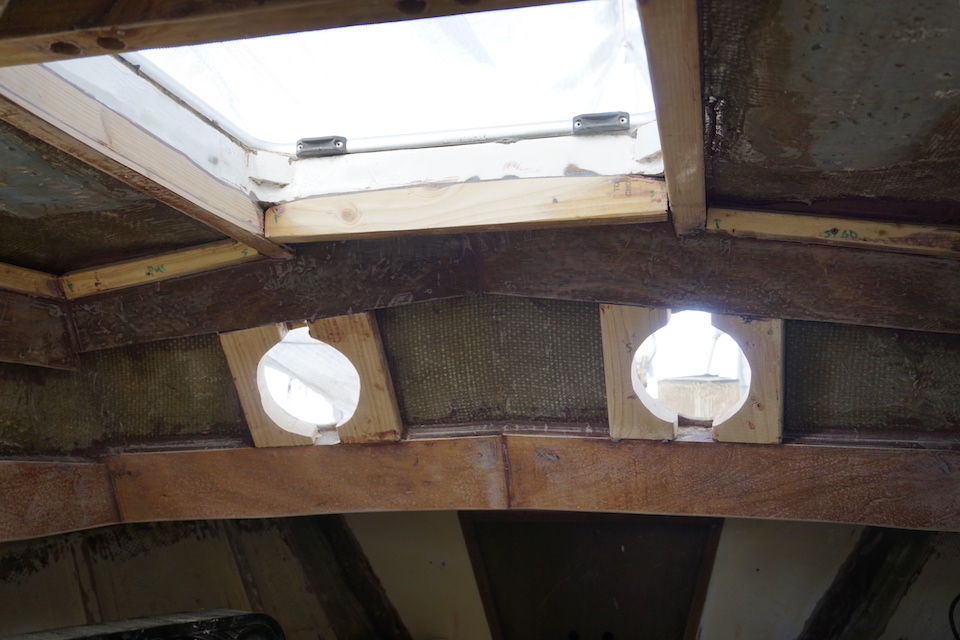
We added frames to the tricky area, the overhead around the hatch, last. We used douglas fir around the hatch and installed easy to shape furring strips for six other frames: three to port, three to starboard. All of these pieces were installed to create an even support system for the new headliner panels. The frames were made into variable shapes to absorb the irregular surface of the overhead, so that the plywood can be placed overtop in a single plane.
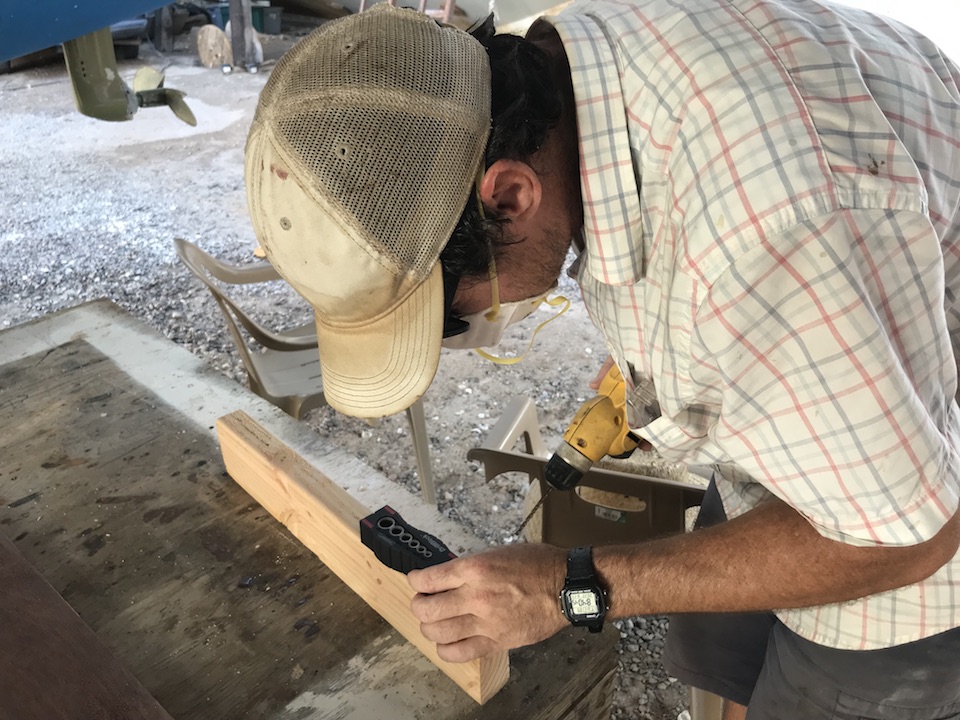


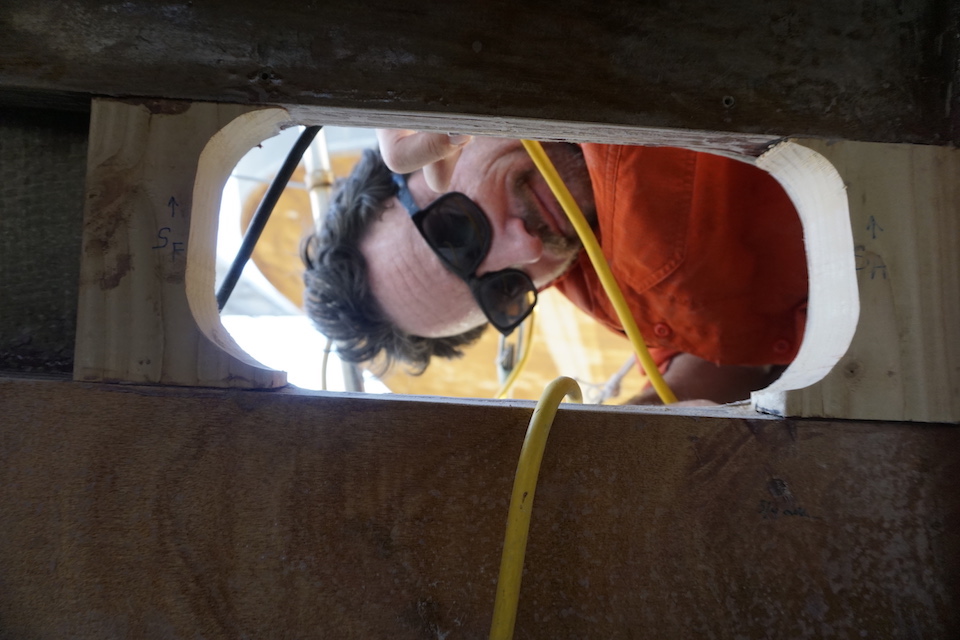
We also added wood around the port lights, to completely border them with wood. Brian then cut the blocks to shape using a jigsaw. Next, we will sand and epoxy the port light frames. We will do some finish work on all the frames: epoxy filler, sanding, and painting. But for now, we are going to move on to the next step in the project.


Sailing Patagonia: Tierra del Fuego Archipelago
This short video is set to music by Lemont, “Take This Hand” from Songs of Our Friends EP. The images are from our year in Tierra del Fuego and the Beagle Channel.

V-Berth Insulation, Part 3, Tabbing Bulkheads and Hull-Deck Joint
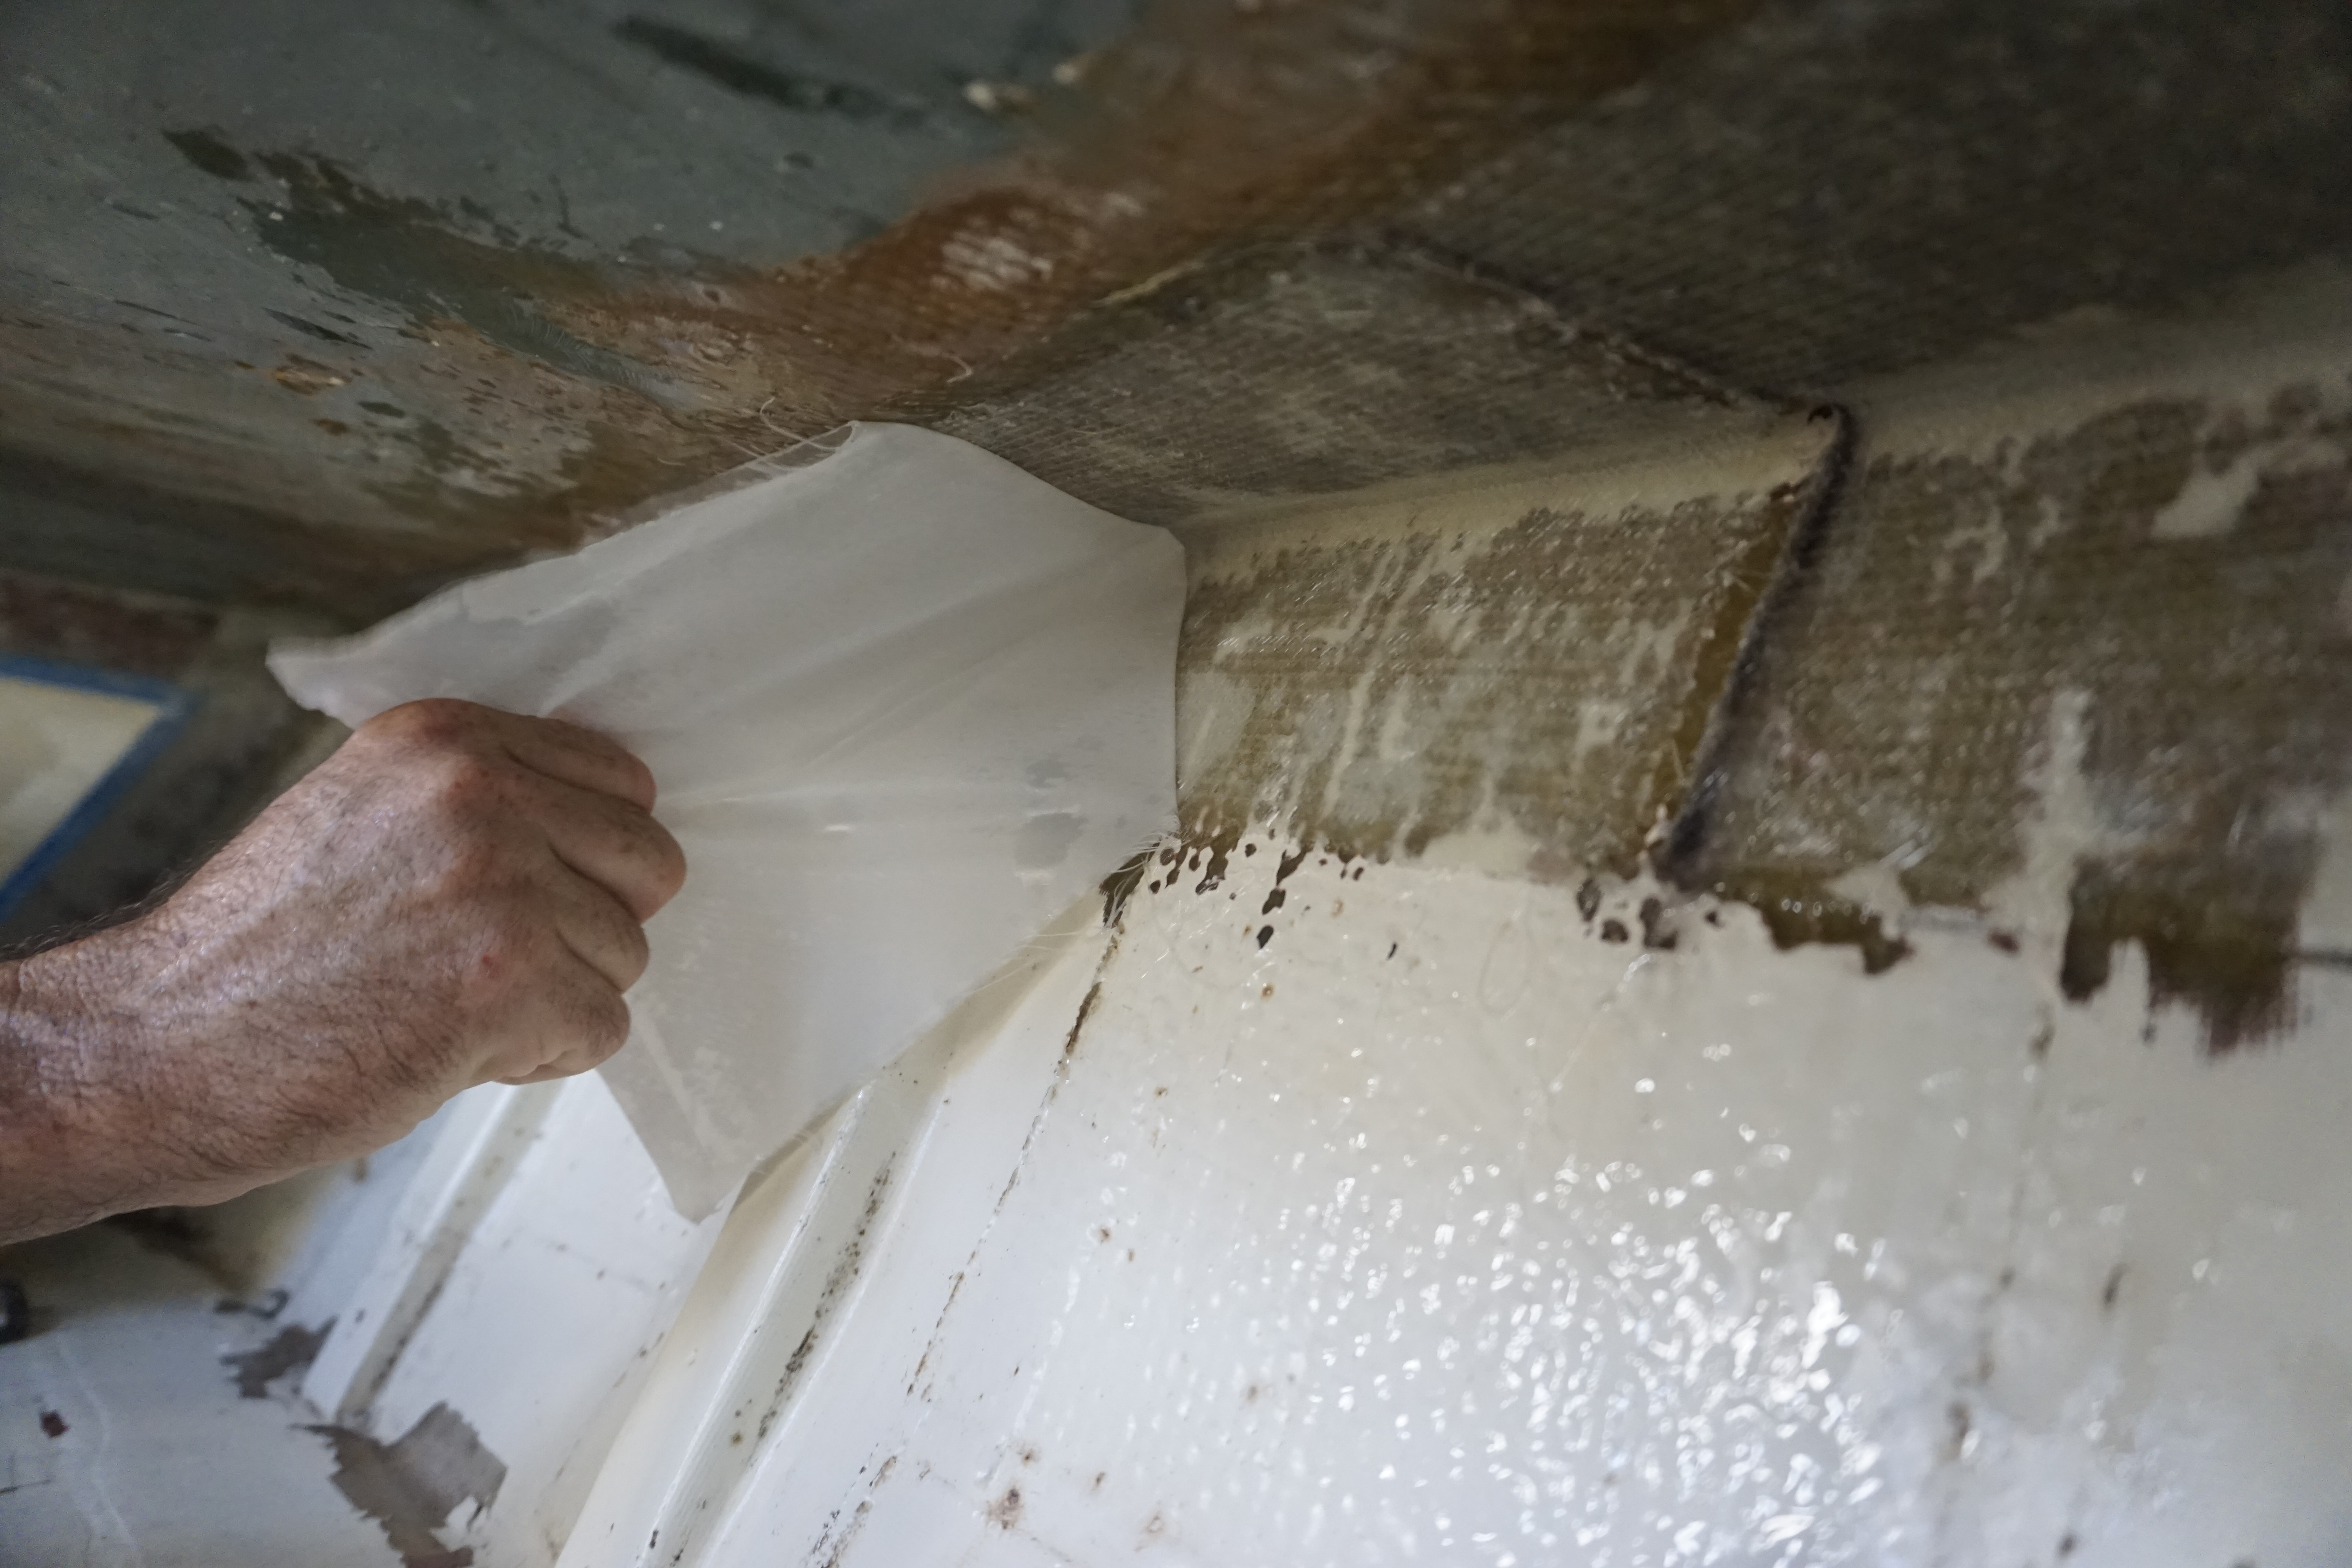
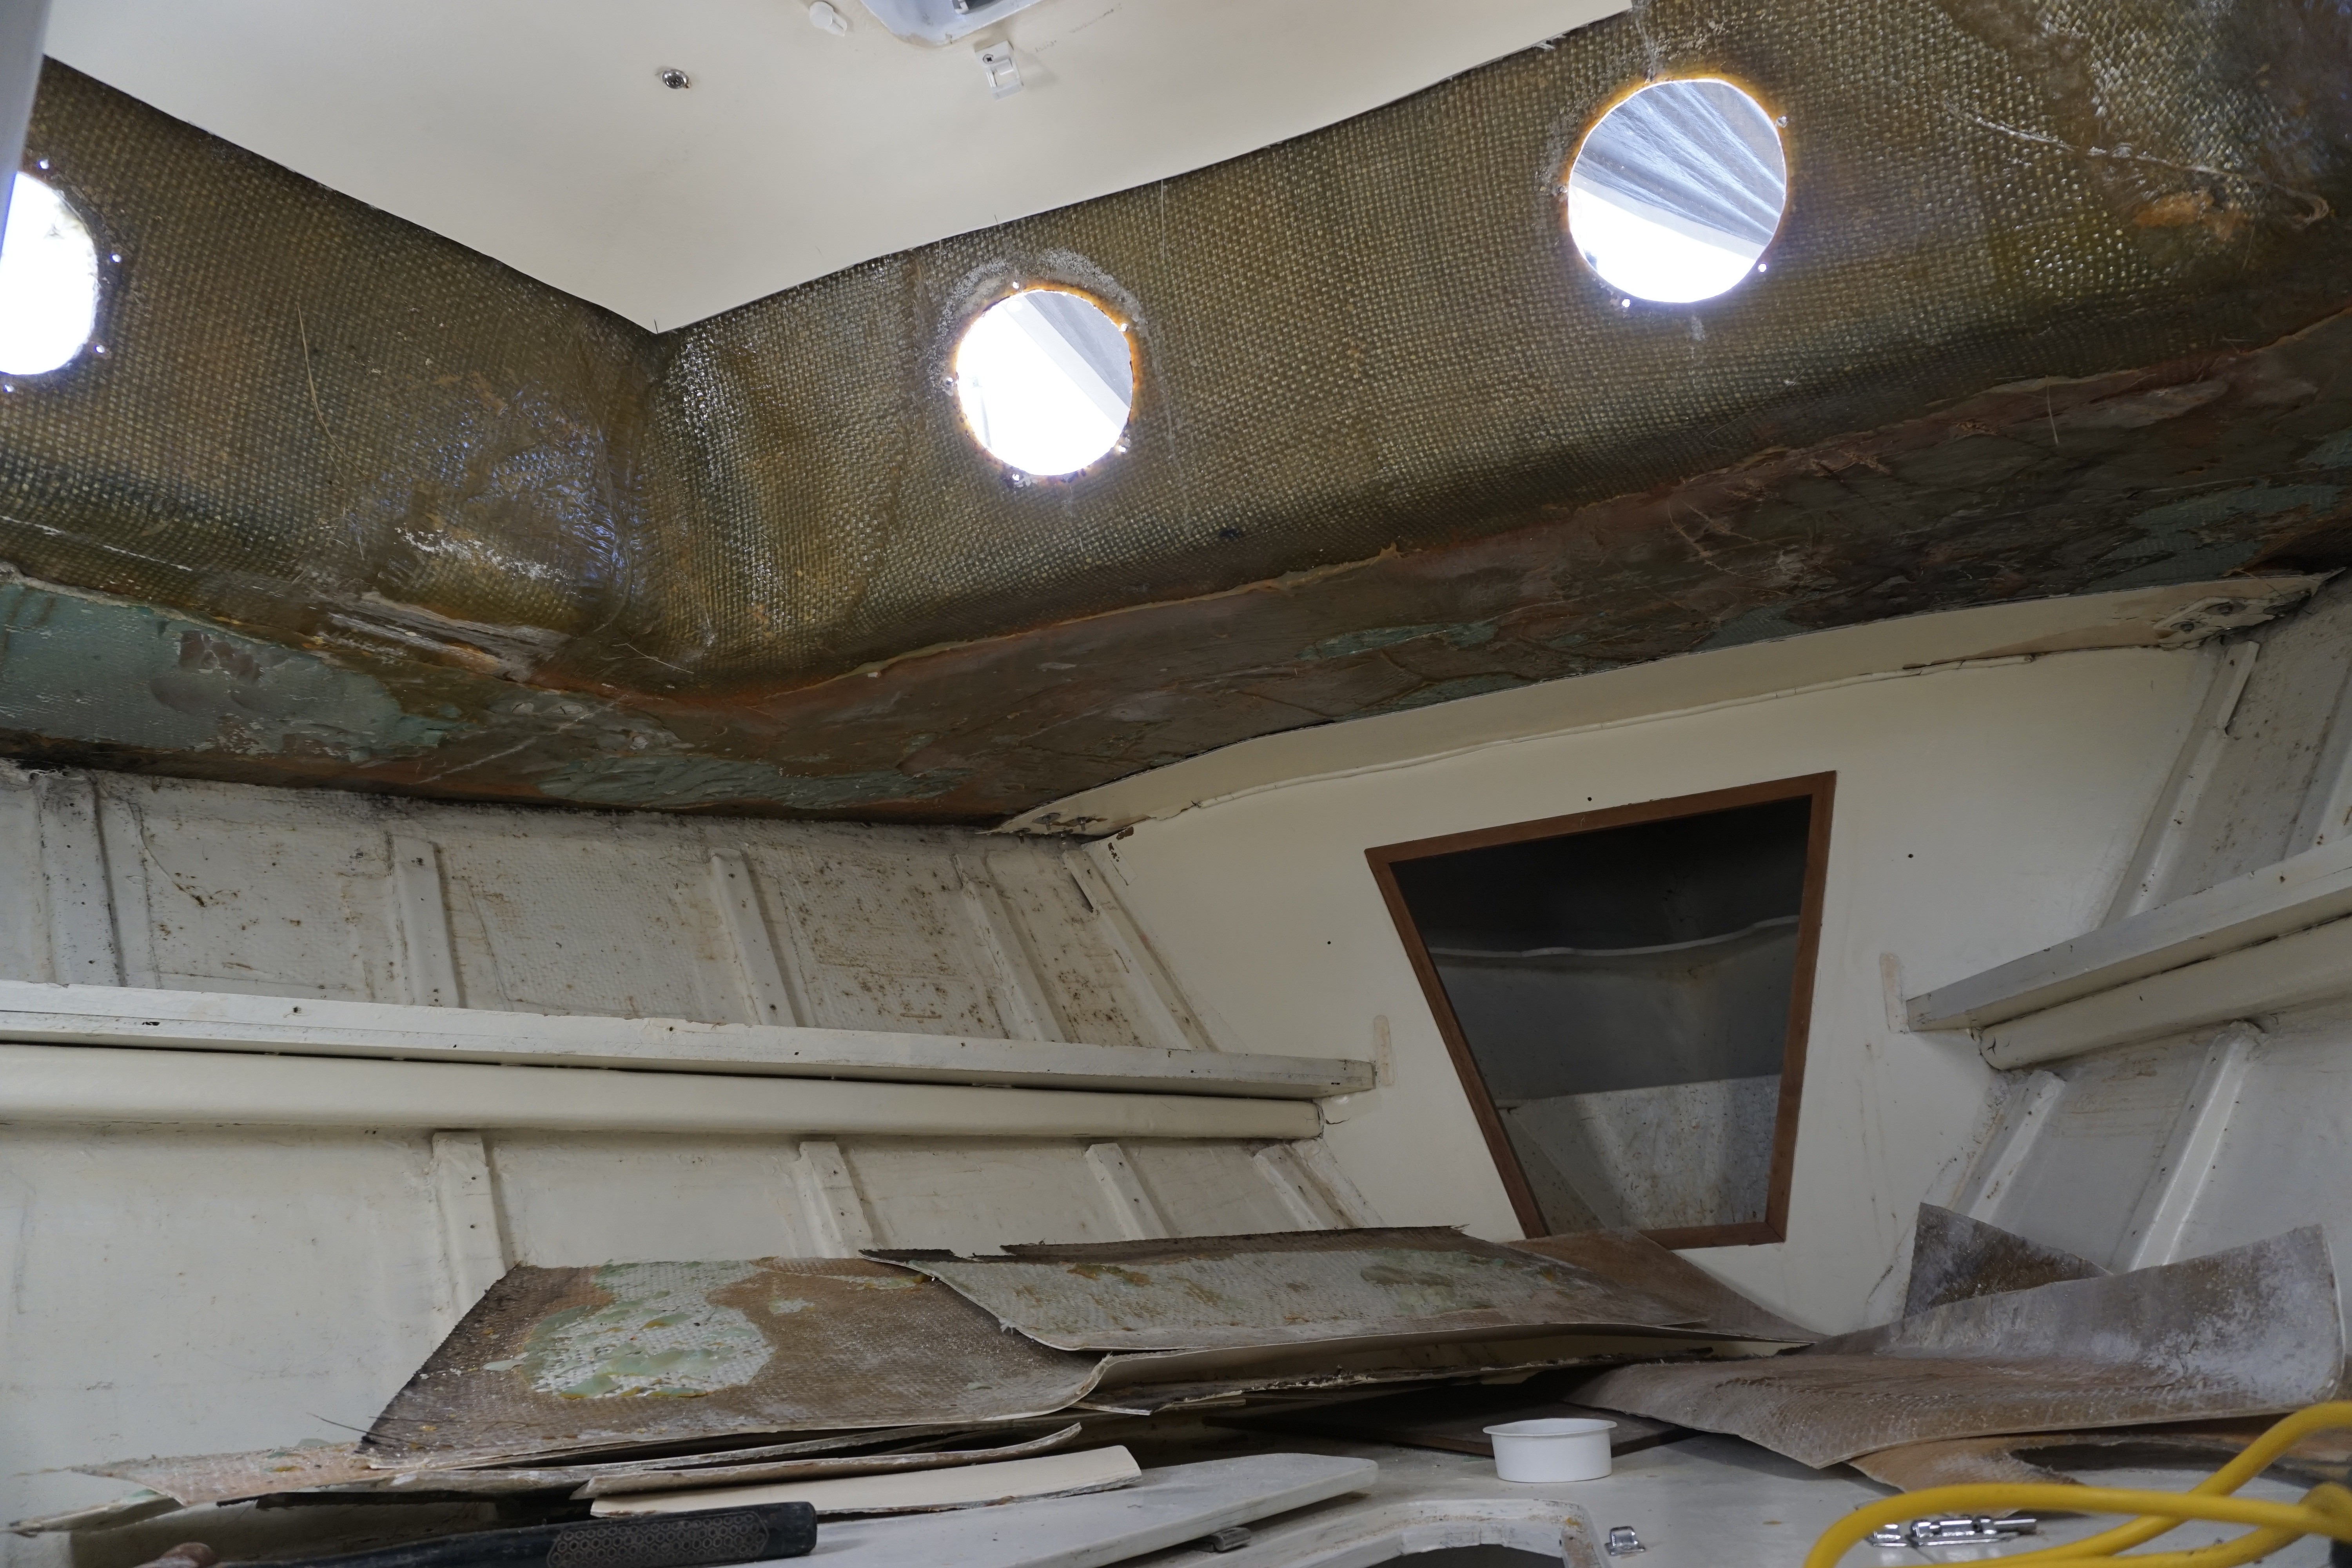
We completed our first fiberglass job of this refit. The job had two parts. The first was to tab in the V-Berth bulkheads. We removed the original 2 inch fiberglass tabbing when we cut out the headliner. In order to add our own 6 inch tape, we had to chisel the formica off of the bulkheads, so that our tabs could better bond to the wood underneath.

The second part was to fiberglass the hull to the deck joint. Brian glassed this joint together from the outside several years ago. This time, we are adding fiberglass on the inside. We removed sections of the original cleats on the sides of the hull to make room for the 6 inch 1708 fiberglass tape. Then we ground down the relevant areas and roughed up the surfaces where the grinder could not reach with a hand file.


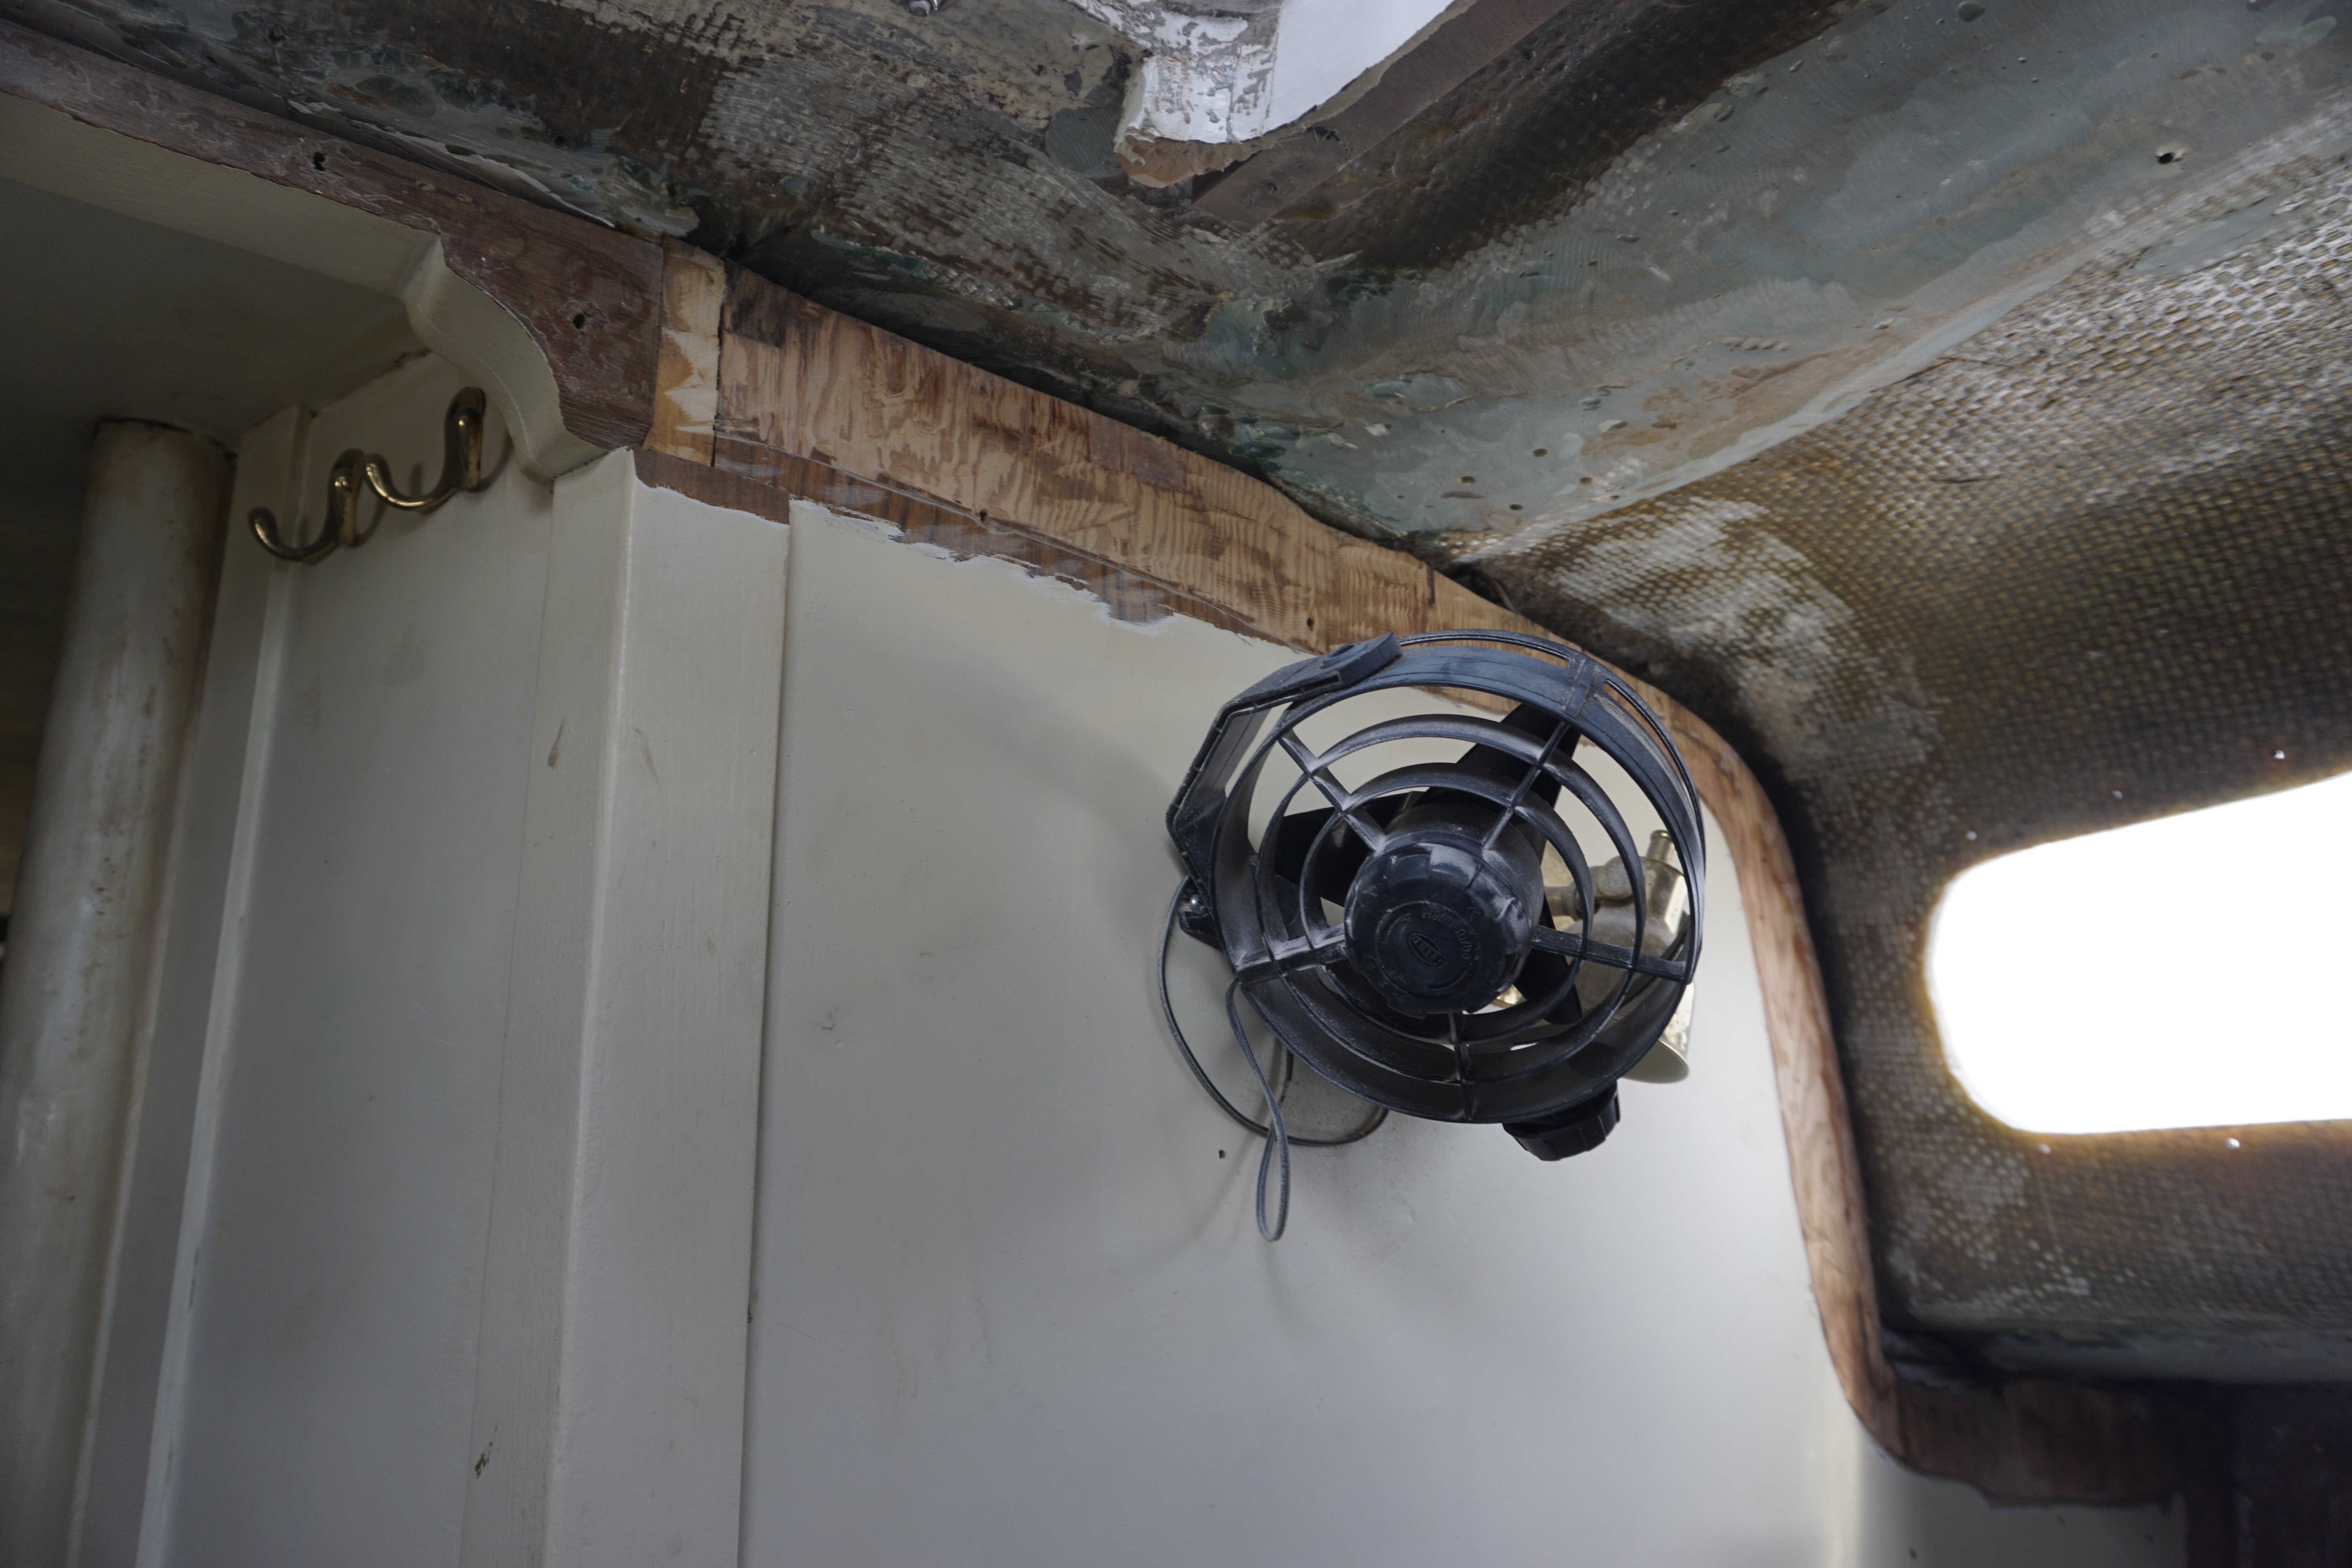
The fiberglass will have two roles: to strengthen the boat and to give us a foundation. We will build our frames on this foundation. We have to add frames for a number of reasons. They will be borders for insulation. They will also be shaped to strengthen the deck. Their third function will be to provide a place for us to anchor our new head liner panels. After we add the frames, insulation, and new liner panels, the overhead in the V-Berth will be complete.

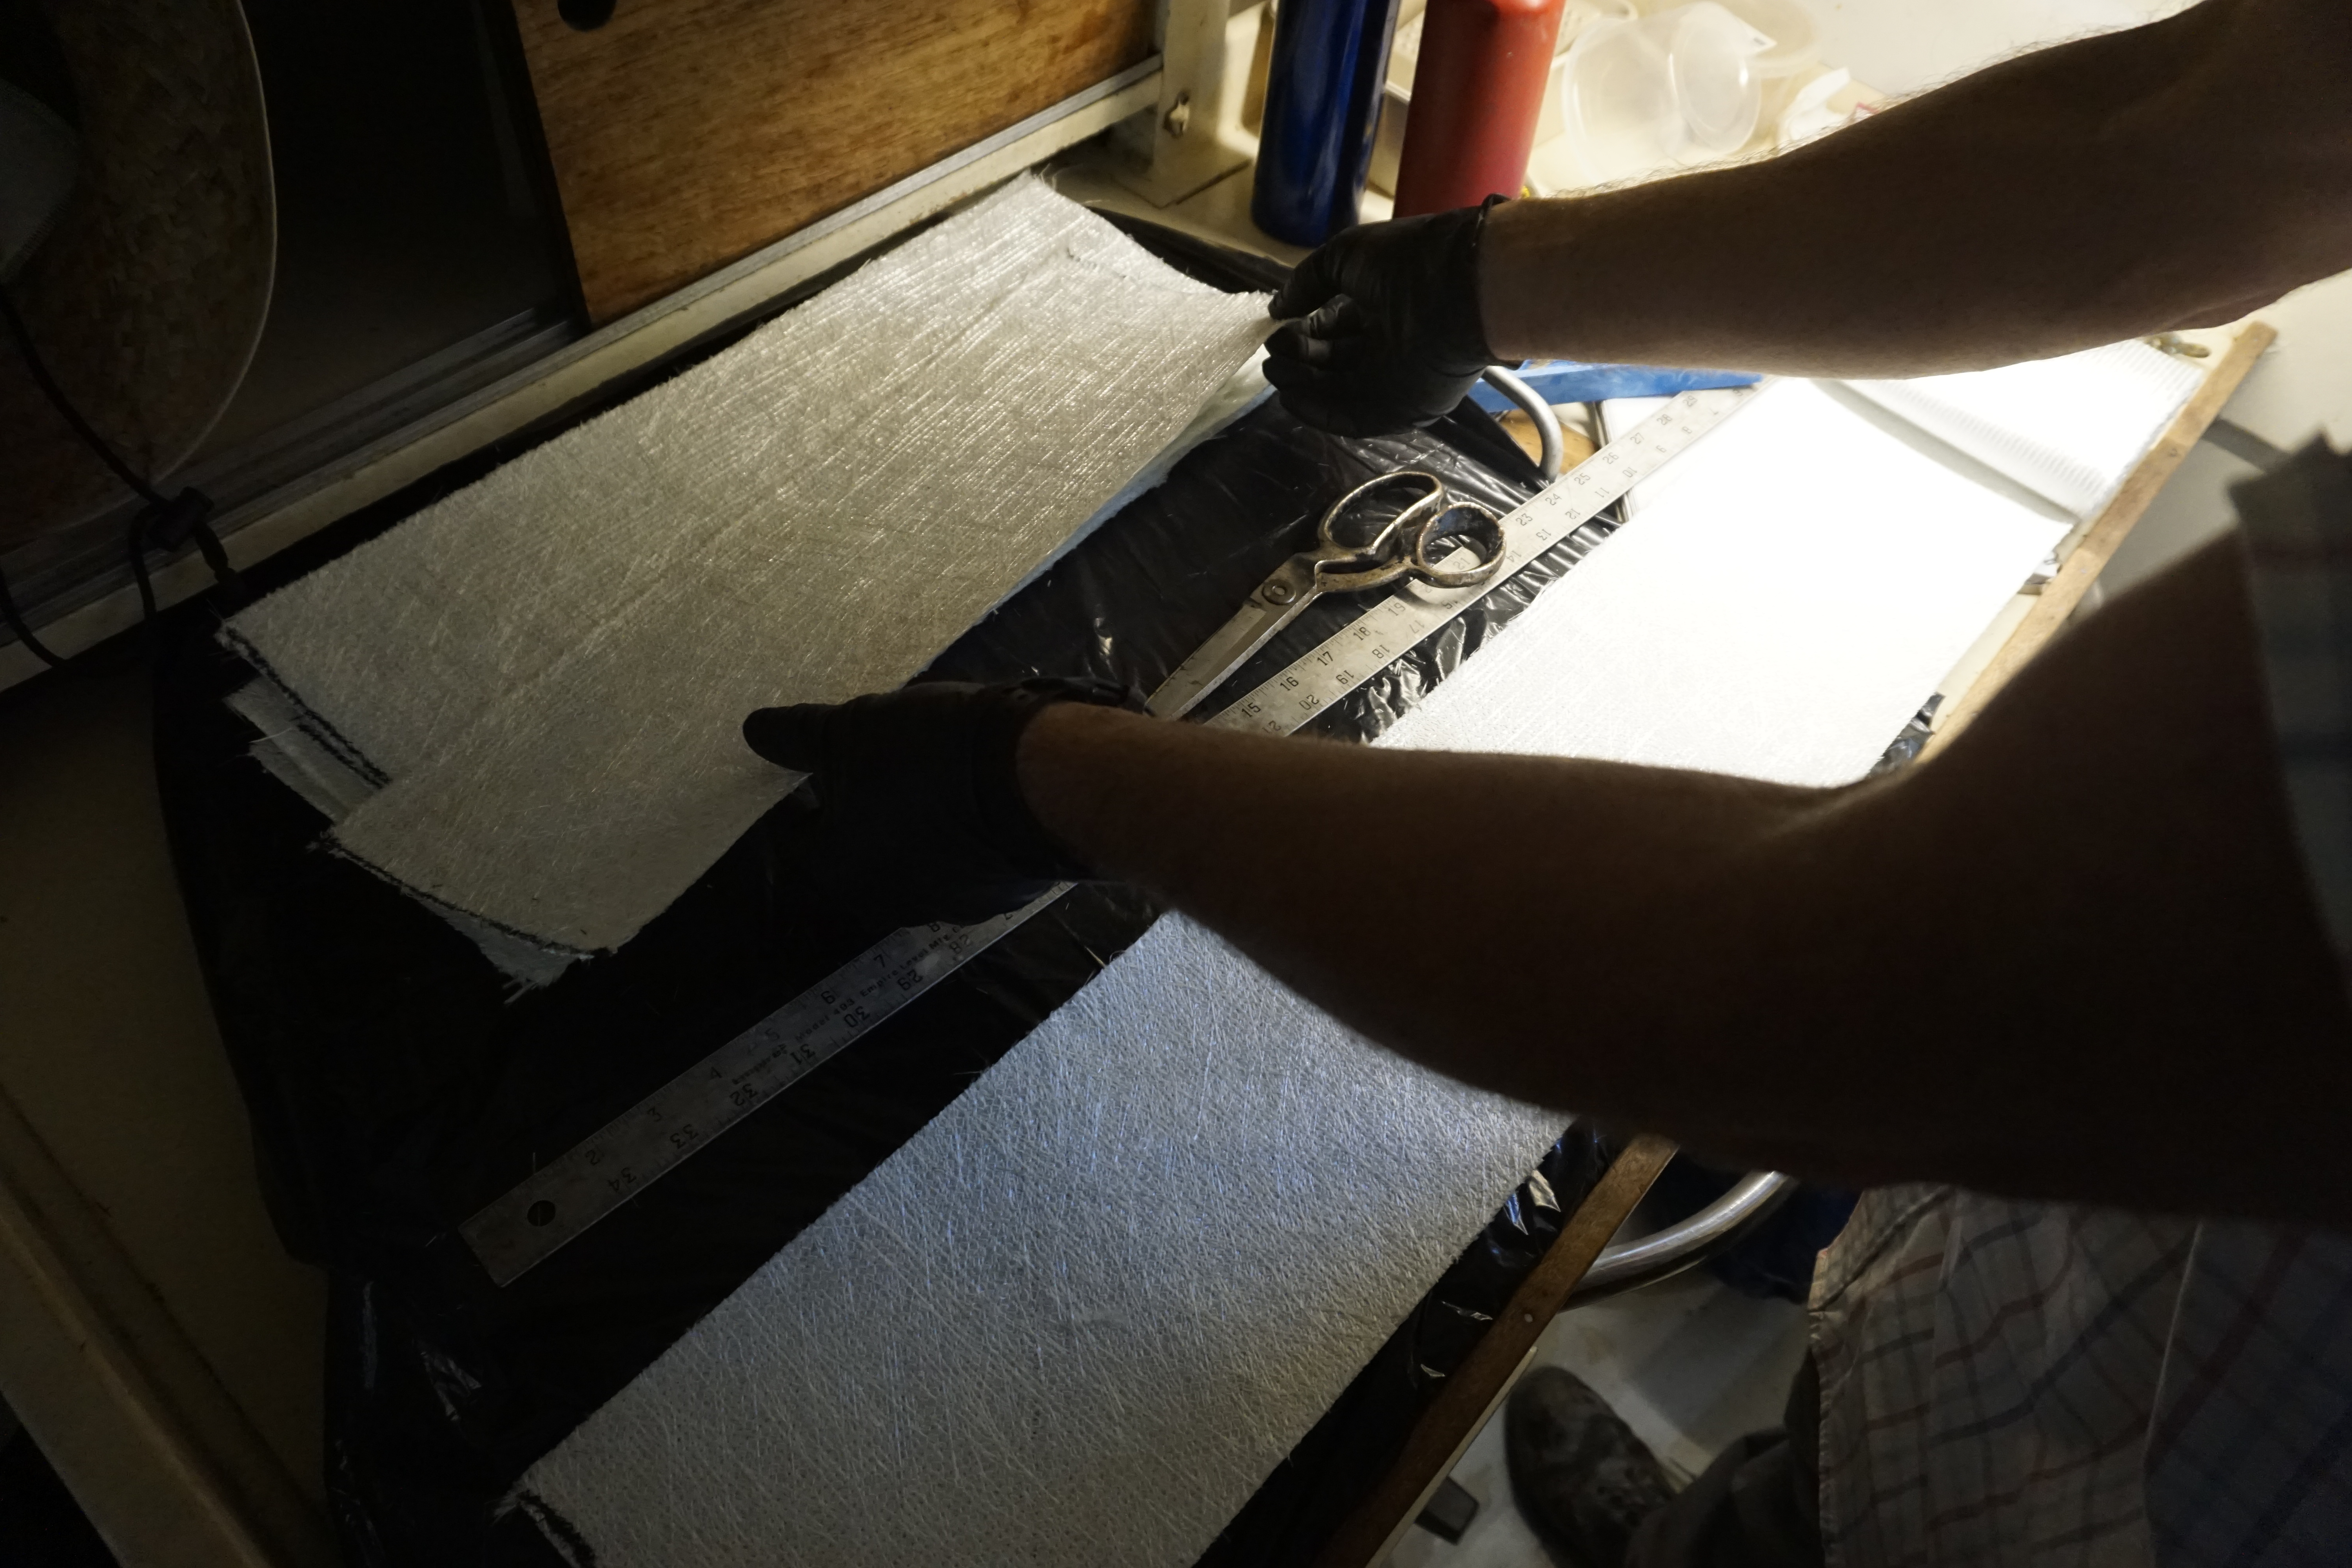
We cut fiberglass and set up epoxy stations before diving into fiberglass work one hot afternoon. The thermometer read 98 degrees when we started. First, Brian added thickened epoxy to the 6 inch sections of the v-berth where we would add fiberglass. Then, I started mixing epoxy. I mixed consistently, 3 ounces at a time. Keeping the epoxy pots small helped us manage in the heat. We both worked the station where we added the epoxy and peel ply to the fiberglass. When a piece of glass was ready, Brian installed it in the v-berth.

We had a good rhythm to our work, but fiberglass jobs can be tricky. This job showed how rusty we were, and it did not go perfectly. The thick 1708 fiberglass did not adhere perfectly to the bulkheads. The formica on the bulkheads caused problems. Wherever fiberglass overlapped the formica, the 1/8th inch rise from the bare plywood to formica proved too much. The glass did not take the rise well. As Brian says in the video, we should have known better. But, oh well. What’s stuck is stuck. We’ll make the best of it, grind down what we need to, fair with thickened epoxy where we need to and move on.

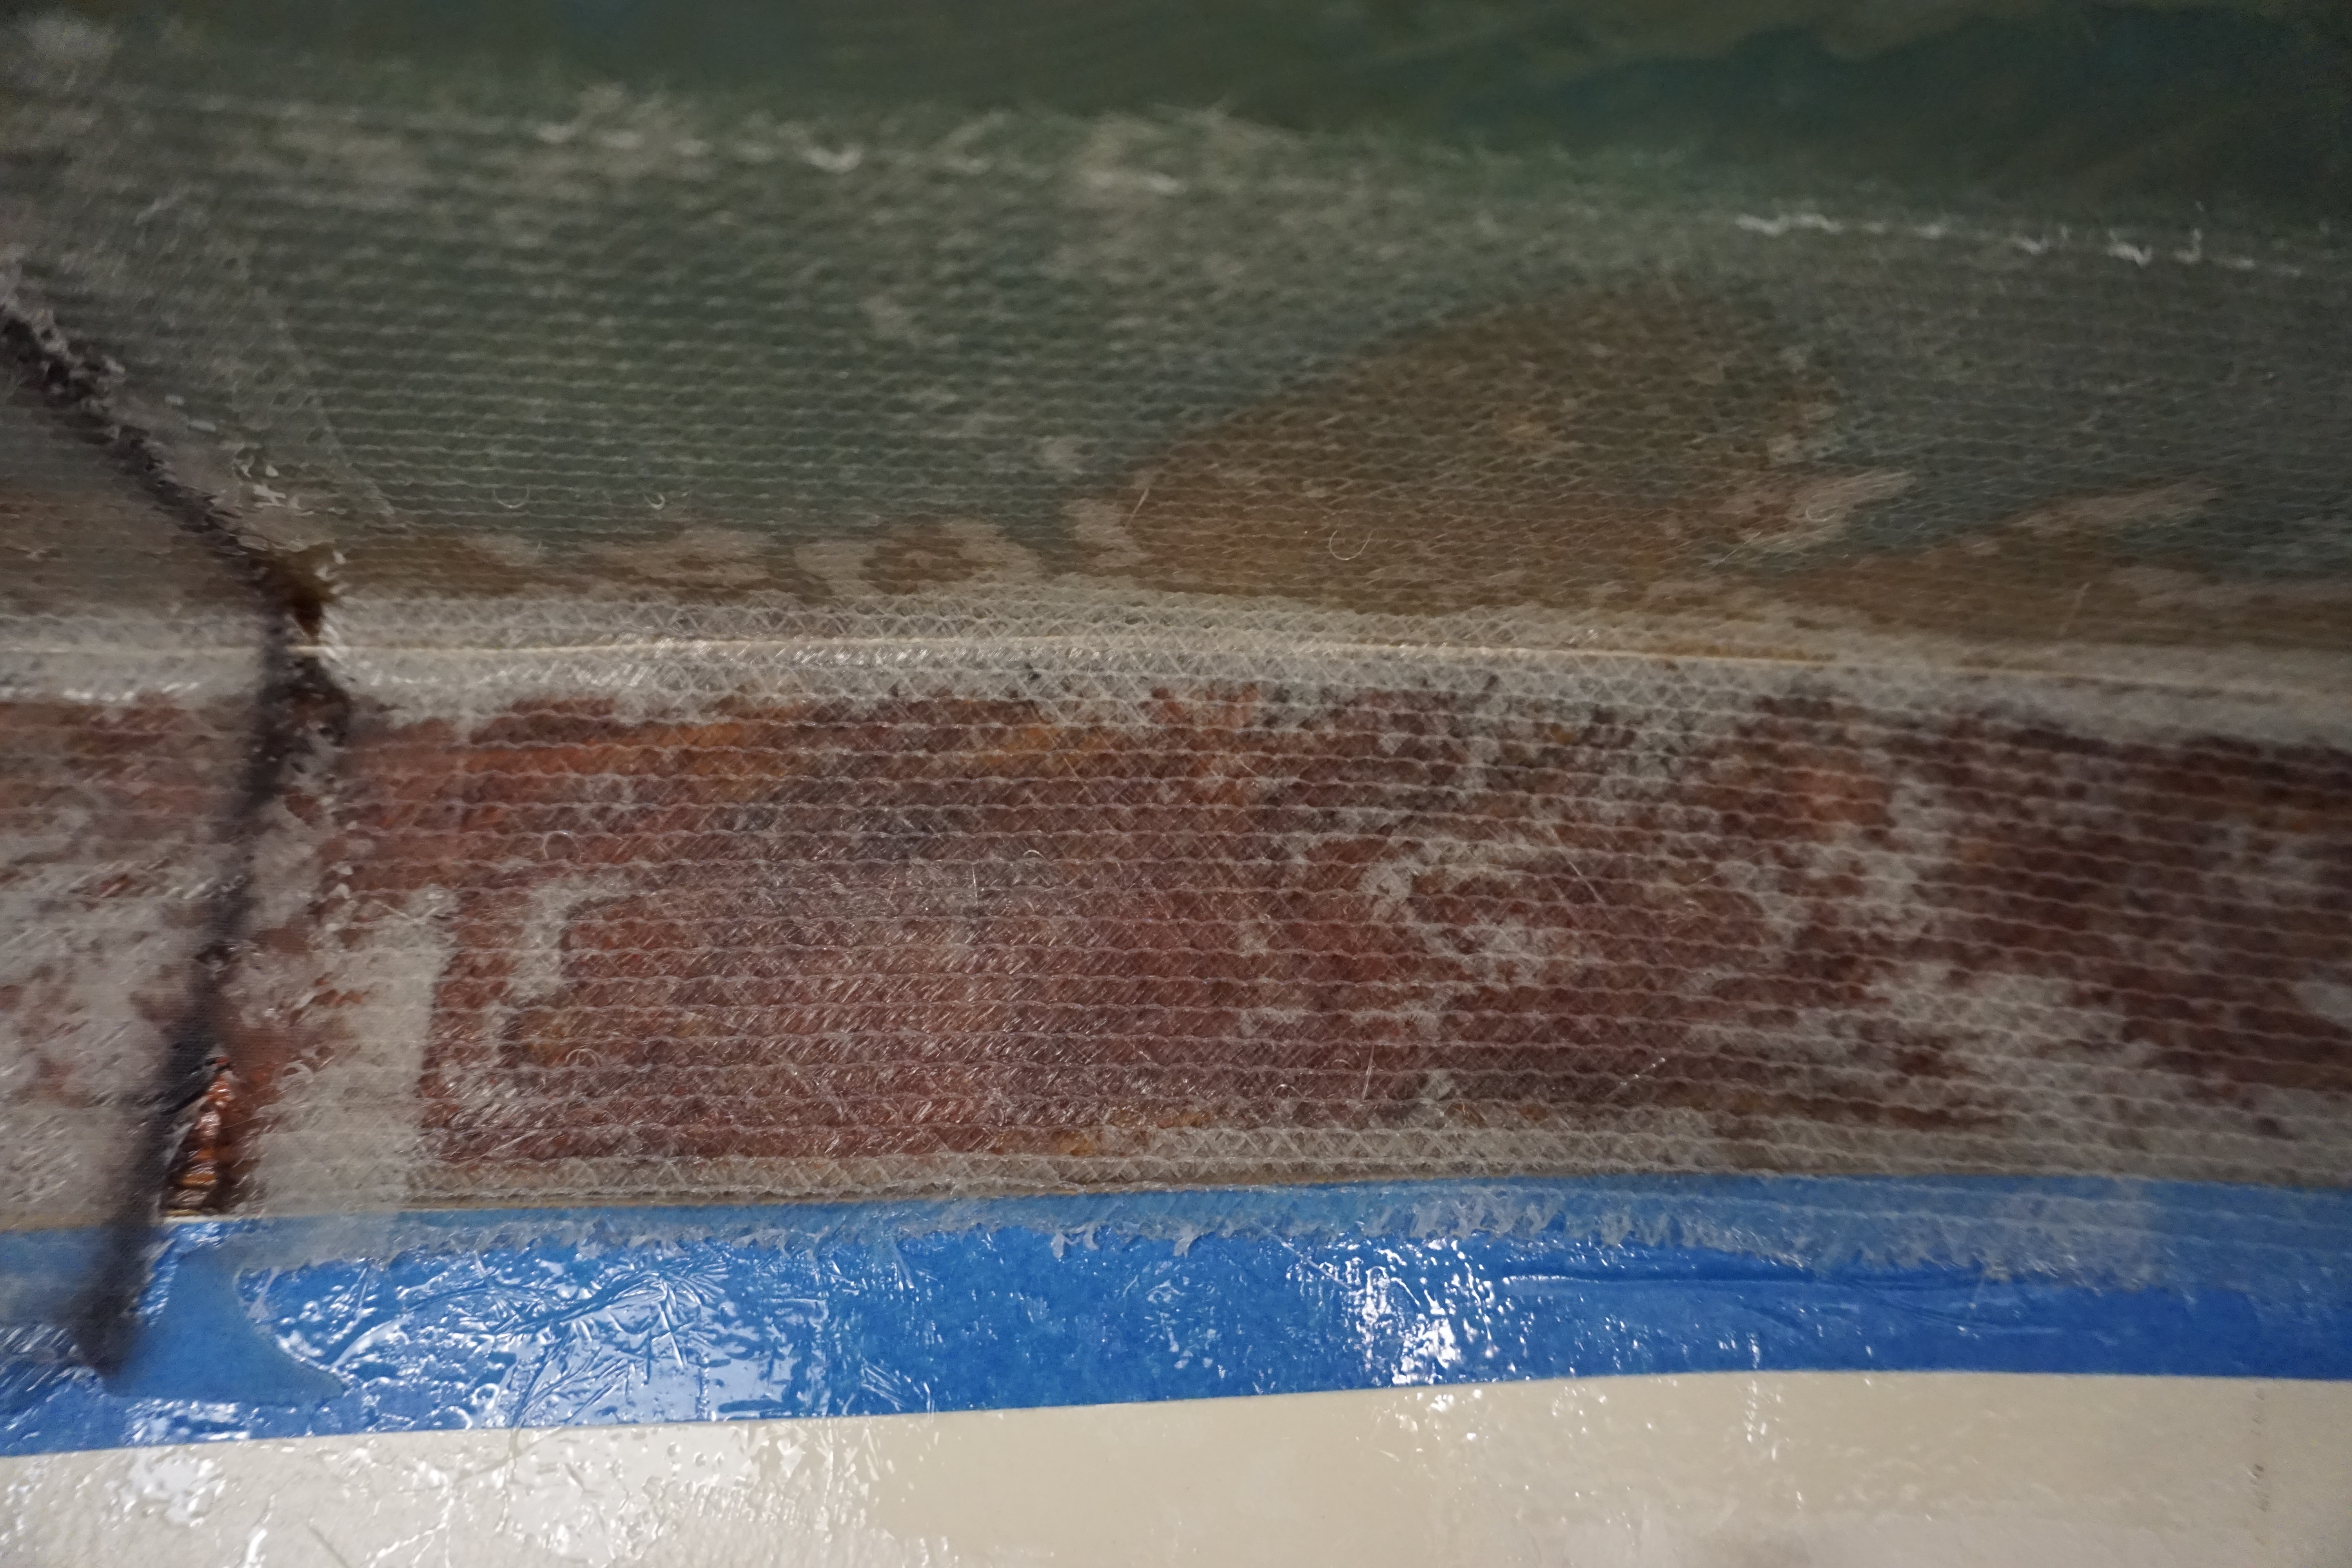

The fiberglass work on the hull to deck joint turned out better than the installation on the bulkheads. There is better adhesion along the joint. All in all, both parts of the job went well enough for us to continue with next steps.
The weeks of the refit are rolling on. These past couple of weeks have felt busy. During week 8 we spent a most of our time at the boat, and we were happy to complete this first fiberglass job. Towards the end of the week, we started to focus on plywood procurement. And somehow, we started week 9 in the United States! We drove to California for okoume marine grade plywood! And we found a cargo trailer to transport it with in Arizona. Now, with the plywood on hand, and with a new place to store our tools, we can make progress on lots of projects. But, we’re also making a point to slow down, to take stock, and to reorganize our work site before we move forward. This first fiberglass job was a reminder for us to balance speed with precision as best we can.


V-Berth Insulation, Part 2, Headliner Removal and Surface Prep
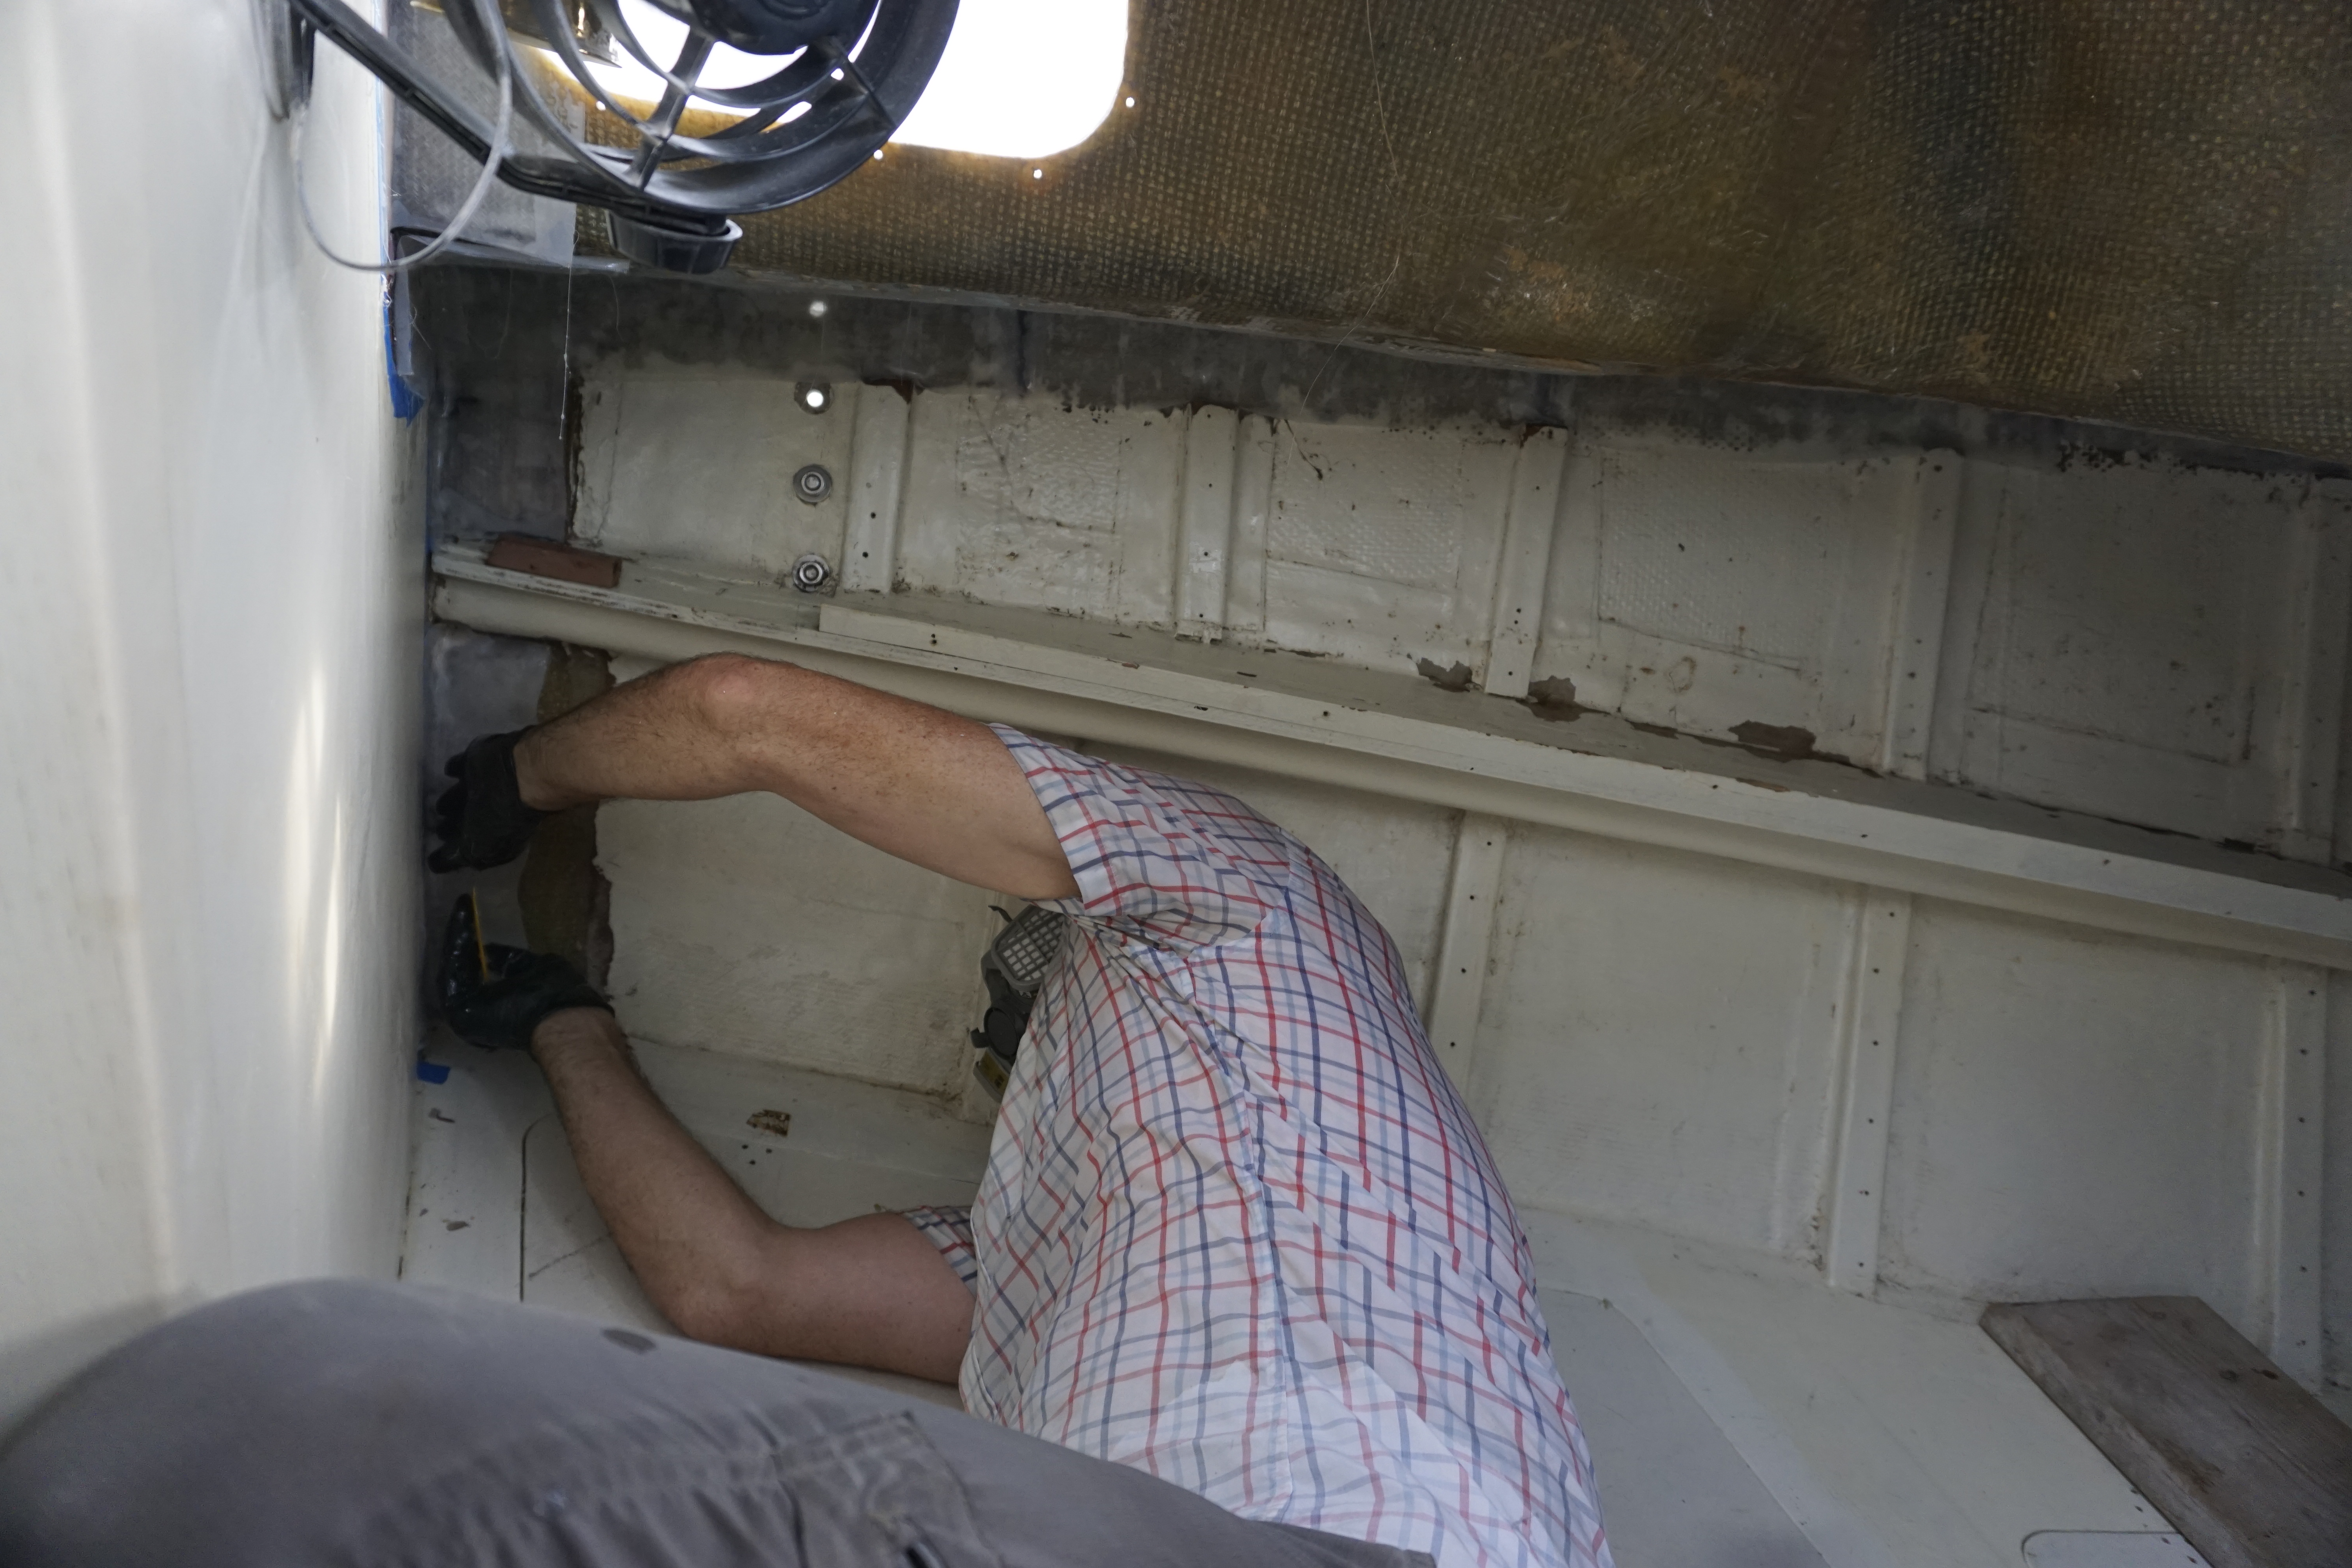
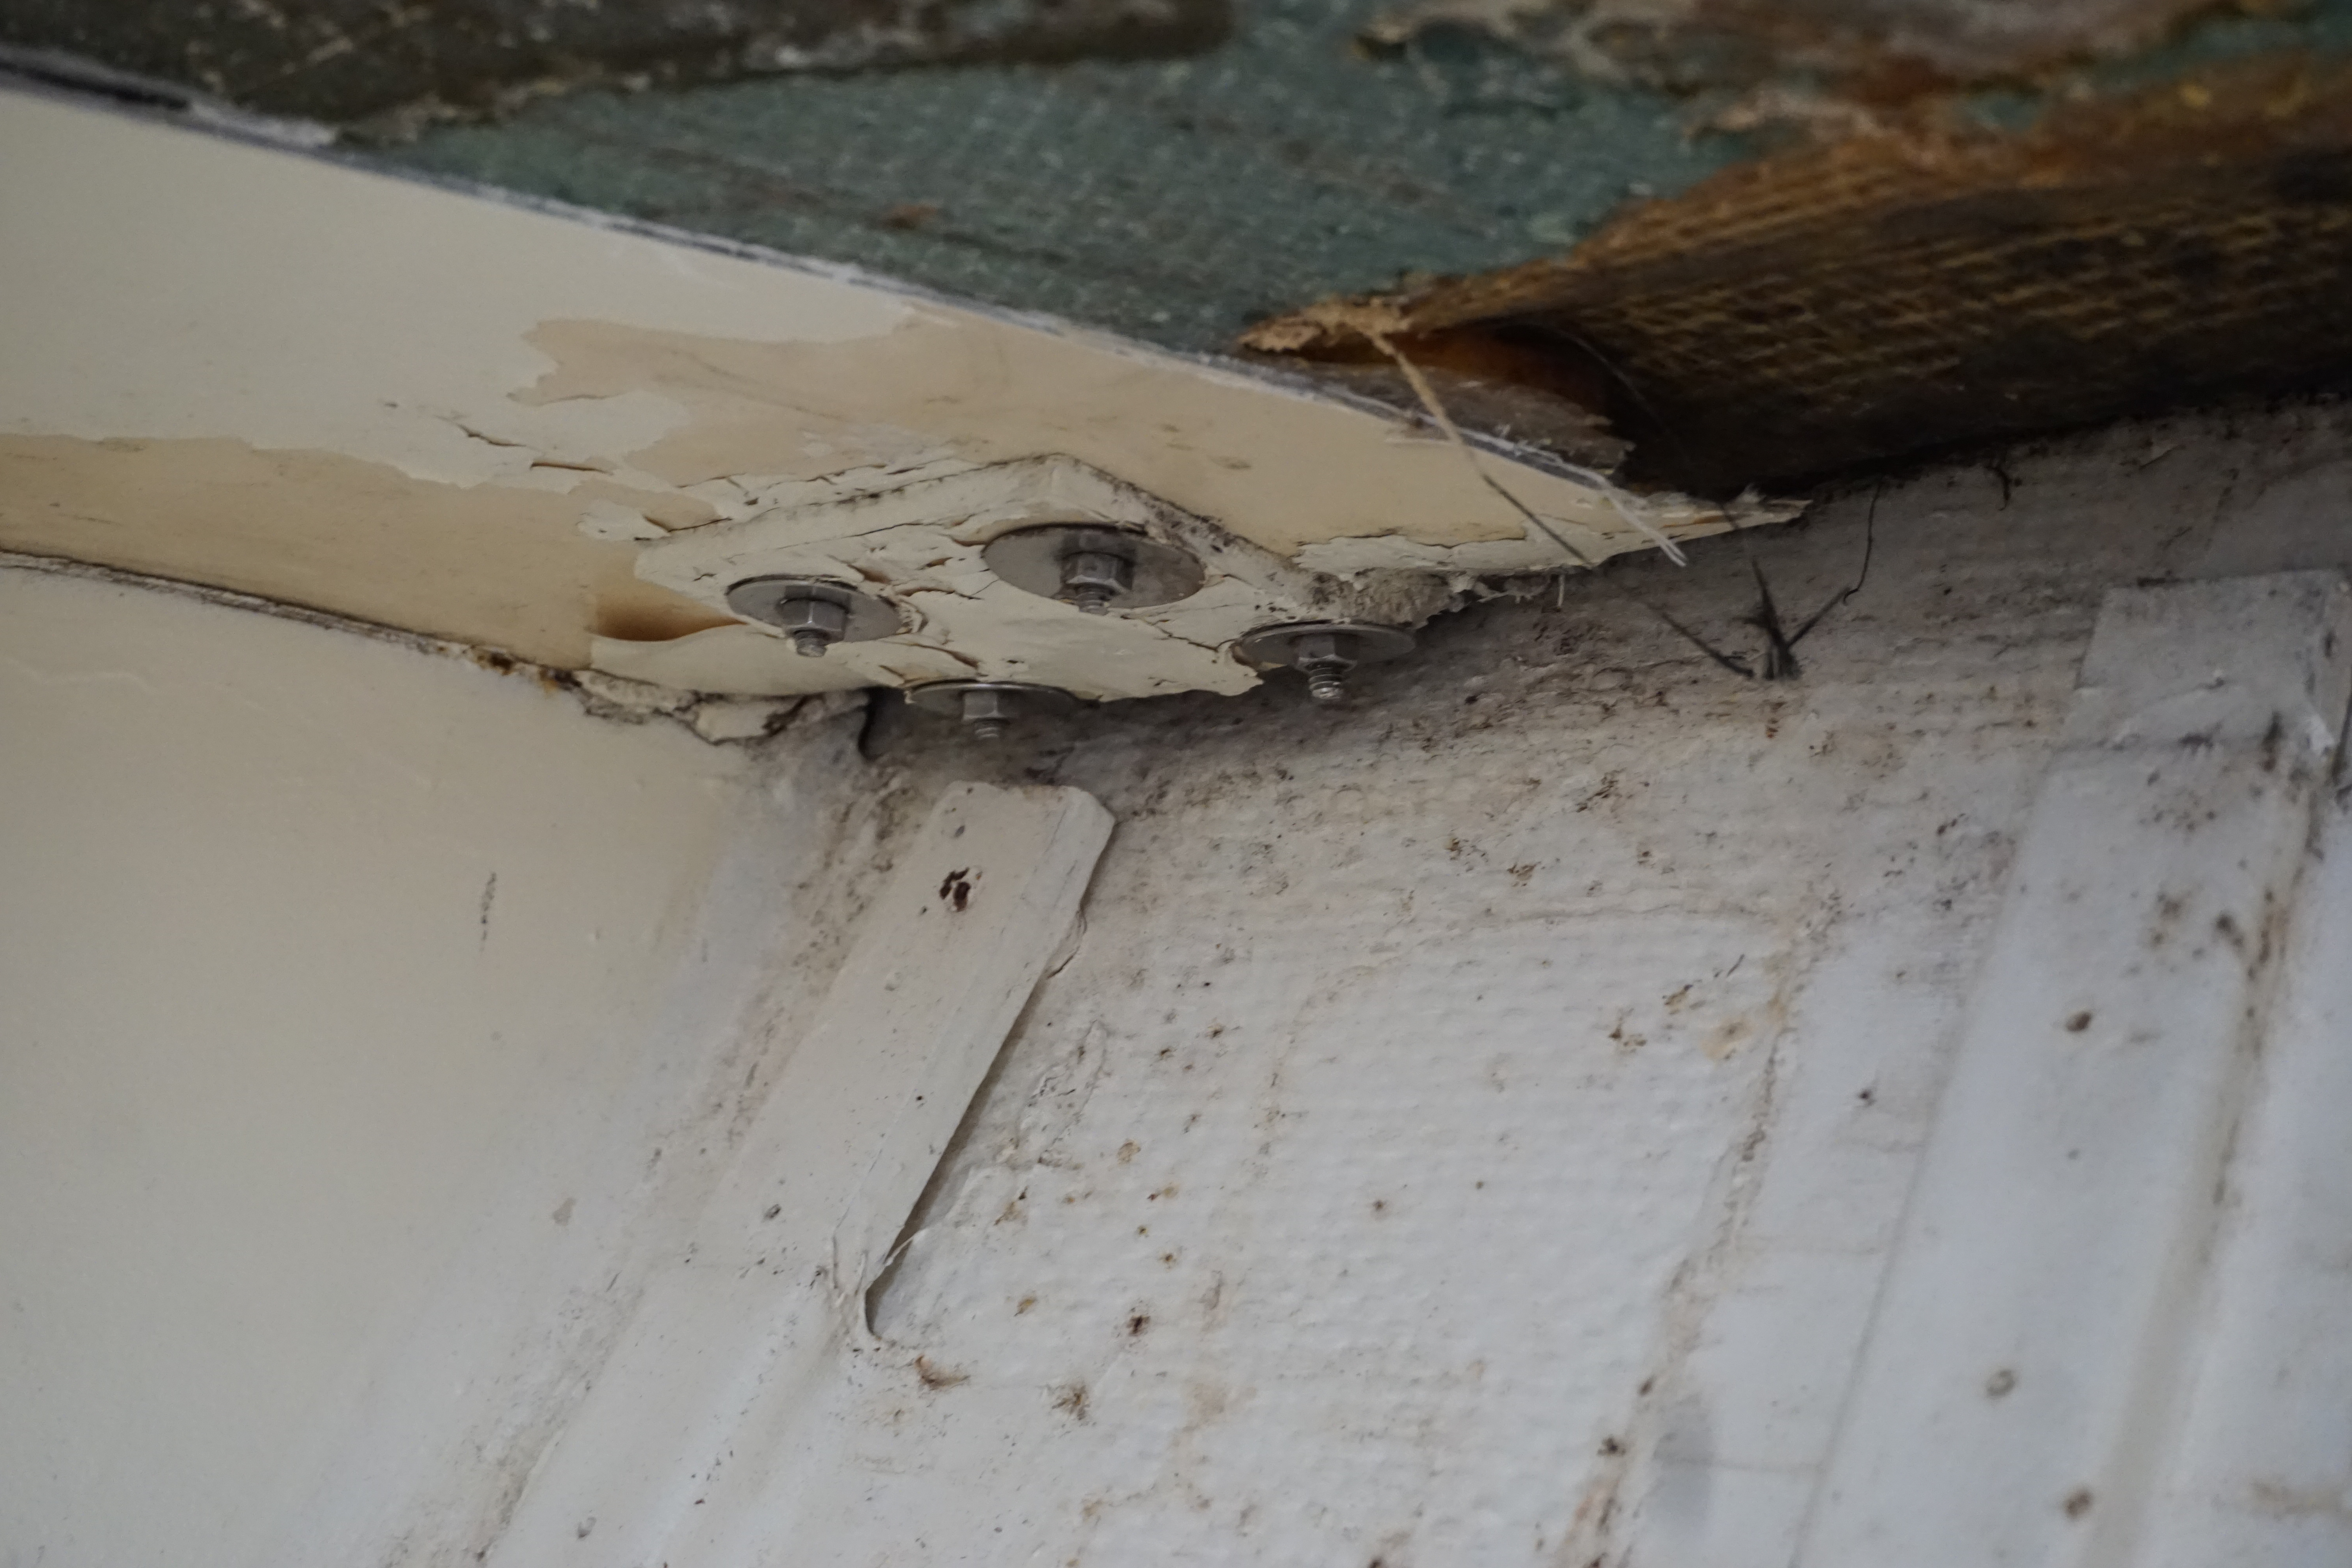
Brian finished the headliner removal this week. First, we unfastened a couple of stanchions, handrail bolts, and trim that were in the way. Next, Brian used a chisel, a multi-max, and some muscle to pull out the remaining sections of the headliner. Some pieces were tabbed to bulkheads with narrow fiberglass tape. These were more difficult to remove, but he got the job done quickly.


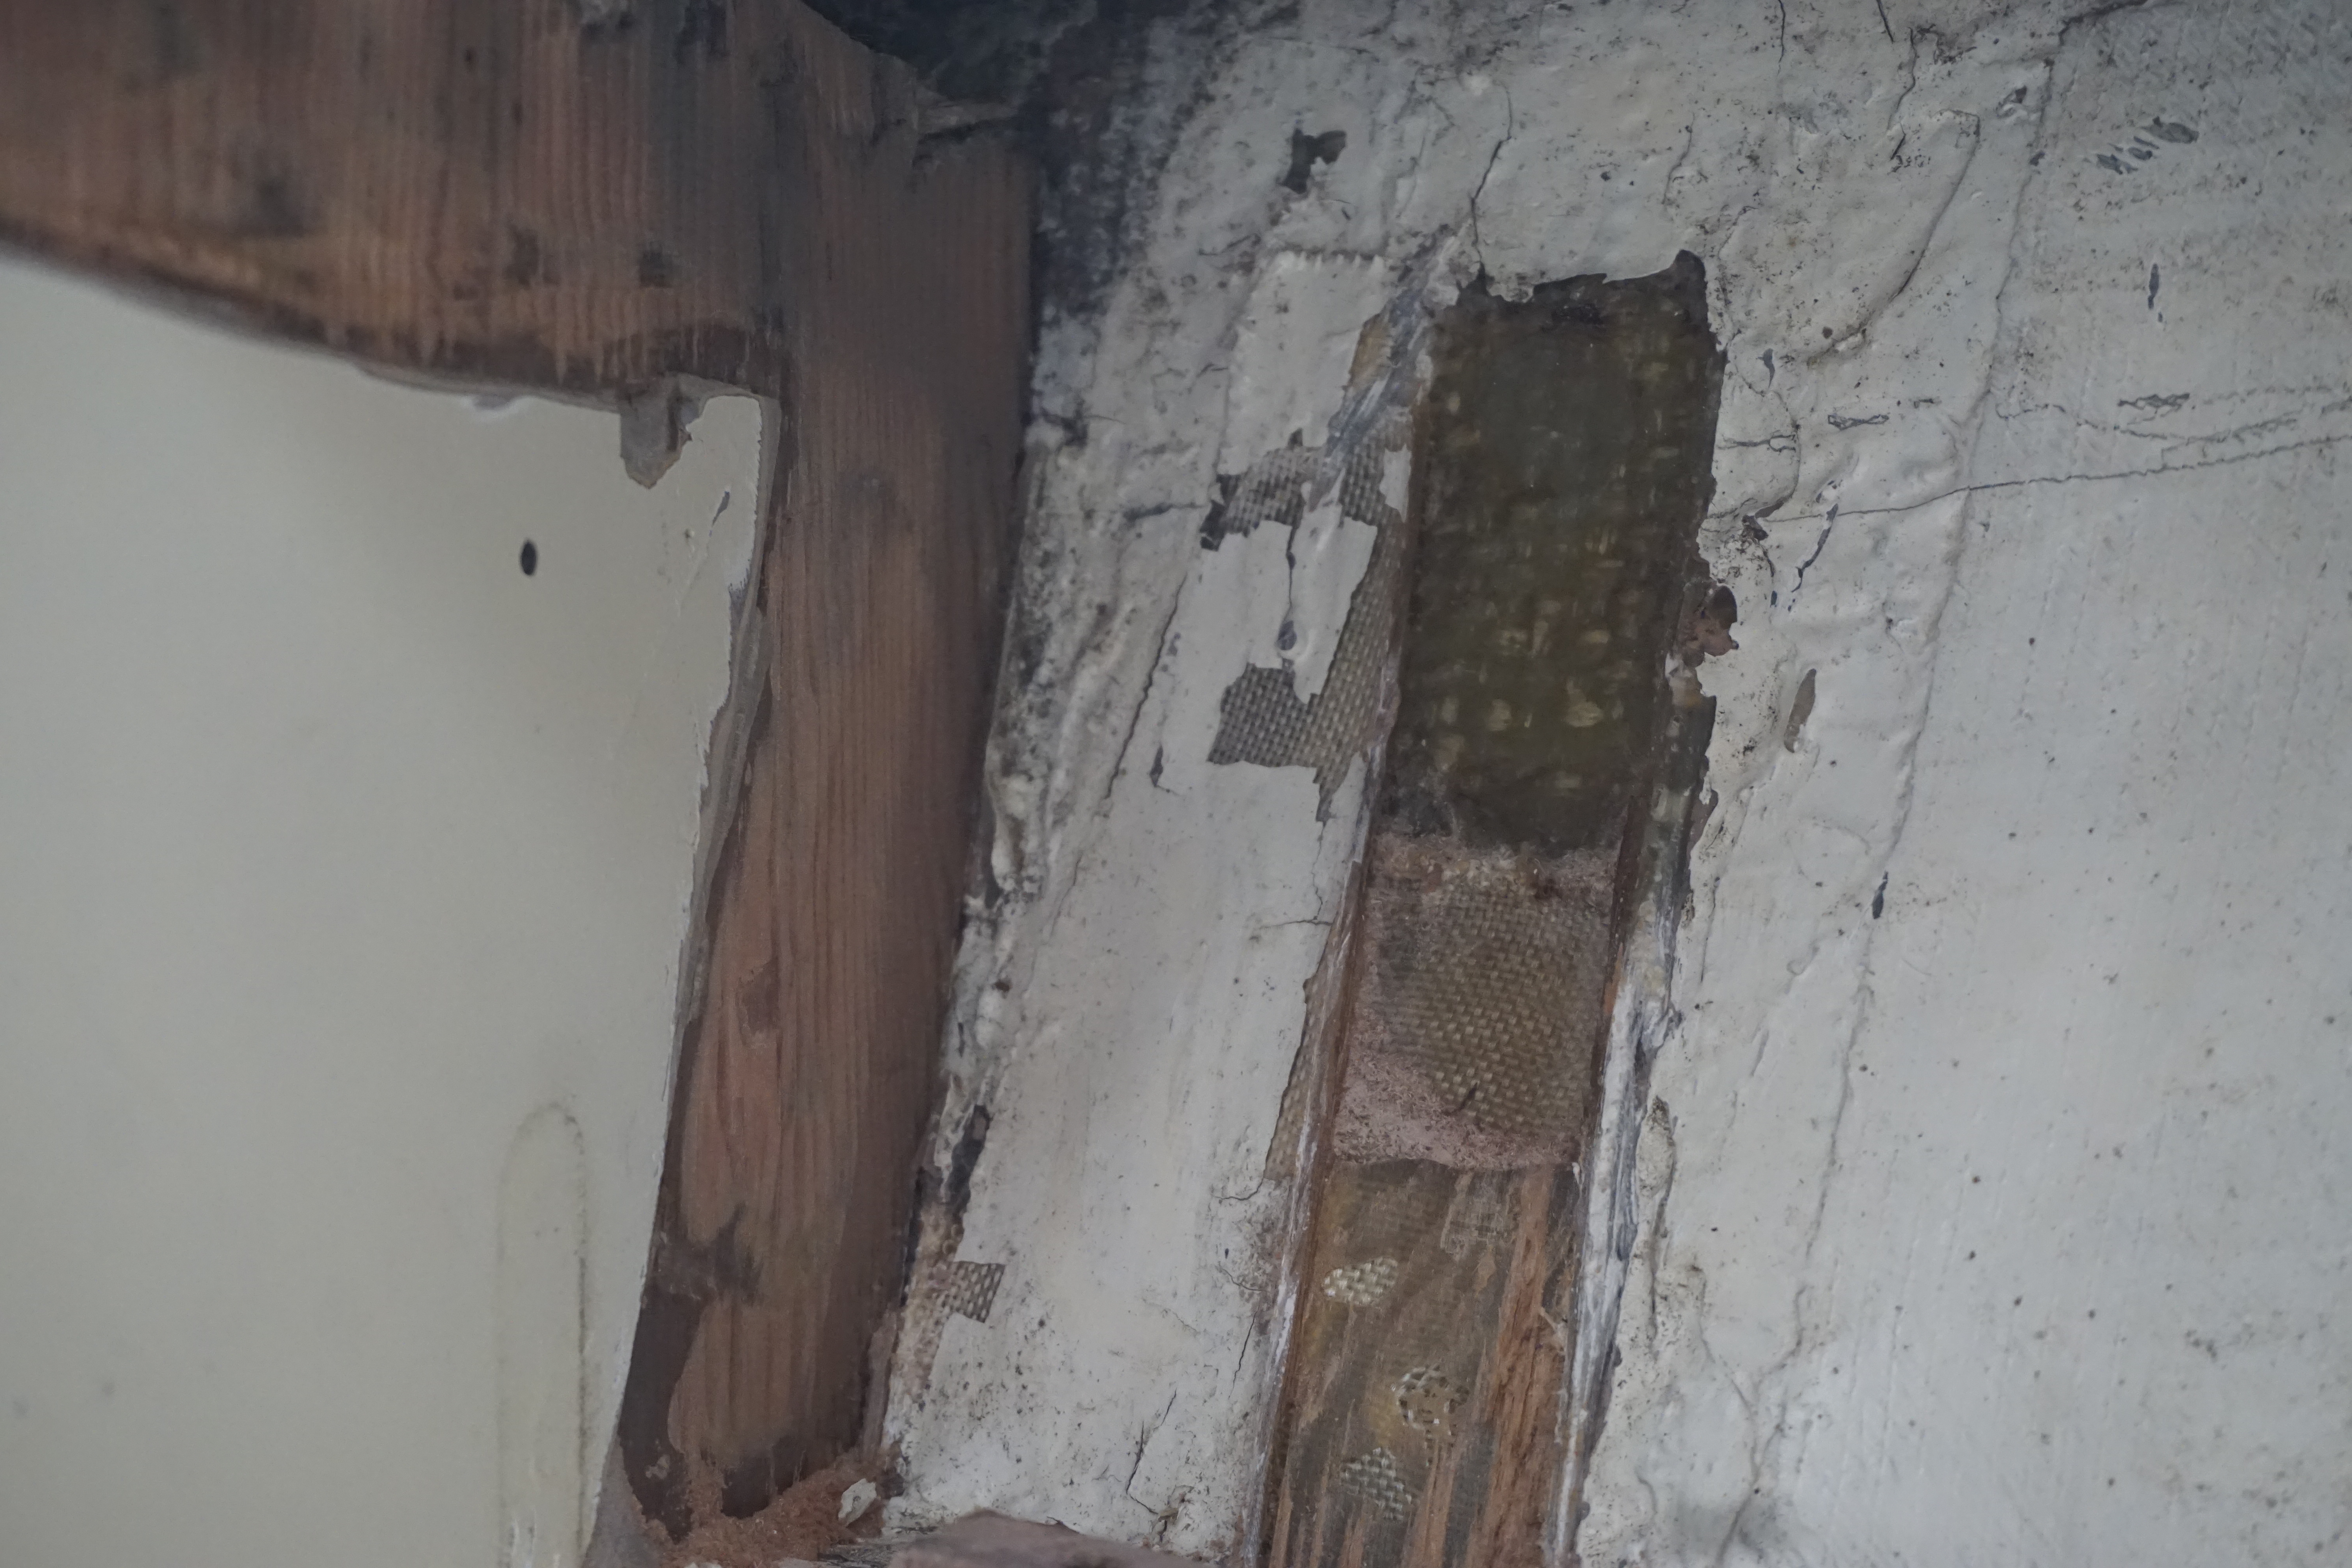
The next step was surface preparation. The resin used to adhere the headliner was applied in large blobs. These blobs are now brittle and sharp around the edges. They stand out in green because the weave of the headliner remained attached to them. Removing the headliner unearthed a variable surface; resin in peaks and valleys, bare spots where the deck core almost peeks through.
Leveling this surface completely is difficult and unnecessary. But Brian has used the variable speed angle grinder to smooth over the area. We are left with a more undulating and friendly surface to work with. In the coming weeks, we will attach a support framework or webbing to this imperfect, but improved surface. The webbing will support the deck from below. It will also create a network or grid of material that stands out from the overhead. Insulation will go in between the grid, and cover panels will mount to the grid.

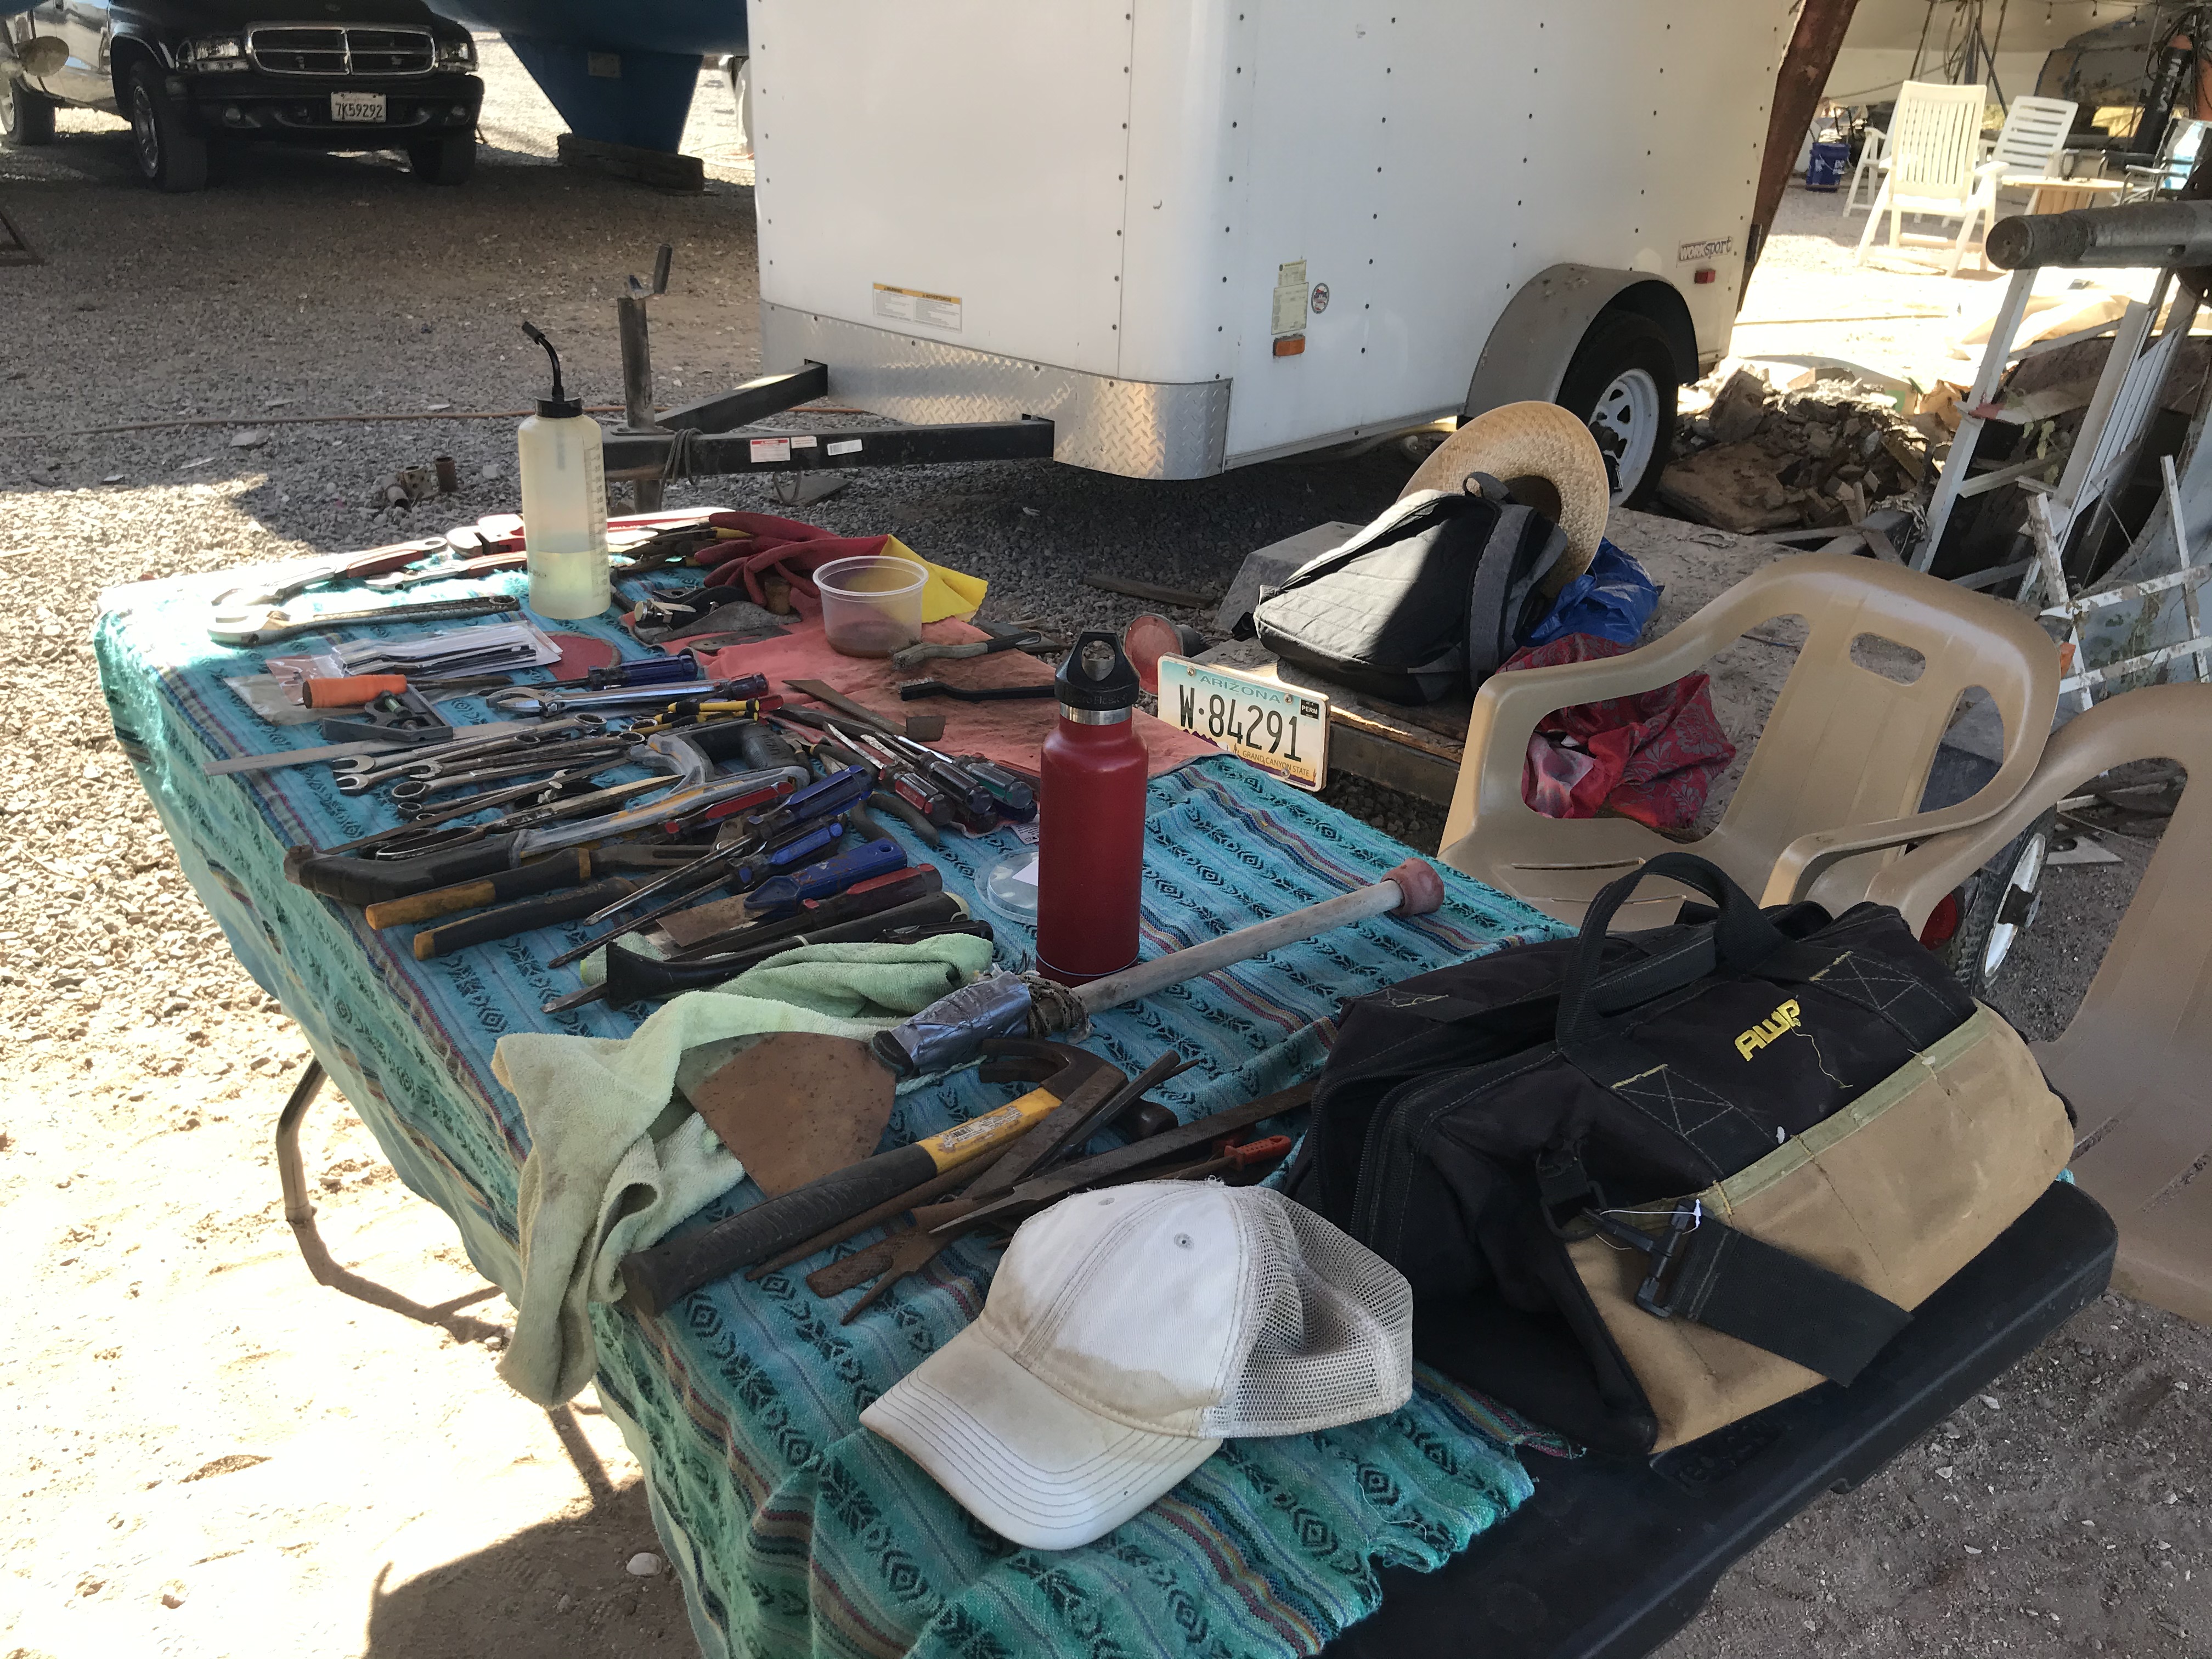
The refit is moving along now. We have taken steps to make things easier: our tools are ready to go, our workspace is clear, and we have what we need to move forward with our immediate jobs. It took a day to clean and organize our tools. Our Grandpa tools needed some tender loving care. All the tools are fairly young, but due to conditions in some of the storage lockers aboard, they have aged rapidly. The rented apartment has come in handy. We have pushed in as much as we can reasonably fit. Sails are stacked on bins. Buckets are stacked on boxes. Now that everything is off the boat, we have trouble remembering how all this stuff fit aboard little Dawn Treader. Added to the pile are some materials we had sent to Lukeville, AZ. With these, we now have all the items we need for our epoxy and fiberglass kit. We also made a trip to the big box hardware stores in the United States, and spent a few hours navigating the aisles.


There are still big things missing from our supplies. We wish it were easier to find insulation and plywood, and we’ll need these and other things sooner rather than later. But, for now, at least we can keep going…

V-Berth Insulation, Part 1, Dismantle and Refit Plan
We spent the first few weeks of this refit period adjusting to life on land. We made trips away from the boat to see family. We gathered tools. We moved ourselves and everything off the boat. In week five, we took real action at Dawn Treader, and the boat was changed in a day.

The V-Berth was dismantled. The side panels, insulation, port lights, and headliner were removed. The headliner was cut out with a multi-max. Roughly 70 percent of the liner now sits against the fence behind the boat. We were pleased that so much was removed so quickly. The liner was largely unattached to the deck above. We will remove the remaining sections of liner when we remove the thru-bolted handrails and stanchions on deck.
We found thin stripes of mold on the insulation when we removed the sealing strips of plywood on the sides of the V-Berth. We found mold behind the insulation when we removed the plastic panels and insulation above the shelves. We found mold on the backside of the headliner, around the border, the outside inch, when we cut out the liner in sections. Wherever air was able to flow a little bit, there was a little bit of mold.


All of what we’re removing on the sides of the V-Berth, the insulation, panels, and sealing strips, we installed in 2015. This installation proved inadequate during three years sailing in colder climates. We made mistakes. We did not go far enough. We did not reimagine the V-Berth well for cold climates. As a result, we used this valuable living space for storage instead of sleeping. The mold in difficult to clean spaces was an issue, another was condensation. The original, uninsulated headliner created a large surface for condensation. Occasionally, we had rain inside. Big fat drops formed on the coachroof. We also had condensation problems on the overhead hatch, the hardware that held the side panels up, and on the metal port light frames.

Many sailors fight condensation and mold. We hope our time in the desert, drying out and refitting Dawn Treader, will better prepare us for these struggles. We have learned many lessons in the past few years, and now we are re ready to try again. Our efforts will be more complex and lengthy this time. Our plans include adding an insulation supporting framework under the deck, and more of everything: insulation, heat, ventilation, air circulation, and access (we plan to widen the opening to the V-Berth). We plan to install different port lights. We will also replace the V-Berth platform again. The plywood delaminated in the rainforest. Our primary goal is to make the V-Berth inhabitable in all climates. Let’s see how it goes…

Video: Sailing the Falkland Islands. Music “Songs of Our Friends” by Lemont.
We sailed to the Falkland Islands in December of 2019 from Uruguay. We were impressed with the people, wildlife, and the weather. Thanks to Lemont for loaning us their song (lemontmusic.com).

Video: Cubic Mini Cub Wood Stove
We are loving springtime in Uruguay, and we’ve made the time to reflect back on winter in Uruguay with our new Cubic Mini Cub wood stove. We hope you enjoy the video!
Thank you Chuck for bringing us the wood stove, and for all the tips on birding!

Flamingo day!

We like cattle tyrants!

Integral Water Tank: Summary and Repair
Coming soon… we rebuild our integral water tank with different materials.

Video: Short Sail in Uruguay
We recently sailed from Juan Lacaze to Piriapolis in the Rio de la Plata in Uruguay. This is the first step towards getting moving after a summer spent dockside.
