
Coming soon… we rebuild our integral water tank with different materials.
Coming soon… we rebuild our integral water tank with different materials.
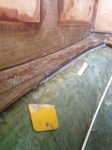
The bucket sink is versatile and moveable. In Dawn Treader, the first location was below the companionway.


After altering our companionway and building a new water tank, we got to work on the galley. We created 3 storage sections (where there was one) with watertight bulkheads.


Our simple galley design has made its everyday use clean, easy, and fun.


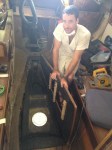
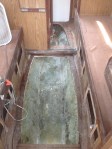
200 hours later, we finished the water tank! Parts 1 (Building an Integral Water Tank) and 2 combined for a rewarding job; now we have double the water capacity (65 gallons), more storage, and an easy to clean cabin sole.


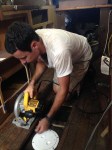
After finishing the brew coat (a food grade epoxy coating), we prepared to epoxy the forward sole section and the main cabin sole/tank top into position. We applied epoxy to the tops of the flange from the old cabin sole, and to the new floors and baffles in the water tank.


We finished the project by filling and painting the border of our new sole. Our water system works great! Check out our galley post to see our bucket sink, foot pump, and water filter.
Our original project plans did not address changing our water tank. But, upon removing the engine, we gained better access and visibility to the water tank area, this revealed the need for further investigation…
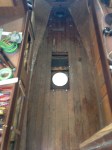


Our work continued, and we ended up removing everything from the bilge: water tank, resin blocks, foam (so much foam). We discovered lots of usable storage after removing oily residue, cleaning, and drying out the bilge.


Removing the water tank revealed the need for reinforcing the compression post, read more in our related post (Repairing Compression Post Base).
Next, we need to construct a new tank! Our new tank will have an expanded footprint that extends well forward of the previous tank. Also, a new integral tank is a good choice for maximizing our water storage capacity. We hope to double the capacity of the previous tank (from 30 gallons).


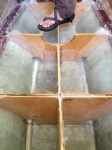


This unexpected project has lots of benefits! We will be able to carry lots more water for long voyages, our hull has been reinforced with 6 new floors and a heavy fiberglass layup, and we now know Dawn Treader is clean from top to bottom! No more hidden treasures!
In part two we complete the tank with paint, install the tank top/sole, add plumbing and inspection ports.


