The bucket sink is versatile and moveable. In Dawn Treader, the first location was below the companionway.
Original sink and galley
Original alcohol stove was below counter hatch
Original location of new bucket sink, alcohol stove removed, Atom stove in place
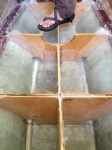
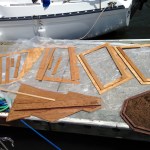
After altering our companionway and building a new water tank, we got to work on the galley. We created 3 storage sections (where there was one) with watertight bulkheads.
Original hatch size
Resizing opening
Wide open single compartment
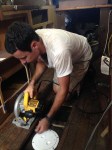
Cutting out a little more countertop
Divider bulkhead
Longitudinal divider
Dry fit of bucket sink
Filling holes
Painted!
Nice and clean, ready for hatch covers
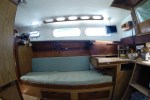
Our simple galley design has made its everyday use clean, easy, and fun.
Painted countertop (Interlux Perfection). Open hatch, empty space for bucket
200 hours later, we finished the water tank! Parts 1 (Building an Integral Water Tank) and 2 combined for a rewarding job; now we have double the water capacity (65 gallons), more storage, and an easy to clean cabin sole.
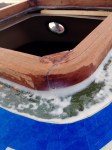
Installing 3 inspection ports
Using an angle grinder to recess the inspection port to stand less proud
Dry fit
Brew coat on the bottom of the sole/tank top
Brew coat (second coat)
Third and last coat
After finishing the brew coat (a food grade epoxy coating), we prepared to epoxy the forward sole section and the main cabin sole/tank top into position. We applied epoxy to the tops of the flange from the old cabin sole, and to the new floors and baffles in the water tank.
Forward sole, to be glued down first
Forward sole section (future storage) with epoxy
Sole/tank top glued in! Filler pieces showing
FIlling/fairing compound
Fairing/sealing tank top in
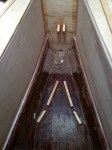
Aft plumbing for vent and supply
Bilge side plumbing: vent and supply
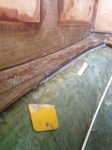
FInished border paint (interlux epoxy primekote), also cream color interlux perfection with non skid
Yes!
We finished the project by filling and painting the border of our new sole. Our water system works great! Check out our galley post to see our bucket sink, foot pump, and water filter.
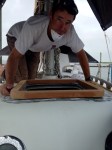
Traditional sliding companionway designs seem to be the standard, few other options are available. However, we were not satisfied with Dawn Treader’s original design. While researching watertight designs and oceangoing rowboats, we found interesting hatch options that looked to be compatible. We chose the Lewmar Ocean 70 hatch for its large entryway, strength, and watertightness.
Dry fit of hatches
Original design with nesting dinghy on top.
Bridge deck and portion of cockpit footwell had to be cutout
Installing bulkhead to support the hatch, Changing the cockpit footwell dimensions
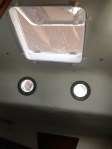
Primer coat
Hatch installations complete!
Applying fairing compound
Fiberglassing bulkhead
New solid top, all joints were fiberglassed
General view
Another view
Dinghy in place over little hatch, experimenting with lashing
Continuing with construction, making hatch framework
A few things changed simultaneously with the new companionway; look for new posts coming soon! Our cockpit footwell volume was reduced. Cabin ventilation was enhanced with the addition of a Lewmar Ocean 30 below the nesting dinghy. Inside the cabin, we now have more space! Our galley area has more elbow room, the new navigation station is in progress, and the cabin design is more open. The cabin sole also has 2 more usable feet of space (we are installing new sole as a result of the water tank project), and now there is ample room for a yoga mat!
Original interior, icebox on the right
Mahogany frame with pine filler piece
Filling
Filled, trimmed, and rounded
Sharp corners rounded
Instrument holes filled, trim epoxied in place
Icebox removed, Sink moved from center to starboard side
Painted frame
Closed hatch, good visibility!
Aft cabin view
We are happy with the companionway redesign! Exit and entry are easier than before, and we are excited to test our watertight hatch at sea! With this big project done, we are one large step closer to sailing.
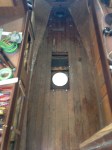
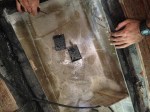
Our original project plans did not address changing our water tank. But, upon removing the engine, we gained better access and visibility to the water tank area, this revealed the need for further investigation…
The tank was underneath our cabin sole
We removed a large section to see better
Everything around the tank was super oily!
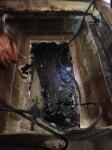
We cut off the top of the tank
Inside looks ok, but everything else is not
Underneath the tank is oily too
A large bottom panel removed, more oil moisture, and mess
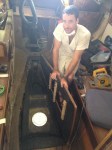
Down the rabbit hole, tank removal continues
After the tank, we move on to removing bucket loads of oily foam in forward areas
Our work continued, and we ended up removing everything from the bilge: water tank, resin blocks, foam (so much foam). We discovered lots of usable storage after removing oily residue, cleaning, and drying out the bilge.
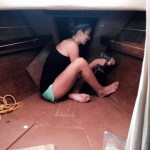
We remained cheerful…
Excavating forward areas
Finding corroded compression post base
Cleaning out this area
Chiseling the resin blocks that surrounded the water tank
Grinding…
After repeat scrubbings, its much cleaner!
Removing the water tank revealed the need for reinforcing the compression post, read more in our related post (Repairing Compression Post Base).
Next, we need to construct a new tank! Our new tank will have an expanded footprint that extends well forward of the previous tank. Also, a new integral tank is a good choice for maximizing our water storage capacity. We hope to double the capacity of the previous tank (from 30 gallons).
Filling flange gap from the old cabin sole
Adding a drain to connect forward bilge to aft bilge
Epoxy for the drain
Fitting new fiberglass pieces to completely line the new tank
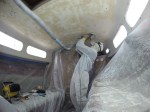
Beginning the layup
Continuing, adding peel ply into the night
Complete layup, marking locations for new floors
Fitting new floors
Fiberglassing the flange
Preparing floors for inspection plates
Testing reach from planned inspection plates
Fiberglassing new floors and baffles
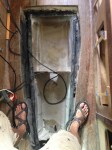
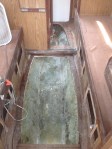
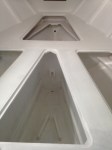
Sanded and ready for food-grade epoxy paint and new tank top/sole
Tank top will double as cabin sole. We are ready to have our floor back!
This unexpected project has lots of benefits! We will be able to carry lots more water for long voyages, our hull has been reinforced with 6 new floors and a heavy fiberglass layup, and we now know Dawn Treader is clean from top to bottom! No more hidden treasures!
In part two we complete the tank with paint, install the tank top/sole, add plumbing and inspection ports.
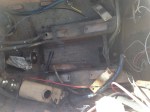
We decided to remove out Yanmar 3GM30F and its related systems in favor of a 6 horsepower Tohatsu Sailpro Outboard Engine. We haven’t had the need for all the power of the 27 horsepower diesel. We now have more valuable space and hopefully less maintenance! By removing the inboard engine we are now able to divide the aft third of the boat into watertight compartments. We’ll update more about that project later!
Our old Yanmar
A big day; we are engaged!
Cutout in cockpit sol
Prepping to lift
On its way out
Removing diesel engine
On the dock!
Empty space 🙂
Headed to a new home
Soon to be clean space
Systems Removed
Happy day!
Our cockpit underwent construction. A new sol was put in (look for that post soon). We built a bracket for our new outboard mount out of aluminum, and we can’t wait to test it out!
In pursuit of our watertight cabin goal, we decided to replace the original forward hatch with a Lewmar Ocean 60 Watertight Hatch. We built a mahogany combing to mount the hatch on a flush surface, and to avoid splash when the hatch is in its vented position. At first this hatch was difficult to close. So difficult we thought it faulty. However, with strength and weight focused on the handles at their attachment points, we can now close it with increasing ease (thank you James).
The original V-Berth left something to be desired: storage, comfort, style, etc. Some of the original cabinetry had been cut away to accommodate an obsolete holding tank, and the volume of available space was largely inaccessible with the previous compartment design. V-berth reconstruction was also a great opportunity to add structure and strengthen the forward third of the Dawn Treader. Its watertight integrity has been enhanced with new watertight compartments. The V-berth platform was also raised 8 inches above the waterline.
Demo process begins
Platform removed
Working in the Anchor Locker
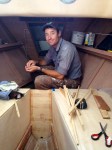
Poser
Combining old with new
New Bulkheads
Corner
4 inches higher (new berth will be 8 inches above the waterline)
At sea chain locker
Building platform
Cubby reserved for anchor
Epoxy
New hatch opening
Fiberglass, filling, and fairing
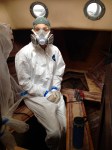
Sanding, my first tyvex
4 new hatches
Looking good
Primer
Lots more storage
Clean and painted
Almost done, barrel bolts and hinges are on
We are super excited to set up our sewing work area in the coming weeks! We’ve got foam, fabric, and a Sailrite Ultrafeed LSZ-1! Let the sewing lessons begin! We’ll see how things turn out…
The all new wiring in 2014 was installed in a couple of weeks. Brian created an electrical box consisting of circuit breakers, postive and negative busses, terminal strips, inverter, and solar charge controller.
Old wiring, note negative bus solder ball!
Electrical box inside
New panel location
Placement under the companionway
We have now moved the electrical panel to the new navigation station, where the old ice box was!
We painted interlux epoxy primekote on the interior cabin. We like the matte finish and high build easy application. Its also a hard durable finish that works inside (less vulnerable to sunlight), so we avoid the high-gloss, expensive, difficult to apply top coat perfection that we use outside.
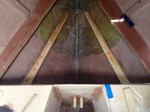
Sanding and prepping the overhead
Modeling
Finished overhead primer
Finished overhead primer
We’ll be updating with more paint in the future, and this is a great base for almost anything we choose.
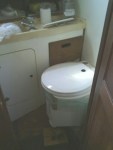
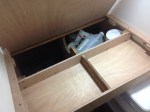
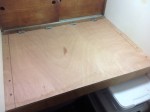
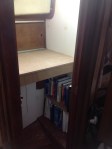
The head was initially converted to a chart room in 2013. All the thru hulls were covered, a composting toilet was installed, and then moved to the V-berth.
After all through hulls were removed
Original setup
Cubbies
New surface
Stuff
Charting
Bookshelves and chart table
Perfect for a bachelor 😉
We have now re-installed the head in this area, and moved the charting/navigation area to the location of the old icebox.